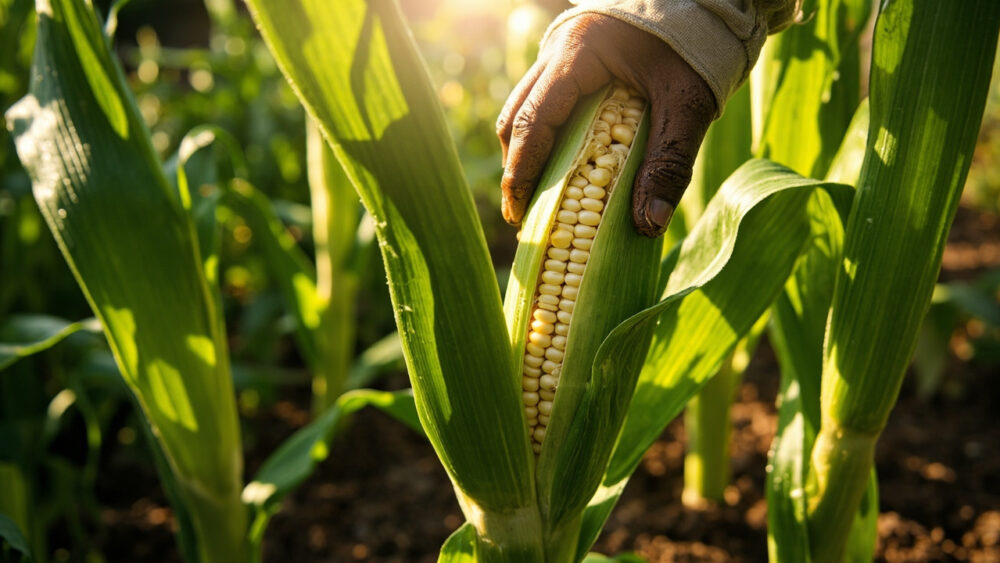
Sweet corn moves through six recognizable stages between planting and harvest: germination, the leafy vegetative stage, tasseling, silking, ear fill, and maturity, and the whole run takes roughly 60 to 100 days depending on the variety. Knowing the sweet corn growing stages tells you exactly what the plant needs at each point, instead of guessing every time you walk out to check on it.
Most failed corn patches do not fail at harvest. They fail two to three weeks in, at a stage almost nobody watches closely enough, and by the time it shows up in the ears it is too late to fix. There is also a sign at tasseling time that gets misread constantly, one that looks like trouble but is actually the plant doing exactly what it should.
Stick around and you will get the honest answer to the question every corn grower eventually asks: why some stalks stall out while the ones six feet away power through. The full Sweet Corn at a Glance card, worth saving to your phone before you walk back out to the garden, is waiting at the bottom.
Germination: Days 1 to 10
Corn seed needs soil at 60 F or warmer to germinate reliably, measured a couple inches down, not just on the surface. Below that it sits and often rots before it sprouts. Plant seed 1 to 1.5 inches deep, spaced 8 to 12 inches apart in rows 30 to 36 inches apart.
You will see the first loop of leaves, called the spike, push through in 5 to 10 days in warm soil, slower in cool conditions. There is nothing to feed yet. Keep the soil consistently damp, not soggy, until you see that first green spike.
The real test of this stage is not what you see above ground.
The Vegetative Stage: Weeks 2 to 6
This is the leafy growth stretch, and it is where corn either builds the engine it needs or falls behind for good. The plant grows a new leaf every few days and can gain several inches a week once it gets rolling, reaching knee to waist height by the end of this window.
This is also the stage where most attempts quietly go wrong, and it has nothing to do with watering. Corn is a heavy nitrogen feeder, and it does its real growing here. Side-dress with a nitrogen-rich fertilizer when plants are about 12 inches tall and again when they hit knee-high, working it into the soil near the base and watering it in.
Skip that feeding and the plant does not collapse, it just quietly caps its own potential. You get short stalks, thin stems, and small ears months later with no obvious cause in between.
Corn also has shallow roots and cannot out-compete weeds on its own, so keep the bed clean by hand or with shallow cultivation, never deep tilling near the base.
Get this stage right and tasseling arrives on schedule with plenty of stored energy behind it.
Tasseling: Roughly Week 6 to 8
The tassel is the male flower, the feathery spike that appears at the very top of the stalk once the plant has put on most of its height, usually 45 to 60 days after planting depending on variety. It starts green or pale yellow and will shed pollen for about a week.
If you assumed a tassel turning brown and dry means the plant is dying, that guess causes a lot of needless worry this time of year. A browning, crumbling tassel a week or two after it opens is normal. It has finished its job of shedding pollen and is simply spent, not sick.
What corn does need at this stage is water, more than at almost any other point in its life. Drought stress during tasseling and silking is the single biggest cause of poor pollination and sparse, gap-toothed ears later on. Aim for a steady 1 to 1.5 inches of water a week here, more in hot, dry weather.
Right behind the tassel comes the stage that decides whether you get full ears or half-empty ones.
Silking and Pollination: Days 60 to 75
Silks are the pale, thread-like strands that emerge from the tip of each developing ear, and every single silk connects to one potential kernel. Pollen falls from the tassels above onto those silks, usually over a window of 5 to 8 days, and this is genuinely the make-or-break moment for a full ear.
Corn is wind-pollinated and does best planted in blocks of at least four rows rather than one or two long skinny rows, since that gives pollen a much better chance of reaching the silks instead of blowing past the patch.
Heat above roughly 95 F can dry pollen out fast and cause silks to become unreceptive, and this is where a lot of ears end up with bare patches or missing kernels near the tip. There is no fix for pollination that already failed. If a heat wave hits during silking, all you can do is keep the soil moist and wait to see how much still took.
Once silks start turning brown and drying at the tips, pollination is finishing up and the plant shifts its energy into filling those kernels.
Ear Fill: Days 70 to 85
This is where kernels plump from thin and watery to the familiar milky, juicy stage you actually want to eat. The husk fills out and feels firm when you press it, and the silks go from brown and dry at the tips down toward fully dried and darkened.
Keep watering consistently through this stretch. A dry spell now shrinks kernels and can cause tip-back, where the top inch or two of the ear never fills in.
Healthy progress here looks like steady, visible plumping week to week and dark green leaves. A stall looks different: leaves that roll or fold lengthwise in the heat of the day and stay rolled into the evening, which is corn telling you plainly that it is short on water, not just adjusting to sun.
When the silks are fully brown and the husks feel tight and full, it is time to start checking for ripeness by hand.
Maturity and Harvest: The Milk Stage
Peel back a little husk and press a kernel with your thumbnail. If it squirts a milky white liquid, it is ready. Clear liquid means a few more days, and no liquid at all with a doughy feel means you have waited too long and the sugars have already started converting to starch.
This window is short, often just 2 to 3 days of peak sweetness per ear, which is the honest answer to the question every new corn grower eventually asks: why the corn from the store never tastes as good as homegrown, and why homegrown goes downhill fast if you pick it late.
Harvest by twisting the ear downward and snapping it off the stalk, then get it cooked or refrigerated quickly since sweet corn loses sugar fast at room temperature.
That short harvest window is exactly why the reference card below is worth keeping close at hand.
Sweet Corn at a Glance
- When to plant: after soil hits a steady 60 F or warmer, generally 1 to 2 weeks after your last frost date.
- Depth and spacing: seeds 1 to 1.5 inches deep, 8 to 12 inches apart, in rows 30 to 36 inches apart, planted in blocks of at least four rows for good pollination.
- Feeding schedule: side-dress with a nitrogen-rich fertilizer at 12 inches tall and again at knee-high.
- Water needs: about 1 inch a week early on, increasing to 1 to 1.5 inches weekly from tasseling through ear fill.
- Time to tasseling: roughly 45 to 60 days from planting, depending on variety.
- Time to harvest: roughly 60 to 100 days total, check ripeness by pressing a kernel for milky liquid.
- Biggest risk window: drought or extreme heat during silking and pollination, which cannot be corrected after the fact.
If you remember one thing, remember this: corn forgives almost nothing during silking, so water it like that week matters most, because it does.
Everything else on this list just gets the plant to that moment in good enough shape to make it count.