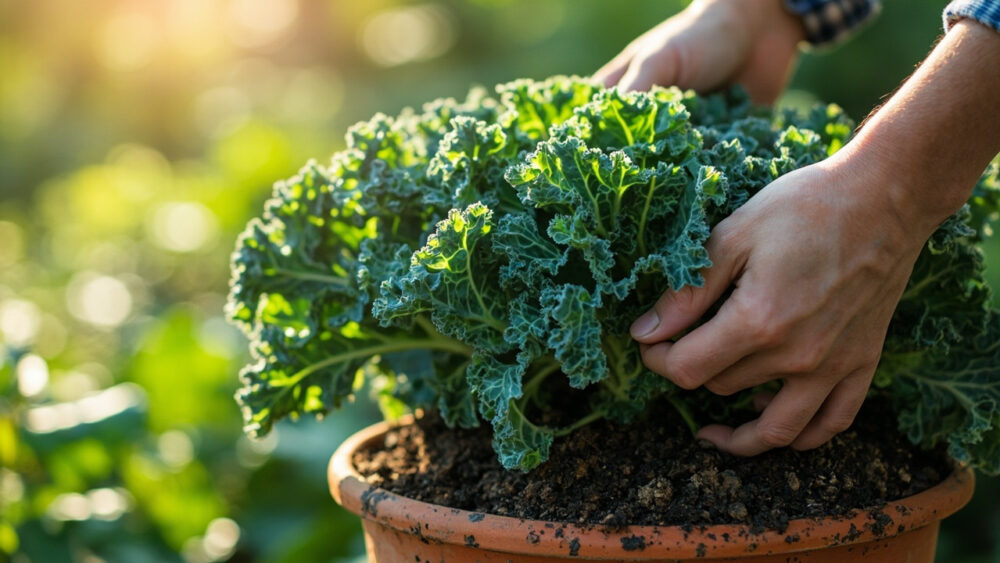
Growing kale in containers works because kale has a shallow, forgiving root system that thrives in a pot at least 12 inches deep and 16 to 20 inches wide, filled with rich, well-draining potting mix, kept consistently moist and fed every three to four weeks. One plant per 5-gallon pot, or three plants in a half whiskey barrel, gets you steady harvests from a single container for months. That is the whole job in outline. The details are where most people either get a container that feeds them all season or one that bolts, yellows, and quits by midsummer.
There is one mistake that wrecks more container kale than pests and disease combined, and it is not what people expect. It is not underwatering. It is planting kale into a container that looked big enough in the store and turned out to be too small and too shallow the moment real roots showed up.
There is also a sign almost everyone misreads in the first few weeks, a purplish tint on the leaves that looks like disease and is actually just the plant telling you something specific about temperature. And there is the honest answer to the question you are about to ask right after this one: yes, kale in a container needs more feeding than kale in the ground, because every watering washes nutrients out the drainage holes. Stick around for the Kale at a Glance card at the bottom. It is built to save to your phone before you buy a single bag of soil.
When to Plant Kale in Containers
Kale is a cool-season crop, and containers let you cheat the calendar a bit since you can move pots to shelter or drag them into a garage during a hard freeze. Direct-sow or transplant two to three weeks before your last expected frost, once soil temperature in the container hits at least 40°F, though germination and growth pick up noticeably once it reaches 50 to 60°F.
For a fall crop, start again six to eight weeks before your first expected fall frost. Kale actually sweetens after a light frost, so this second planting often outperforms the spring one.
In warmer zones (8 and up), kale can run as a fall-through-spring crop, skipping the hot months entirely. In colder zones, spring and late-summer plantings bracket a hot, bolt-prone summer that kale does not enjoy.
Get the timing right and the rest of the guide is just maintenance.
Choosing the Spot and Prepping the Container
Kale wants at least 6 hours of direct sun, though in hot climates afternoon shade is a real advantage, not a compromise. Container size is non-negotiable: go no smaller than 12 inches deep with drainage holes, since kale’s roots need room to run even though the plant looks compact up top.
Fabric grow bags work well because they drain fast and let roots breathe, but they also dry out faster and need more frequent watering.
Fill with a quality potting mix, not garden soil, which compacts and drains poorly in a container. Mix in a couple handfuls of compost or a slow-release balanced fertilizer at planting time to give roots something to work with early.
This is the setup step people skip to save five minutes, and it costs them the whole season.
Planting Kale Step by Step
1. Fill and settle the container
Fill the pot to about an inch below the rim with moistened potting mix. Water it once before planting so it settles and you are not planting into a container that sinks two inches by tomorrow.
2. Sow or transplant
If direct-sowing, plant seeds a quarter to half an inch deep, 2 to 3 seeds per eventual plant spot, then thin to the strongest seedling once they have their first true leaves. If transplanting starts, bury the stem up to the first set of leaves, just as you would a tomato.
3. Space for the size you want
Give each plant 12 to 16 inches in a large container, or one plant to a 5-gallon pot. Tighter spacing (8 to 10 inches) is fine if you plan to harvest young for baby kale rather than growing full-size plants.
4. Water in well
Soak thoroughly right after planting until water runs from the drainage holes. This settles roots against soil and removes air pockets that dry out and kill young roots.
Get through week one and the plant is doing the hard work on its own from here, though it still needs you to show up consistently.
Watering and Feeding Through the Season
Containers dry out faster than ground soil, full stop. Check moisture by pushing a finger 1 to 2 inches into the mix; if it is dry at that depth, water until it runs from the bottom. In hot weather this can mean watering every day.
That purplish or reddish tint on young leaves is not disease, and it is not the guess most people jump to (a nutrient deficiency). It is almost always cold soil temperature, especially in early spring plantings. It fades on its own as the container warms, and it does not affect flavor or harvest.
The related tell everyone misreads: leaves turning pale yellow-green rather than purple usually does mean a nitrogen shortage, which is common in containers because frequent watering leaches nutrients out fast.
Feed every 3 to 4 weeks with a balanced liquid fertilizer, or work in a slow-release granular at planting and again at the 6-week mark. Kale is a heavy enough feeder that container plants genuinely need more frequent feeding than the same plant in garden soil.
Feed and water on schedule and you buy yourself a much longer harvest window than you’d expect from a pot this size.
Problems Likely to Strike, and How to Head Them Off
Aphids cluster on the undersides of leaves, especially in the crowded lower growth. A strong jet of water knocks most of them off; a insecticidal soap applied per the product label handles the rest.
Cabbage worms and loopers chew ragged holes and leave small dark droppings on leaves. Floating row cover over the container before moths arrive is the single best prevention. If you spot green caterpillars, hand-pick them or treat with a Bt product labeled for caterpillars, following the label exactly.
Bolting (a sudden central flower stalk) happens when kale gets stressed by heat or by a container that is too small and dried out repeatedly. Once a kale plant bolts, leaf quality drops for good. Harvest what you can and start a new round for cool weather.
Bottom rot or yellowing lower leaves usually means overwatering or a container without enough drainage, not underwatering, which is the guess most people make first.
Catch these early and none of them cost you the whole plant, but ignore them for a week and some of them will.
When and How to Harvest Kale
Start harvesting once outer leaves reach 8 to 10 inches long, usually 55 to 75 days from seed depending on variety, or as soon as 30 days if you are harvesting baby leaves. Pick from the outside in, always leaving the top rosette and inner leaves intact so the plant keeps producing.
Never strip a plant bare in one pass. Take no more than a third of the leaves at a time, and the plant will keep pushing new growth for months, especially in cool weather.
Leaves are ready when they feel firm and hold their color. Leaves that go pale, thin, or limp are past their best and better composted than eaten. A light frost actually improves flavor by triggering the plant to convert starches to sugars, so do not rush to cover container kale for a mild frost the way you would tender crops.
Harvest right and one container can feed you steadily from planting straight through into the following season’s first plantings.
Kale at a Glance
- When to plant: two to three weeks before last frost, or six to eight weeks before first fall frost, once container soil hits at least 40°F.
- Container size: at least 12 inches deep and 16 to 20 inches wide, one plant per 5-gallon pot, with real drainage holes.
- Spacing: 12 to 16 inches per plant for full-size heads, 8 to 10 inches if harvesting baby leaves.
- Planting depth: seeds a quarter to half inch deep, transplants buried to the first set of leaves.
- Watering: check 1 to 2 inches down, water when dry, expect daily watering in hot weather.
- Feeding: balanced fertilizer every 3 to 4 weeks, containers leach nutrients faster than garden beds.
- Harvest: outer leaves at 8 to 10 inches long, roughly 55 to 75 days from seed, take no more than a third of the plant at once.
The one habit that actually matters most is checking soil moisture with a finger, not a guess, every day the weather is warm.
Everything else on this page is just backup for that single habit.