The method that actually works for croton is a simple stem cutting rooted in damp perlite or a perlite-and-peat mix, kept warm and humid until roots form, which usually takes four to eight weeks. Skip the water-glass approach most people try first. It works occasionally, but it rots stems more often than it grows roots, and how to propagate croton successfully really comes down to controlling moisture and heat, not the container you root it in.
There is one mistake that tanks most attempts, and it is not the one people worry about. It has nothing to do with rooting hormone or the sharpness of your knife.
Below, the exact steps, what the cutting should look like each week, when it is actually ready to pot up, and a save-able Croton at a Glance card at the bottom with every number you need on your phone while you work.
Why Stem Cuttings Beat Water and Leaf Propagation
Croton does not root reliably from a single leaf. No leaf-in-water trick works here the way it does for pothos or begonia. The plant needs a piece of stem with at least one node, the slightly swollen point where a leaf attaches, because that is where new roots actually originate.
Water rooting is the other common guess, and it is the guess that quietly ruins the most attempts. Croton stems ooze a milky sap when cut, and sitting that cut end in standing water encourages rot faster than it encourages roots, especially in a warm room. A damp, airy medium drains that sap zone instead of drowning it.
That is why perlite, or a perlite and peat blend, out-performs water for this plant almost every time.
Step by Step: Taking the Cutting and Getting It to Root
Take the cutting
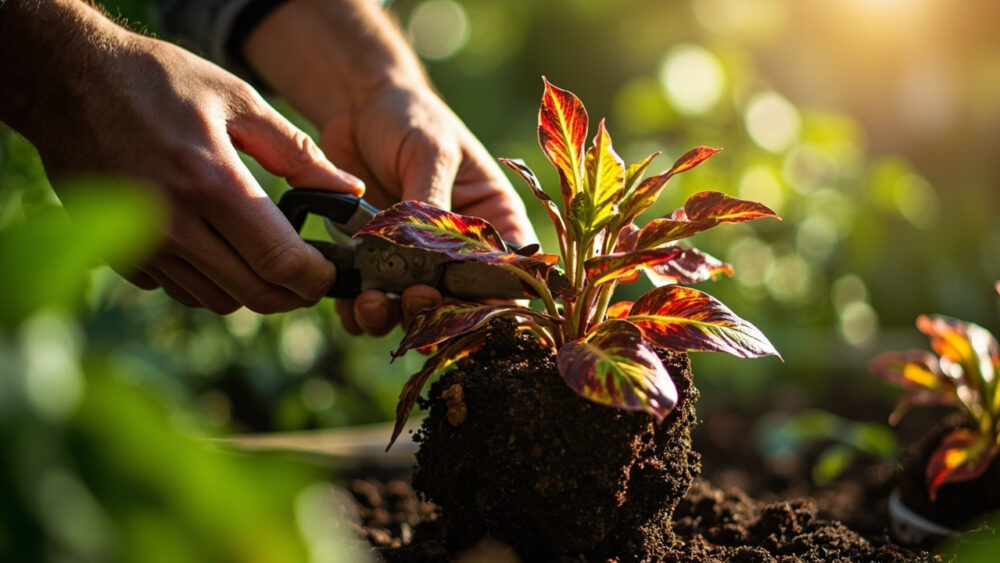
Choose a healthy stem tip with at least two or three leaves and one or two nodes below them. Cut four to six inches long, just below a node, using clean, sharp pruners. Semi-hardwood stems, ones that have started to firm up and turn slightly woody but are not yet fully brittle, root better than very soft new growth.
Prep the cutting
Wipe the milky sap off the cut end with a damp paper towel. Let the cutting sit out for fifteen to thirty minutes so the wound dries slightly and forms a thin callus. Strip the lower one or two leaves so no foliage touches the rooting medium.
Rooting medium and hormone
Fill a small pot with moistened perlite, or a fifty-fifty perlite and peat mix. Dip the cut end in rooting hormone powder or gel if you have it; it is not mandatory for croton but it does speed things up and improve your odds. Insert the cutting one to two inches deep and firm the medium around it so it stands on its own.
Conditions that actually matter
Cover the pot loosely with a clear plastic bag or a propagation dome to hold humidity, keeping the plastic off the leaves. Place it somewhere bright but out of direct sun, and keep the room between 70 and 80 degrees Fahrenheit. Bottom heat, from a seedling heat mat or just a warm spot on top of the fridge, makes a real difference on this plant.
Get those three things right, warmth, humidity, and a well-draining medium, and the timeline below takes care of itself.
Week by Week: What to Expect
Nothing visible happens in week one, and that is normal, not a failure. The cutting is calluses over and beginning to form root initials under the bark, invisible from outside.
Weeks two to three are where people panic and pull the cutting to check on it, which is the second-biggest mistake after water rooting. Every tug disturbs the tiny hair roots trying to form. Leave it alone and just keep the medium evenly moist, never soggy.
By weeks four to six, you should feel resistance when you gently tug the stem, a sign roots have anchored it. Some cuttings show a bit of fresh leaf growth by week six or seven, which is a good sign but not the real test.
The real test comes around week eight: light tug resistance plus visible white or tan roots when you peek at the drainage hole. That is when the plant is actually ready, not before.
When and How to Pot Up
Pot up once roots are one to two inches long and there are several of them, not just one thin strand. A single root means wait another week or two; croton wants a small root system before it moves, unlike some houseplants that transplant on a single root tip.
Move the rooted cutting into a four to six inch pot with a standard well-draining houseplant mix, ideally one with some perlite or bark already in it. Plant at the same depth it was rooting, water it in, and keep humidity elevated for another week or two while it adjusts to open air.
Bright, indirect light is right for the first month. Full sun, which mature croton eventually loves, can scorch a young cutting still building its root mass.
Getting the timing right here matters more than most people expect, and rushing it is exactly how good cuttings die in their new pot.
Why Most Attempts Fail, Really
If you assumed the failure point is a bad cutting or the wrong season, that is a reasonable guess, but it is usually not the real cause. Most failed croton cuttings die from one of three things, and none of them is bad luck.
- Rotting in water: the sap-and-standing-water problem covered above, the single most common cause.
- Cold rooting spot: below 65 degrees Fahrenheit, root formation slows dramatically or stalls out entirely, even with everything else right.
- Overwatered medium: perlite that is kept soaked rather than just moist suffocates the forming roots as effectively as a glass of water does.
Fix those three and the honest odds tilt heavily in your favor.
One more honest note: variegated crotons with thin, spindly stems root slower and less reliably than the thick-stemmed, broad-leaf types, so patience matters more with fancier cultivars.
Now that you know what breaks it, here is everything worth saving before you start.
Croton at a Glance
- Best method: stem cutting rooted in damp perlite or a perlite and peat mix, not water.
- Cutting size: four to six inches long, with at least one node, taken from semi-hardwood growth.
- Rooting depth: one to two inches into the medium, lower leaves stripped first.
- Ideal conditions: 70 to 80 degrees Fahrenheit, bright indirect light, high humidity under a bag or dome.
- Timeline: callus and hidden root formation in week one, tug resistance by weeks four to six, visible roots and readiness by week eight.
- Pot up when: roots are one to two inches long and multiple roots are visible, not just one strand.
- Biggest killer: standing water on the cut end, followed by a rooting spot that is too cold.
Get the warmth and the moisture level right, and croton roots on a fairly predictable schedule.
Rush the potting or root it in water, and you will be starting over with a fresh cutting instead.