Yellow squash goes in the ground after your last frost, once the soil has warmed to at least 60°F, planted in full sun about an inch deep and given 24 to 36 inches to sprawl. That part is simple. Learning how to grow yellow squash that actually keeps producing all summer instead of quitting in July is the harder, more useful skill.
Most people who fail at this crop make the same mistake, and it is not watering or fertilizer. It is planting too early or crowding plants so tight that airflow disappears and disease moves in within weeks.
There is also a sign almost every new grower misreads completely: a squash plant loaded with blossoms but producing zero fruit. It looks like a fertility problem. It almost never is.
Stick with me through planting, feeding, and the pest that ends more squash plants than anything else, and you will get the full picture. The save-able Yellow Squash at a Glance card is waiting at the bottom once you have the real story.
When to Plant Yellow Squash
Yellow squash is a heat lover with zero frost tolerance, and it will sulk or die outright if you plant it too early. Wait until soil temperature is reliably above 60°F, ideally 65 to 70°F, which usually lines up with one to two weeks after your last spring frost date.
If you cannot check soil temperature with a thermometer, watch the ground itself. Soil that is dry and crumbly an inch down, not cold and damp, is ready.
Gardeners in short-season, cooler zones (roughly zone 5 and colder) often start seed indoors two to three weeks before that window, in individual pots, since squash resents transplanting and hates having its roots disturbed. Everyone in zone 6 and warmer does better direct-seeding outdoors.
You can keep planting a second and third round every three to four weeks through early summer for a longer harvest instead of one big glut.
Getting the timing right is only half the job, the spot you choose matters just as much.
Choosing the Spot and Prepping the Soil
Squash wants a minimum of 6 to 8 hours of direct sun and soil that drains well but holds some moisture. Low, soggy corners of the yard grow rot, not squash.
Work 2 to 3 inches of compost or aged manure into the top 6 to 8 inches of soil before planting. Squash is a heavy feeder and shallow soil prep shows up later as pale leaves and small fruit.
A soil pH between 6.0 and 6.8 is the sweet spot. You do not need to obsess over exact numbers, just avoid soil that is heavily acidic or straight clay that stays wet for days after rain.
This is also where the crowding mistake starts, before a single seed even goes in the ground.
Planting Yellow Squash Step by Step
Give each plant real room. This is the single change that prevents the most common disease problems later in the season.
1. Space generously
Plant seeds or transplants 24 to 36 inches apart, with rows 3 to 4 feet apart, or use hills spaced 3 feet apart with two or three plants per hill. Crowded squash has no airflow, and no airflow means powdery mildew moves in early.
2. Plant at the right depth
Sow seeds about 1 inch deep directly in the garden. If you started transplants indoors, set them at the same depth they were growing in the pot, not deeper.
3. Water in immediately
Give newly planted seeds or transplants a good soak right away to settle soil around the roots and trigger germination, which usually takes 7 to 10 days in warm soil.
4. Thin if needed
If you planted a few seeds per hill for insurance, thin to the strongest one or two seedlings once they have their first true leaves.
Once plants are in and spaced right, the season becomes about water, feeding, and staying ahead of trouble.
Watering and Feeding Through the Season
Squash wants about 1 to 1.5 inches of water per week, delivered deeply and less often rather than a light sprinkle daily. Water at the base, not overhead, since wet leaves invite fungal disease.
Check soil moisture by feeling an inch or two down. If it is dry there, water. If it is still damp, wait a day.
Feed with a balanced fertilizer or compost tea at planting, then side-dress with a phosphorus-and-potassium-leaning feed once flowering starts. Too much nitrogen at that stage gives you huge dark leaves and almost no fruit.
Mulch with straw or shredded leaves once plants are established. It holds moisture, keeps soil temperature steady, and cuts down on soil-borne disease splashing onto leaves.
Now here is that blossom mystery from the intro, and it has nothing to do with feeding.
Why All Blossoms and No Squash Is Normal at First
If you guessed a fertility problem, that is the natural guess, and it is wrong. Squash plants produce male flowers first, sometimes for a week or two straight, before the female flowers show up.
Female flowers have a small swollen bulge at the base that looks like a tiny squash. Male flowers sit on a plain thin stem. Early on you will see mostly males, and no amount of fertilizer speeds that up.
Once females appear, pollination is the next hurdle. Poor bee activity, cool damp weather, or heavy pesticide use nearby can all leave female flowers unfertilized, and they will yellow and drop without swelling. Hand-pollinating with a small brush, moving pollen from a male flower to a female one in the morning, solves this reliably if you are not seeing bees.
That patience pays off, but it is not the only threat waiting in the wings.
Pests and Problems That End Most Squash Plants
The single biggest squash-killer in home gardens is the squash vine borer, a moth larva that tunnels into the base of the stem and causes sudden wilting even though the soil is plenty moist. By the time you see the wilt, the damage inside the stem is often already done.
Watch for small holes near the stem base with a sawdust-like frass around them. Wrapping the lower stem in foil or a fabric collar at planting, and checking weekly for eggs on stems and undersides of leaves, catches it before it burrows in.
Squash bugs cluster on leaves and stems and cause speckled, collapsing foliage. Handpicking adults and crushing egg clusters (found in neat rows on leaf undersides) keeps numbers down without chemicals.
Powdery mildew, a white dusty coating on leaves, shows up in humid weather or crowded plantings. Good spacing and base watering prevent most of it. If it takes hold, a fungicide labeled for powdery mildew on vegetables can slow it, applied exactly per the product label.
If a plant collapses fast and you find a hollowed stem, it is usually too late to save that plant, and pulling it to stop the borer from spreading to others is the honest move.
Get through these threats and you are on the home stretch to the part you actually planted this for.
When and How to Harvest Yellow Squash
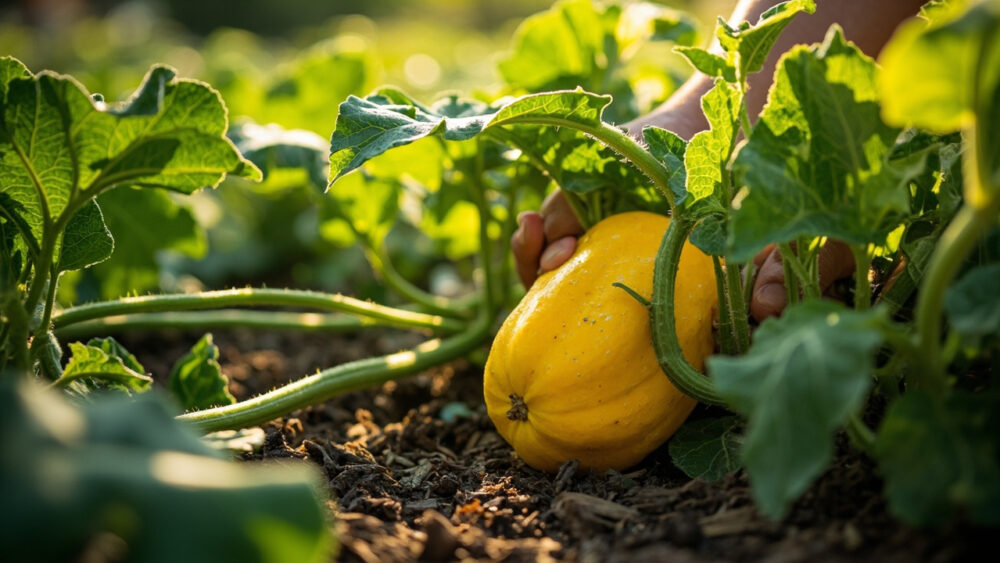
Yellow squash matures fast, typically 45 to 55 days from seed, and once it starts, it does not slow down. Harvest fruit at 6 to 8 inches long, when the skin is glossy and easy to pierce with a fingernail.
This is the other place people go wrong: waiting for squash to get big. Oversized, dull-skinned squash with tough skin and big seeds are past their best, and letting fruit mature on the vine actually signals the plant to slow down production.
Cut fruit with a sharp knife or pruners, leaving an inch of stem attached, rather than twisting it off. Check plants every day or two once they start producing, since a plant in full swing can go from harvest-ready to oversized in 48 hours.
Steady picking is what keeps a squash plant productive for two months instead of two weeks.
Yellow Squash at a Glance
- When to plant: One to two weeks after your last frost, once soil is reliably above 60°F, ideally 65 to 70°F.
- Sun and soil: Full sun, 6 to 8 hours minimum, well-draining soil enriched with 2 to 3 inches of compost, pH 6.0 to 6.8.
- Spacing and depth: Seeds 1 inch deep, plants 24 to 36 inches apart, rows or hills 3 to 4 feet apart.
- Watering: 1 to 1.5 inches per week, deep soaks at the base, not overhead.
- Feeding: Balanced fertilizer at planting, phosphorus-and-potassium feed once flowering begins.
- Biggest threat: Squash vine borer, watch for holes and frass at the stem base, use a stem collar as prevention.
- Harvest: 45 to 55 days from seed, pick at 6 to 8 inches long with glossy skin, check plants daily once production starts.
Space plants generously and pick fruit young and often, that combination solves more squash problems than any product on a shelf.
Everything else, from blossom timing to vine borers, is just patience and paying attention.