Here is how to grow collard greens without wasting a season: put transplants or seeds in the ground 2 to 4 weeks before your last spring frost, or better yet in mid to late summer for a fall crop, give each plant 18 to 24 inches of space, and keep the soil evenly moist while feeding it every 4 to 6 weeks. Collards are one of the most forgiving greens you can grow, tolerant of light frost, heat, and mediocre soil, but a handful of specific mistakes still take out most first attempts.
The biggest one is not what you think. It is not watering, and it is not planting too early. It is spacing plants too close and then wondering why the leaves stay small and bitter and the whole bed turns into a magnet for aphids by midsummer.
There is also a harvesting mistake almost everyone makes on their first go, one that either stunts the plant permanently or wastes weeks of good eating. And stick around for the honest answer on whether you should grow collards in spring or fall, because the two seasons behave differently and nobody tells you that up front. Save-able specifics on timing, spacing, and feeding are waiting in the “Collard Greens at a Glance” card at the bottom.
When to Plant Collard Greens
Collards are cool-season plants that tolerate heat better than almost any other green, which is why you can plant them twice. For a spring cropset out transplants 2 to 4 weeks before your last expected frost, once soil temperature is at least 45 to 50°F. For a fall cropwhich most experienced growers actually prefer, start seeds or transplants 10 to 12 weeks before your first fall frost.
Fall-grown collards taste sweeter because a light frost converts some of the plant’s starches to sugar. Spring collards grow fast but tend to bolt and turn bitter once real heat arrives.
In zones 7 and warmer, you can often keep a fall planting producing right through winter.
That timing question about spring versus fall matters more once you see what happens to the soil these plants actually want.
Choosing the Spot and Prepping the Soil
Collards want full sunat least 6 hours a day, though in hot climates a little afternoon shade keeps a spring crop from bolting as fast. They are heavy feeders, so skimping on soil prep is where a lot of thin, pale harvests start.
Work in 2 to 3 inches of compost or aged manure before planting. Aim for a soil pH between 6.0 and 7.5; collards are one of the more pH-tolerant brassicas, but they still sulk in soil that is too acidic.
Loosen the top 8 to 10 inches so roots can spread wide, since collards develop a broad, shallow root system rather than a deep taproot.
Good soil sets the table, but how you actually get the plants into it decides whether they take off or stall.
Planting Collard Greens Step by Step
1. Decide seeds or transplants
Direct seed if your season is long enough, or start transplants indoors 5 to 6 weeks before you want to set them out. Transplants give you a head start, especially for that early spring window before heat arrives.
2. Sow or set at the right depth
Sow seeds ¼ to ½ inch deep. Set transplants at the same depth they were growing in their pot, burying the stem no deeper than the first true leaves.
3. Space generously
This is where most people go wrong. Give plants 18 to 24 inches apart in rows spaced 24 to 36 inches apart. Crowded collards produce small, tough leaves and hold humidity around the base that invites disease.
4. Water in immediately
Soak the bed right after planting so roots make firm contact with soil. Keep the top inch consistently damp until you see new growth, usually within 7 to 10 days.
Once they are in the ground and spaced right, the real work shifts to keeping them fed and hydrated through the season.
Watering and Feeding Through the Season
Collards need about 1 to 1.5 inches of water per week, whether from rain or you. Check by pushing a finger 2 inches into the soil; if it comes up dry, water deeply rather than lightly and often.
Inconsistent watering is what turns collard leaves bitter and tough faster than heat alone, so a steady schedule matters more than any single soaking.
Feed with a balanced fertilizer or a side-dressing of compost every 4 to 6 weeks. Nitrogen-hungry crops like this one will show pale, yellowing lower leaves when they are running low, your cue to feed again rather than wait it out.
Mulch with 2 to 3 inches of straw or shredded leaves to hold moisture and keep leaves clean.
Fed and watered plants still have to survive the pests that treat collards like a buffet, so here is what actually shows up.
Problems Most Likely to Strike
If you guessed aphids would be your main headache, you are half right, but the bigger threat on collards is usually cabbage worms and harlequin bugs, which do real damage fast.
- Cabbage worms and loopers: chew ragged holes in leaves. Check undersides for pale green caterpillars and eggs. Hand-pick when populations are small, or use a product labeled for caterpillars on brassicas, following the label exactly.
- Aphids: cluster on new growth and leaf undersides, causing curling and stunted leaves. A strong water spray knocks most colonies back. Insecticidal soap handles the rest.
- Harlequin bugs: shield-shaped, black and orange, suck sap and leave stippled, wilted leaves. Hand-pick adults and eggs early in the season before populations build.
- Clubroot and black rot: soil-borne diseases that cause stunted, yellowing plants. Rotate brassicas to a new bed every year and avoid working in wet soil to limit spread.
Most of these problems are manageable if you catch them early, which means walking the bed and checking leaf undersides at least once a week.
Get through pest season and you arrive at the part everyone clicked for: picking the leaves at the right time.
When and How to Harvest Collard Greens
Collards reach harvestable size in 55 to 75 days from transplant, depending on variety, though you do not have to wait for full maturity. Start picking outer leaves once they reach 8 to 10 inches long, usually 30 to 40 days in.
Here is the mistake almost everyone makes: stripping the whole plant at once. That shocks it and can stop production entirely.
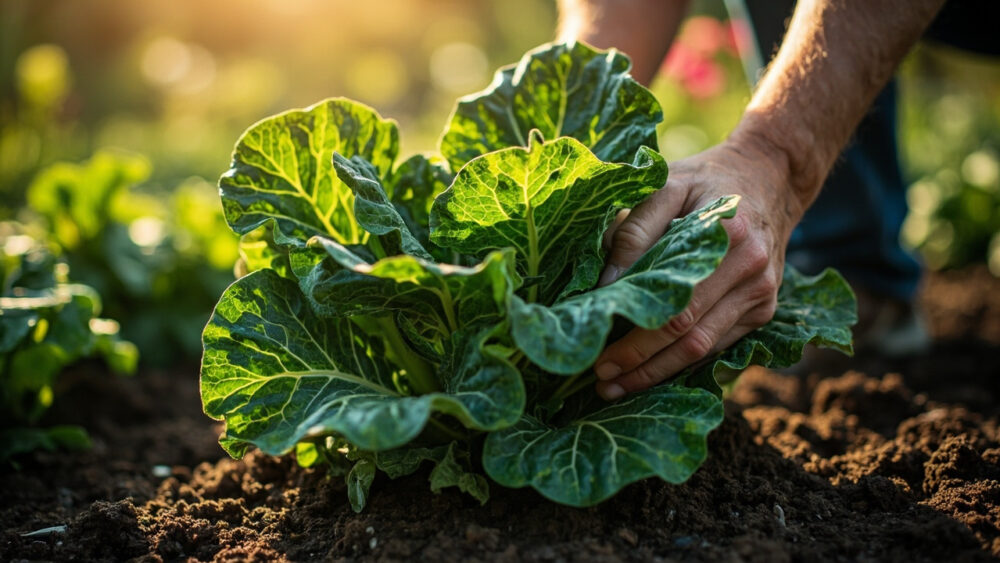
Harvest from the bottom uptaking only the lower, older leaves and leaving the top rosette and newest growth intact. The plant keeps producing new leaves from the center for weeks or months this way.
Snap or cut leaves close to the stem. Leaves are most tender and mild before a hard freeze. A light frost actually sweetens them, so do not rush to pull fall plantings at the first cold snap.
A well-tended plant can keep giving you leaves for two to three months, sometimes longer in mild climates, which is the real payoff for spacing and feeding it right from the start.
Collard Greens at a Glance
- When to plant: 2 to 4 weeks before last spring frost, or 10 to 12 weeks before first fall frost for the sweeter, preferred crop.
- Spacing: 18 to 24 inches between plants, rows 24 to 36 inches apart.
- Planting depth: ¼ to ½ inch for seeds, same depth as pot for transplants.
- Sun and soil: full sun, pH 6.0 to 7.5, soil enriched with 2 to 3 inches of compost.
- Water needs: 1 to 1.5 inches per week, consistent rather than heavy and occasional.
- Feeding: balanced fertilizer or compost every 4 to 6 weeks.
- Harvest: pick outer leaves at 8 to 10 inches long starting around 30 to 40 days, harvesting bottom-up so the plant keeps producing.
Get the spacing and the bottom-up harvest right and collards practically grow themselves.
Everything else on this list is just keeping them fed, watered, and ahead of the bugs.