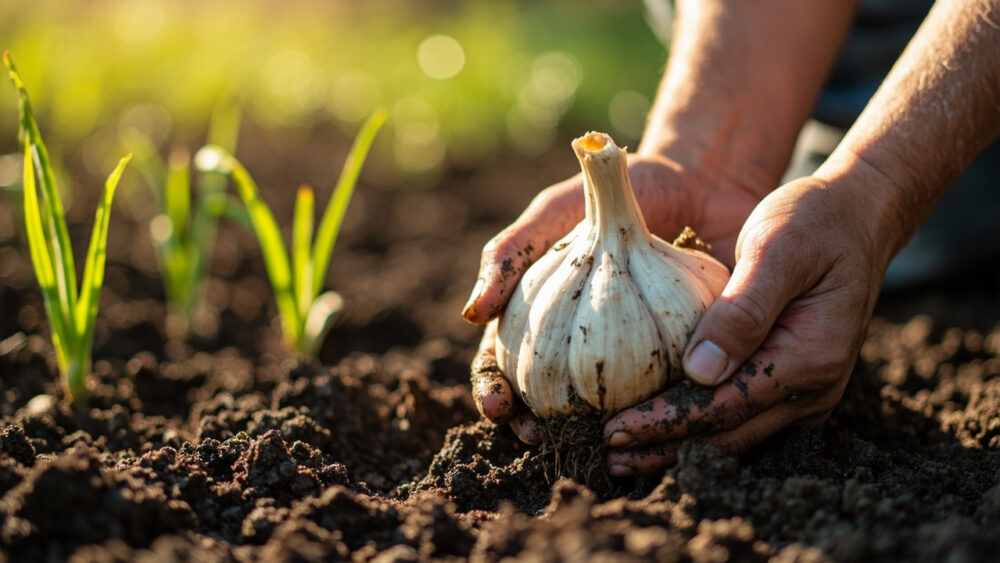
Elephant garlic goes in the ground in fall, four to six weeks before your soil freezes hard, planted 4 to 6 inches deep and 8 to 12 inches apart in loose, well-drained soil. It grows through the following season and comes out of the ground in early to mid summer, when the lower leaves start browning and roughly half the plant is still green. That part is simple enough. The parts that actually determine whether you get softball-sized bulbs or a handful of overpriced garlic-flavored onions are the ones nobody warns you about.
Here is the first surprise: elephant garlic is not really garlic. It is a type of leek that happens to form a garlic-shaped bulb, and that single fact explains most of the mistakes people make with it, including the one that quietly wrecks the harvest for a huge number of first-time growers. There is also a sign everyone misreads in early summer, right when the plant looks its best, that tells you the exact opposite of what people assume it means.
Stick with me through the planting steps, the feeding schedule, and the problems that actually show up on this plant, and I will hand you a save-able Elephant Garlic at a Glance card at the very bottom with every number in one place.
When to Plant Elephant Garlic
Fall planting is the standard and the reason is root development, not tradition. You want the clove to push roots before the ground freezes, without pushing much top growth. Aim for four to six weeks before your ground typically freezes solid, which in most of the country lands somewhere in the range of mid September through November depending on your zone.
In zones 7 and warmer, you can push planting later into fall since hard freezes arrive slower. In zones 3 and 4, get it in the ground earlier and mulch heavily, because a clove that has not rooted before a deep freeze is a clove that rots come spring.
Spring planting works too, but only if you get the clove into workable soil as early as possible, ideally as soon as the ground can be dug, four to six weeks before your last expected frost. Spring-planted bulbs are almost always smaller at harvest, because they miss out on that long fall-to-spring root-building window.
Timing gets the plant started right, but where you put it decides how big it gets.
Choosing the Spot and Prepping the Soil
Full sun is non-negotiable, six hours minimum, and loose, well-drained soil matters more for this plant than for almost anything else in the vegetable garden. Elephant garlic bulbs are big and they need to expand sideways through soil that is not compacted or clay-heavy.
Work in 2 to 3 inches of compost or aged manure before planting, and if your soil is heavy clay, raise the bed 6 to 8 inches to guarantee drainage. Soggy soil over winter is the single most common cause of rot, not cold.
Skip any spot where onions, garlic, or leeks grew in the last two to three years. Same family, same soil-borne disease risk, and elephant garlic sits in that ground for eight to nine months, plenty of time for lingering fungal issues to find it.
Good soil is half the job done before a single clove goes in the ground.
Planting Elephant Garlic Step by Step
Here is the mistake that ruins most first attempts: planting the whole bulb instead of breaking it into individual cloves. Elephant garlic bulbs typically hold just four to six cloves, each one large, and each one capable of growing into a full new bulb on its own. Plant the whole head and you get a mess of small, crowded, misshapen bulbs instead of a few excellent ones.
Steps
- Break the bulb apart by hand right before planting, keeping the papery wrapper on each clove intact. Peeled, bruised, or nicked cloves rot faster than they root.
- Discard any clove that feels soft, light, or hollow. Plant only firm, heavy cloves.
- Dig or push each clove 4 to 6 inches deep, pointed end up, flat root end down.
- Space cloves 8 to 12 inches apart, with rows 12 to 18 inches apart. This plant needs real room, closer spacing than that stunts bulb size.
- Cover with soil, firm gently, and water once at planting to settle the soil around the clove.
- Mulch with 3 to 4 inches of straw, especially for fall planting, to buffer temperature swings and suppress weeds.
Get the clove orientation and spacing right and the plant does most of the rest of the work itself over winter.
Watering and Feeding Through the Season
Consistent moisture beats heavy watering. Elephant garlic wants soil that feels like a wrung-out sponge, damp an inch down, never waterlogged and never bone dry for long stretches. About 1 inch of water per week, from rain or irrigation combined, is a solid target through active spring growth.
Feed in early spring as soon as new growth appears, with a nitrogen-rich feed to push leaf growth, then switch to something lower in nitrogen and higher in phosphorus and potassium once bulbing starts in late spring. Too much nitrogen late in the season buys you gorgeous leaves and a disappointing bulb.
Here is the sign everyone misreads: in late spring, a tall flower stalk called a scape will shoot up from the center of the plant, sometimes topped with a dramatic globe of purple-white flowers. It looks like a sign of vigor. It is actually a sign to grab your shears.
Cut the scape off as soon as it appears, unless you’re intentionally letting one plant flower for seed. Left in place, it diverts energy away from the bulb and can shrink your harvest noticeably.
Stop watering roughly two weeks before harvest to let the bulbs firm up and the wrappers cure a bit in the ground.
Cutting that scape is the single easiest thing you can do to grow a bigger bulb, and almost nobody who’s new to this plant does it.
Problems That Actually Show Up
Rot is the most common failure, almost always from poor drainage or a wet, mild winter. There’s no cure once a clove has gone soft underground, so prevention through raised beds and well-drained soil is the real fix, not a rescue treatment.
Watch for these issues through the season:
- Yellowing leaf tips in summer heat: usually normal senescence as the plant heads toward maturity, not a deficiency, especially if it’s happening evenly and harvest time is near.
- White fuzzy growth at the base or rotting roots: a fungal rot, often worsened by overwatering. Improve drainage and avoid replanting that bed with alliums for several years.
- Small pinhole tunnels or distorted leaves: allium leaf miner or onion maggot in some regions. Floating row cover early in the season is the most reliable cultural defense.
- Rust-colored spots on leaves: a fungal leaf rust, more common in humid climates with poor air circulation. Space plants properly and avoid overhead watering late in the day.
For any fungal or pest pressure that gets ahead of you, a product labeled for the specific issue and used exactly per the label instructions is the right call, not a home mixture and not guesswork.
Handle drainage and spacing well from the start and most of this list never becomes a real problem.
When and How to Harvest
The honest answer to when it’s ready: watch the leaves, not the calendar. When the bottom third to half of the leaves have browned and dried while several upper leaves are still green, the bulb is mature. That’s typically early to mid summer for fall-planted elephant garlic, later for spring-planted.
Pulling too early is the second-most common mistake, right behind planting whole bulbs. An impatient harvest gets you small, underdeveloped cloves that don’t store well. Waiting too long, on the other hand, risks the wrapper splitting and the bulb separating underground, which invites rot and cuts storage life short too.
Loosen the soil with a garden fork a few inches out from the stalk rather than yanking, since elephant garlic bulbs are large and shallow tugging snaps the stem clean off. Lift gently, brush off loose soil, and avoid washing the bulbs.
Cure them somewhere warm, dry, and shaded with good airflow for two to three weeks, stems still attached, before trimming and storing. Properly cured bulbs store for several months in a cool, dry spot with decent ventilation.
Save your biggest, firmest bulbs to replant next fall, and the whole cycle gets easier every year you do it.
Elephant Garlic at a Glance
- When to plant: fall, four to six weeks before your ground freezes hard, or very early spring as soon as soil is workable.
- Depth and spacing: plant individual cloves 4 to 6 inches deep, pointed end up, spaced 8 to 12 inches apart with 12 to 18 inches between rows.
- Soil and site: full sun, loose and well-drained soil enriched with compost, raised beds if your soil is heavy clay.
- Water: about 1 inch per week during active growth, stopping roughly two weeks before harvest.
- Key task: cut off the flower scape as soon as it appears to push more energy into the bulb.
- Harvest window: early to mid summer, when the lower half of the leaves browns and the upper leaves stay green.
- Curing: two to three weeks in a warm, dry, shaded, airy spot with stems attached before trimming and storing.
Get the fall planting window and clove spacing right, and cut that scape when it shows up. Everything else about elephant garlic tends to take care of itself.