A pumpkin plant moves through six distinct stages between seed and harvest: germination, seedling, vining, flowering, fruit set, and ripening, and the whole run takes roughly 90 to 120 days depending on the variety. If you’re standing in the garden right now trying to figure out what you’re looking at, the leaf shape and flower color will tell you exactly which stage you’re in. Understanding these pumpkins growing stages is the difference between panicking over normal plant behavior and knowing when to actually step in.
Here’s the part almost nobody expects: the stage where most pumpkin patches fail isn’t germination or the first frost scare. It’s the one right after the flowers show up, when the vine looks perfect and the grower assumes everything is fine.
Stick around for the honest read on that stage, the sign that separates a healthy pause from a real stall, and a save-able “Pumpkins at a Glance” card at the bottom with every number you’ll want on your phone this weekend.
Germination: Days 1 to 10
Pumpkin seeds need soil that has warmed to at least 65°F, ideally 70 to 85°F, which usually means waiting until one to two weeks after your last frost date. Plant seeds 1 inch deep, pointed end down, in hills spaced 4 to 6 feet apart or rows with 3 feet between plants. Below 60°F soil, seeds often rot before they sprout instead of just sitting slow.
You won’t see anything above ground for the first several days. What’s happening below is the seed coat splitting and a root pushing down before the shoot pushes up.
The mistake here is planting too early to beat the season. Cold, wet soil kills more pumpkin seeds than any pest does.
Once that first loop of stem breaks the surface, the plant enters its most vulnerable few weeks.
Seedling Stage: Days 10 to 20
The seedling emerges bent like a hook, then straightens and unfolds two rounded seed leaves called cotyledons. True leaves, the rough, lobed ones you recognize as pumpkin foliage, follow within a few days. By the end of this stage the plant has three to five true leaves and stands a few inches tall.
This is when cutworms, slugs, and cucumber beetles do their damage, since a seedling has almost no reserves to recover from being chewed through at the stem. Check the base of each plant in the morning when slug trails are easiest to spot.
Keep soil evenly moist but not soggy. Roots are shallow now and dry out fast in full sun.
Once the vine starts actually reaching outward instead of just standing upright, you’ve entered the growth spurt.
Vining Stage: Weeks 3 to 6
This is the stage that convinces people they’ve got a green thumb, because growth is visibly fast. Vines can extend 6 inches or more per day under good heat and moisture, eventually running 10 to 20 feet from the base depending on variety. Leaves get noticeably larger, and you’ll see tendrils curling out to grab onto anything nearby.
The plant is working entirely on leaf and root development now, building the engine that will eventually feed the fruit. It needs consistent water, about 1 to 1.5 inches per week, and a nitrogen-heavy feeding early in this stage before flowers show up.
Give the vine room or train it in a direction on purpose, because an unmanaged pumpkin vine will happily climb into your tomatoes.
Then the first flowers open, and this is exactly where most seasons quietly go sideways.
Flowering Stage: Weeks 6 to 8
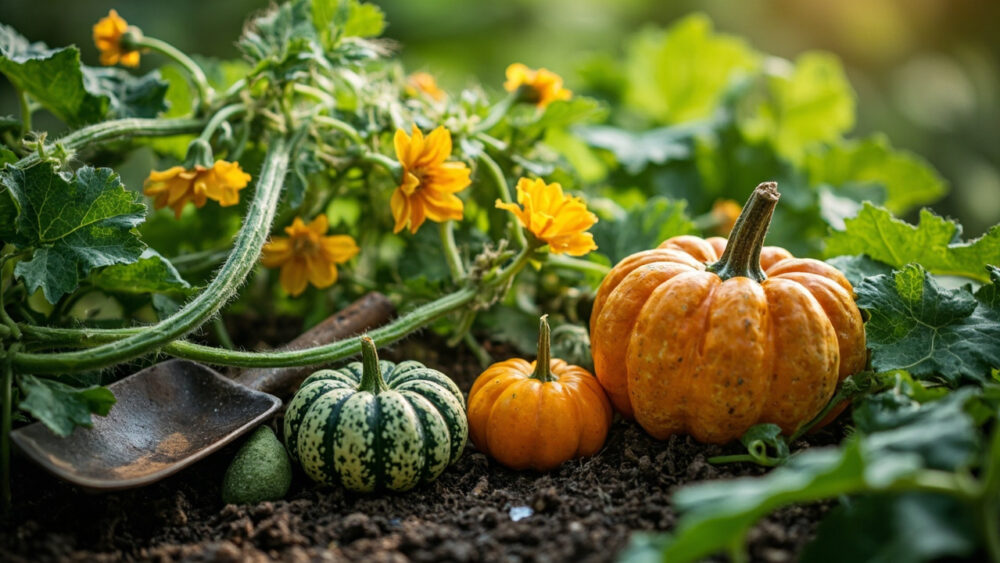
Pumpkins produce male flowers first, sometimes two to three weeks before a single female flower appears. Both are bright yellow-orange and look nearly identical from a distance, but the female flower has a small round swelling at its base, the immature fruit, while the male is just a plain straight stem.
If you assumed lots of flowers means lots of pumpkins coming, that guess is what trips up most first-time growers. Male-only flowering for weeks is completely normal, not a problem, and definitely not a reason to add more fertilizer.
Each flower opens for a single day, usually in early morning, and closes by afternoon. Bees have to move pollen from male to female in that narrow window or the flower drops without setting fruit.
This is the stage where a plant can look flawless and still produce nothing, and it’s why the next section matters more than any other.
The Stage Where Most Pumpkin Patches Actually Fail
Fruit set, right after pollination, is where good-looking vines stop turning into pumpkins. A female flower can open, close, and drop off within a day or two if pollination didn’t happen, and the small fruit behind it shrivels and yellows instead of swelling.
Low bee activity, cool damp weather that keeps pollinators grounded, and overcrowded vines that hide flowers from view all cause this. Hand pollination fixes it fast: pick a freshly opened male flower, strip the petals back, and brush the pollen directly onto the center of an open female flower, ideally before 10 a.m.
A plant can also abort extra fruit on purpose. It’s normal for a vine to set five or six small pumpkins and then drop all but one or two as it decides what it can actually feed to full size.
Once a fruit survives its first week without yellowing or softening, you’re past the riskiest point in the whole season.
Healthy Progress vs. a Real Stall
A pumpkin that’s growing normally changes size noticeably every few days, keeps a firm green stem attaching it to the vine, and sits on foliage that’s deep green with only the oldest, lowest leaves fading. That’s the plant working as intended, not a warning sign.
A real stall looks different. The fruit’s color and size stay identical for over a week, the stem near the fruit softens or turns yellow, or the whole vine wilts in the cool of morning rather than just in afternoon heat.
Powdery mildew, a white dusty coating on leaves, is common by midseason and mostly cosmetic if caught early; remove the worst leaves and treat according to a labeled fungicide if it’s spreading fast. Squash vine borers, on the other hand, cause sudden wilting of an entire vine and are far harder to reverse once inside the stem.
Once you can tell a lazy afternoon droop from an actual problem, the rest of the season is mostly just waiting.
Ripening Stage: Weeks 10 to 16
The fruit shifts from green to its mature color, usually orange but sometimes white, tan, or blue-gray depending on variety, over two to four weeks. The rind hardens enough that a fingernail can’t easily dent it, and the vine near the stem starts to dry and brown.
Stop watering as heavily once color change begins; too much water this late dilutes flavor and can crack the rind. Leave the pumpkin on the vine until the stem is fully dried and woody rather than green and pliable.
A pumpkin cut too early with a green stem will not ripen properly off the vine and won’t store well.
That last stretch on the vine is what turns a good-looking pumpkin into one that actually keeps through fall.
Pumpkins at a Glance
- When to plant: one to two weeks after your last frost, once soil hits at least 65°F.
- Spacing: hills 4 to 6 feet apart, or rows spaced 3 feet apart for smaller varieties.
- Depth: 1 inch deep, pointed end down.
- Days to maturity: 90 to 120 days from seed, varying by cultivar.
- Water needs: 1 to 1.5 inches per week, tapering off as fruit changes color.
- Pollination window: flowers open one day only, usually in early morning. Hand pollinate if bee activity looks low.
- Harvest signal: full color change, hard rind, and a dry, woody stem, not a calendar date.
Most pumpkin failures trace back to two moments: planting into cold soil, and misreading a normal pollination lull as a dying plant.
Get those two right and the vine mostly grows itself.