Growing caladium comes down to three things most people get wrong before they even plant: waiting for warm soil, not warm air, giving the tubers enough elbow room, and matching light to the leaf color you actually bought. Get those right and caladium is close to foolproof. Get them wrong and you get a tuber that sits in cold, wet soil and rots before it ever pushes a leaf.
This guide walks the whole run, from planting timing anchored to soil temperature, through the spacing and depth that actually matter, to the one watering mistake that kills more caladium than any pest does. There’s also a sign on the leaves that everyone assumes means too much sun, and it’s usually the opposite problem entirely.
Stick around to the bottom for the save-able Caladium at a Glance card, the version of this whole guide you can pull up on your phone while your hands are still dirty.
When to Plant Caladium
Caladium is tropical to its core, and it will not forgive a rush. Wait until soil temperature is reliably above 65°Fnot just until frost has passed. That usually lands two to four weeks after your last spring frost date, depending on your region.
In cooler zones (7 and below), most gardeners start tubers indoors in pots four to six weeks before the outdoor move, then transplant once nights stay above 60°F. In zones 8 through 11, direct planting outdoors works fine once soil has warmed.
If you plant into cold soil “because the calendar says it’s time,” the tuber often just sits there, or rots outright. Caladium doesn’t care what the calendar says, only what the soil feels like.
Next question: once the soil’s warm enough, where should these actually go.
Choosing the Spot and Prepping the Soil
Here’s the part that trips people up: caladium is sold as a shade plant, but many modern varieties, especially the sturdier “sun” types with thicker leaves, tolerate several hours of morning sun just fine. Match the variety to the lightnot a blanket “shade only” rule. Check the tag or tuber label if you have one; thin, delicate-leaved types want dappled or filtered light all day, while thicker-leaved sun-tolerant types can take direct morning sun with afternoon shade.
Soil should be loose, rich in organic matter, and well-draining. Caladium tubers rot fast in heavy, compacted, or waterlogged soil. Work in a couple inches of compost before planting, especially in clay soils.
Containers work just as well as beds, and give you the advantage of moving plants if a spot turns out too sunny.
Soil’s ready, spot’s picked, now for the part where depth and orientation actually matter.
Planting Caladium Step by Step
1. Look at the tuber before you plant it
Caladium tubers have knobby growth points, sometimes called eyes, usually clustered on the top side. If you can’t tell top from bottom, plant it on its side; the plant will sort itself out, just a bit slower.
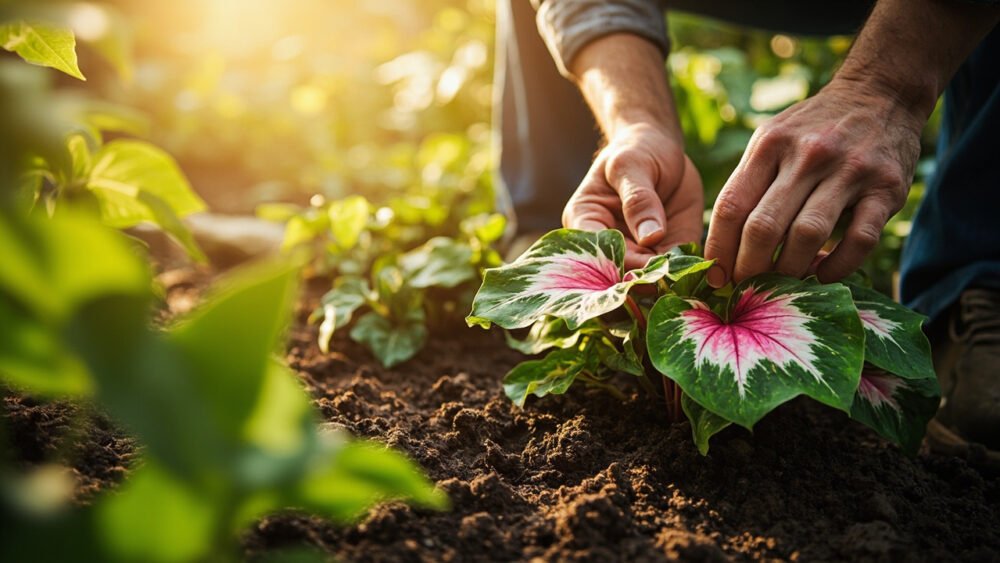
2. Set depth at 1 to 2 inches
Plant 1 to 2 inches deepeyes facing up when visible. Deeper planting in cool soil slows sprouting further, so err shallow if your soil is on the cooler side of that 65°F mark.
3. Space tubers 8 to 12 inches apart
Crowded caladium looks lush for about a month, then turns into a competition for light and water that stunts everyone. Give standard-size tubers 8 to 12 inches of breathing room. Smaller “mini” tubers can go closer, around 6 inches.
4. Water in once, then wait
Water thoroughly after planting to settle soil around the tuber, then hold off on heavy watering until you see growth. Overwatering before sprouts appear is the single most common way to lose a caladium tuber before it even gets started.
Once they’re in the ground, the real skill is knowing how much water and food they actually want.
Watering and Feeding Through the Season
Caladium wants consistently moist soil, never soggy. Check by feelan inch down: if it’s dry, water. If it’s still damp, wait a day. In containers, this often means watering every two to three days in summer heat. In ground beds with mulch, once or twice a week is common.
If you assumed dry, curling leaf edges mean the plant needs more water, that guess is right about half the time. The other half, it’s a sign of too much direct sun scorching a shade-variety leaf, not thirst. Check the soil moisture first before adding water on top of a sunburn problem.
Feed monthly with a balanced liquid fertilizer through the growing season, or work a slow-release granular into the soil at planting time. Caladium is a fairly heavy feeder once established. Skipping fertilizer entirely usually shows up as smaller, paler leaves by midsummer.
Fed and watered right, most caladium sails through summer, but a few problems show up reliably enough to name.
Problems That Actually Show Up
Rot is the big one. It comes from cold soil, overwatering before sprouting, or poor drainage, and it’s usually fatal to that tuber. There’s no reviving a mushy, foul-smelling tuber once it’s gone soft. Prevention, meaning warm soil and restrained watering early on, is the only real fix.
Slugs and snails will shred new leaves overnight, leaving ragged holes. Handpicking in the evening or using a labeled slug bait around the bed handles most infestations.
Spider mites show up in hot, dry conditions, especially on container plants indoors or on a porch. Fine webbing and stippled, dusty-looking leaves are the tell. A insecticidal soap applied per the label, along with raising humidity, usually clears it.
Faded, washed-out leaf color partway through summer is often just too much direct sun for that variety, not a nutrient problem. Move the pot or accept some color loss is coming with the light you’ve got.
Handle the tubers themselves carefully too, since caladium is toxic to pets and humans if chewed or swallowed, causing mouth and throat irritation, drooling, and vomiting in pets. If you suspect a pet has eaten any part of the plant, call your veterinarian rather than waiting to see what happens.
Get through summer clean, and the next question is what “done” even looks like for a plant grown for leaves, not flowers.
When Caladium Matures, and What Harvest Really Means
Caladium is grown for foliage, not fruit or flowers, so there’s no single harvest day. It matures into full, colorful leaf cover roughly 8 to 10 weeks after sprouting, and stays showy right up until fall temperatures drop.
The real “harvest” is at season’s endwhen nights start dipping toward 60°F and leaves begin yellowing and dying back on their own. That’s your cue to dig the tubers if you’re in a zone where winter will kill them (below zone 9 for reliable outdoor survival).
Dig gently with a hand fork, shake off soil, and let tubers air-dry for a few days in a shaded, ventilated spot before storing in dry peat or vermiculite somewhere around 55 to 65°F for winter. Skip this in zones 10 and 11, where caladium can often stay in the ground year-round.
Everything you need to remember about the whole process is right below, saved in one place.
Caladium at a Glance
- When to plant: once soil is reliably above 65°F, typically two to four weeks after your last frost date.
- Light: shade to filtered light for thin-leaved varieties, morning sun with afternoon shade for thicker “sun” varieties.
- Depth and spacing: plant 1 to 2 inches deep, eyes facing up, spaced 8 to 12 inches apart.
- Watering: keep soil consistently moist but never soggy, checking by feel an inch down before adding water.
- Feeding: balanced liquid fertilizer monthly, or slow-release granular worked in at planting.
- Biggest risk: tuber rot from cold soil or overwatering before sprouting. Prevention is the only cure.
- End of season: dig tubers after foliage yellows and dies back in fall if you’re below zone 9, store dry around 55 to 65°F over winter.
If you only remember one thing, remember the soil temperature rule, not the calendar date.
Warm soil and restrained early watering solve most caladium problems before they ever start.