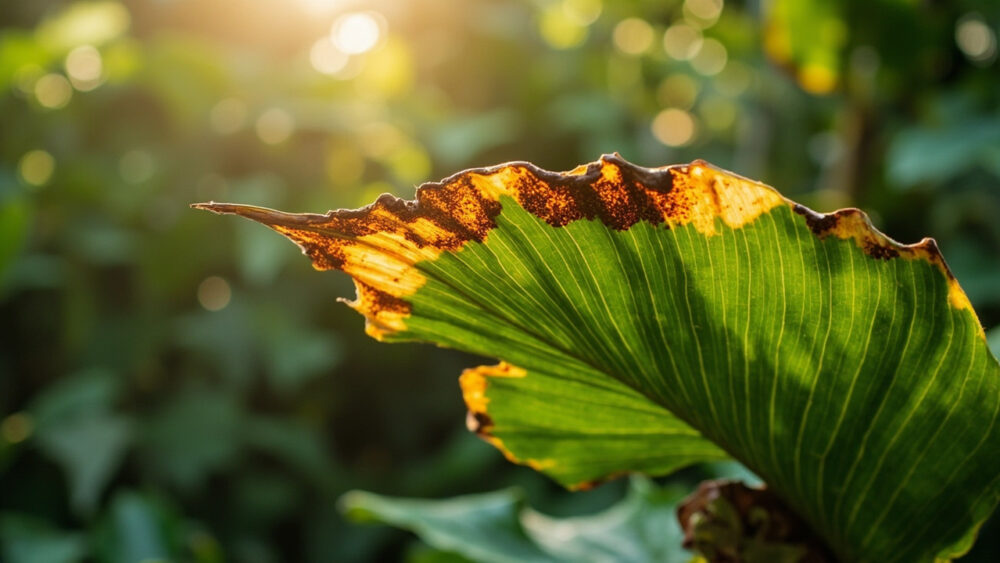
Nine times out of ten, bird of paradise leaves turn brown from underwatering combined with low humidity, usually showing up first as crispy brown edges or tips on the older, lower leaves. The fix is a deep, thorough watering and a humidity boost, not a fertilizer dose and not a spot near the radiator. But that is only the most common cause, not the only one, and if you guess wrong here you can keep a plant declining for months.
Most people blame the sun first, dragging the plant away from its bright window the moment they see brown. That is usually the wrong move and can make things worse. The real tell is on the leaf itself: whether the brown is a crispy edge, a soft mushy blotch, or a sharp line down one side tells you almost exactly which of the causes below you are dealing with.
Stick with this to the end. There is a two-minute diagnosis checklist at the bottom you can run right now, standing next to the plant, to land on the actual cause instead of guessing.
Causes, Most to Least Likely
1. Underwatering and low humidity
Confirm it: the brown starts as crisp, papery edges or tips on lower and older leaves, the soil an inch or two down is bone dry, and the air around the plant is dry, especially near heating vents or air conditioning.
Bird of paradise wants deep, infrequent watering, not frequent sips. Water until it runs from the drainage holes, let the top 2 inches dry between waterings, and group it with other plants or run a humidifier if your home sits below 40 percent humidity.
Get the watering rhythm right and half of all bird of paradise problems disappear on their own.
2. Overwatering and root rot
Confirm it: brown patches are soft and mushy rather than crisp, sometimes with a yellow halo, and the soil stays wet for a week or more. Pull the plant slightly or check the pot weight, it will feel heavy and swampy.
Cut back watering immediately and check the roots if you can. Healthy roots are firm and white to tan; rotted roots are brown, black, and mushy with a sour smell.
If the pot lacks drainage holes or sits in a saucer of standing water, that is your answer before you even touch the soil.
3. Too much direct sun or a sudden light change
Confirm it: brown, bleached, or crispy patches appear on the side of the leaf facing the window, often with a scorched look, and it followed a move to a brighter spot or an unusually intense stretch of sun.
Bird of paradise likes bright light but hard, direct afternoon sun through unfiltered glass can scorch leaves, especially on plants that were moved from lower light too fast.
Filter the light with a sheer curtain or pull the plant back 2 to 3 feet from the glass and see if new growth comes in clean.
4. Cold drafts or temperature swings
Confirm it: the browning shows up on leaves nearest a drafty window, exterior door, or vent, sometimes with the leaf turning dark or almost black at the edge, and it appeared shortly after a cold night or a draft you can feel with your hand.
Bird of paradise sulks below about 50°F and resents cold blasts of AC or a chilly windowsill in winter.
Move it away from the draft, and if it happened outdoors, bring it inside well before nights dip into the 40s.
5. Salt or mineral buildup from water and fertilizer
Confirm it: you see a white or yellowish crust on the soil surface or pot rim, and the brown appears as a fine margin along leaf edges on multiple leaves at once, not just the oldest one.
Tap water minerals and over-fertilizing both leave salts in the soil that burn root tips and show up as leaf-edge browning.
Flush the pot with plenty of plain water until it drains freely several times, and cut fertilizer back to a light feed only during active spring and summer growth.
6. Low humidity paired with fertilizer or repotting shock
Confirm it: browning appeared within a week or two of repotting, a big fertilizer dose, or a move to a new location, and it is spread across leaves of different ages rather than following a clean pattern.
Bird of paradise resents disruption and will drop or brown a few leaves after any big change, even a good one like fresh soil.
Give it a stable spot, consistent watering, and skip fertilizer for four to six weeks while it settles back in.
7. Pests hiding on the undersides
Confirm it: flip the leaf over and look for fine webbing, tiny moving specks, or sticky residue, spider mites and scale are the usual culprits, and brown often starts as stippled or bronzed patches before going fully crisp.
This one is less common than the watering and light issues above but worth ruling out, especially if the plant has been indoors all winter.
Wipe leaves down with a damp cloth, and if pests are confirmed, treat with insecticidal soap or a horticultural oil, following the product label exactly.
Once you have a shortlist of one or two likely causes, the next step is telling them apart for good.
How to Tell the Causes Apart
Where the brown starts matters more than almost anything else. Older, lower leaves first points to underwatering, salt buildup, or general aging, all normal wear the plant sheds on purpose. New leaves or the whole plant at once points to shock, cold damage, or a bigger root problem like rot.
Texture is the second clue. Crisp and papery means a water or air moisture issue. Soft, mushy, or water-soaked means rot. A hard scorched patch facing the window means light.
Pattern seals it. A uniform edge all around the leaf suggests water stress or salts. A one-sided patch suggests sun or a draft. Random spots or webbing on the underside points to pests.
With the pattern identified, here is what actually happens next for that plant.
Will It Recover?
Already-brown sections never turn green again. No cause on this list reverses damage on the leaf itself, you are always waiting on new growth to prove the fix worked.
For underwatering, low humidity, and light or draft scorch, the outlook is good. Correct the care and new leaves usually come in clean within a few weeks to a couple of months, depending on the season.
For salt buildup and shock from repotting or fertilizer, recovery is also good but slower, often one full growth cycle before you see the payoff.
Root rot is the one to take seriously. Mild rot caught early, with some firm white roots still intact, can bounce back after a repot into fresh, well-draining soil and a hard cutback on watering. Advanced rot, where most roots are mushy and brown, is often not recoverable, and the honest move is to take a healthy cutting if possible or accept the loss rather than nursing a dead root system for months.
Pest damage recovers fine once the infestation is actually gone, but persistent, and it is worth staying ahead of the next round before it starts.
How to Keep It From Happening Again
Water deeply and infrequently, checking soil moisture 2 inches down with a finger rather than watering on a fixed schedule. Bird of paradise would rather dry out slightly between waterings than sit wet.
Keep humidity above 40 percent if you can, especially in winter when heating dries out indoor air fast.
Give it bright, filtered light rather than raw afternoon sun through glass, and make any light or location change gradual over a week or two instead of all at once.
Flush the pot with plain water every couple of months to clear mineral buildup, and feed lightly only during spring and summer active growth, never in winter dormancy.
None of this is complicated, it is just consistency, and the checklist below turns all of it into a two-minute walkthrough.
Diagnosis Checklist
- Check the soil 2 inches down: if it is bone dry, suspect underwatering and low humidity first.
- Check the soil weight and smell: if it is soggy, heavy, or sour, suspect overwatering or root rot.
- Look at the leaf texture: crisp and papery means water or air stress, soft and mushy means rot.
- Look at where the brown started: older lower leaves suggest normal wear or underwatering, new or all-over leaves suggest shock, cold, or rot.
- Check the pattern on the leaf: a full edge all around points to water or salts, a one-sided patch points to sun or draft.
- Flip the leaf and check the underside: webbing, specks, or sticky residue mean pests, treat accordingly.
- Check the pot rim and soil surface for white or yellow crust: if present, flush the pot with plain water.
- Recall the last two to three weeks: any repotting, moving, or heavy fertilizing points to shock rather than a new chronic problem.
- Feel for drafts near the plant with your hand at leaf height: cold air movement confirms a temperature cause.
- Once you have a likely cause, apply its fix and watch new growth, not old leaves, for the verdict.
Trim off the fully brown sections for appearance once you are confident in your diagnosis, cutting into the green if you want a clean edge.
The plant will tell you if you got it right within a few weeks, through the leaves it grows next, not the ones it already lost.