Most orchid browning comes down to water sitting where it shouldn’teither in the crown, between leaf bases, or around roots that stay soggy too long. If the brown is soft, mushy, or spreading fast, cut back watering immediately and check the roots before you do anything else. If it’s dry, crispy, and confined to leaf tips, you’re looking at a completely different problem with a completely different fix.
Here’s the thing almost everyone gets wrong first: they blame the light. Sun scorch happens, but it’s far less common than the browning caused by water management, and the two look different enough once you know what to check. The real tell isn’t the color of the brown, it’s where on the plant it shows up and whether it spreads.
By the end of this you’ll know exactly which of five or six causes you’re dealing with, whether your orchid is going to pull through, and how to stop this from being a repeat problem. The full diagnosis checklist you can run right now, at the plant, is at the bottom.
Causes, Most to Least Likely
1. Crown or Root Rot from Overwatering
This is the number one causeespecially in Phalaenopsis grown in bark or moss that’s stayed wet too long. Confirm it by checking the crown, the point where leaves meet at the center, for a soft, dark, almost translucent look, and by sliding the plant out of its pot to check roots. Healthy roots are firm and greenish-white or tan; rotted roots are brown, hollow, and mushy when squeezed.
If the crown is affected, tip the plant sideways and let water drain out immediately, then avoid water pooling there again. Trim any mushy roots with clean scissors, repot into fresh bark, and let the medium dry out noticeably between waterings from now on.
Crown rot moves fast, so speed matters more here than with any other cause.
2. Underwatering and Root Desiccation
If the leaves are thin, slightly wrinkled, and the brown patches feel dry and papery rather than soft, the roots may be too dried out to take up water. Confirm by checking the roots through the pot: shriveled, gray, or silvery roots (instead of plump green ones after watering) mean the plant has been thirsty for a while, not overwatered.
Fix it by soaking the pot in room-temperature water for 10 to 15 minutes, letting it fully drain, and returning to a regular schedule, generally once the top inch of bark feels dry, roughly every 5 to 7 days for most home conditions.
Underwatering is easier to reverse than rot, which is good news if this is your cause.
3. Sunburn or Heat Scorch
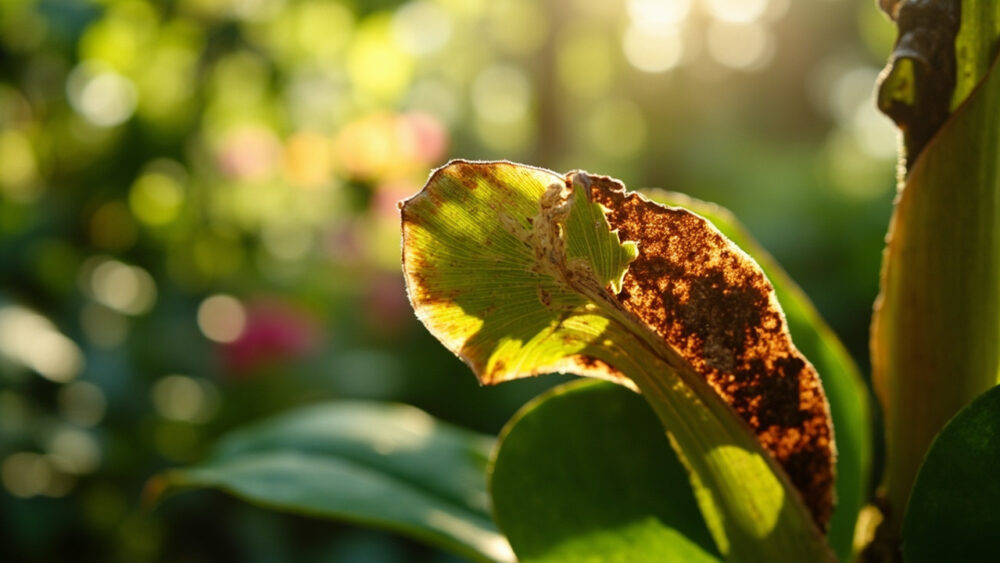
Direct, intense sun, especially through an unfiltered south or west window in summer, can bleach and then brown patches on leaves that face the glass. Confirm this one by the shape: scorch shows up as a flat, bleached-tan or brown patch on the side of the leaf that faced the light, often with a sharp edge between damaged and healthy tissue.
Move the plant back from direct sun or add a sheer curtain, and know that the damaged tissue itself will not turn green again.
New growth from here on will be fine as long as the light is corrected, which is more than you can say for some of the other causes.
4. Fungal or Bacterial Leaf Spot
Water sitting on leaves, especially in low airflow, invites fungal or bacterial spots that start small, dark, and slightly sunken, then spread and turn brown with a yellow ring around the edge. Confirm by looking for a halo or a wet-looking margin around the brown spot, which dry environmental damage never has.
Remove affected leaf tissue with a clean blade if the spot is limited, improve air circulation with a small fan, and avoid getting water on the leaves themselves when you irrigate. If it’s spreading across multiple leaves, a fungicide or bactericide labeled for orchids can help; follow the product label exactly.
Left alone, this one keeps recruiting new leaves, so don’t wait to act.
5. Natural Aging of Older Leaves
Orchids shed their oldest leaves as a normal part of growth, and that leaf will yellow, then brown, from the bottom of the plant up, usually one leaf at a time over months. Confirm it by location and pace: it’s always the lowest, oldest leaf, it happens slowly, and the rest of the plant looks completely healthy.
There’s no fix needed here beyond letting the leaf fully brown and pulling it away gently, or trimming it once it’s fully dry.
If this is your only symptom, you can stop worrying and skip straight to prevention.
6. Fertilizer Burn or Mineral Buildup
Too much fertilizer, or fertilizer applied to dry roots, can scorch root tips and leaf edges with a crispy brown margin, often on newer leaves rather than old ones. Confirm by checking your feeding habit: if you fertilize every watering at full strength, or you see a white or tan crust on the bark surface, this is likely your cause.
Flush the pot thoroughly with plain water to wash out excess salts, and switch to feeding at quarter to half strength, only every second or third watering.
That crust on the bark is worth checking even if you suspect something else entirely.
How to Tell the Causes Apart
Location on the plant is your fastest clue. Crown rot starts at the center. Aging starts at the bottom, one leaf at a time. Sunburn and fertilizer burn show up on whichever leaves face the light or got the feed, regardless of age.
Texture matters just as much as location. Soft, mushy, and dark means rot. Dry, crisp, and papery means underwatering, sunburn, or salt burn. A wet-looking halo around a spot means disease.
Speed tells you urgency: rot and bacterial spot spread over days, aging and sunburn stay put.
Once you’ve matched location, texture, and speed to one cause above, the fix is already written for you.
Will It Recover?
Crown rot is the most serious call. If caught early and the crown still has any firm green tissue, the plant can survive, though it may never regrow a healthy crown and could need to regrow entirely from a side shoot, which takes months to years. If the crown is fully collapsed and mushy, that plant is not coming back.
Underwatering damage, sunburn, and fertilizer burn on individual leaves will not reverse on the leaf itself, but the plant as a whole recovers fully once conditions are corrected, and new leaves grow in clean.
Fungal and bacterial spots stop spreading once treated and airflow improves, though existing damage stays.
Natural leaf aging needs no recovery at all, since it was never a problem to begin with.
The honest rule: if the roots and crown are healthy, the orchid is fine regardless of how rough the leaves look.
How to Keep It From Happening Again
Water on a schedule tied to the medium, not the calendar. Bark dries faster than moss, and both dry faster in warm rooms, so check by feel or weight rather than counting days blindly.
Never let water sit in the crown. Water in the morning so any splashed leaves dry by evening, and tip the pot to drain excess after every watering.
Give bright, indirect light, an east window or a few feet back from a south or west one, and feed lightly and rarely rather than often and strong.
Get these three habits right and most of the causes above stop being a recurring issue.
Diagnosis Checklist
- Check the crown first: if it looks soft, dark, or translucent, treat as crown rot immediately and drain any standing water.
- Slide the plant from its pot and check the roots: mushy and hollow means rot, shriveled and gray means underwatering, firm and green or tan means roots are fine.
- Note where the brown leaf sits on the plant: lowest and oldest with slow yellowing means natural aging, no action needed.
- Check the shape of the brown patch: a flat, sharp-edged patch facing a window means sunburn, correct the light and move on.
- Look for a wet-looking halo or dark sunken center around the spot: that signals fungal or bacterial disease, remove affected tissue and improve airflow.
- Check the bark surface for a white or tan crust and recall your feeding habits: heavy or frequent fertilizing points to salt burn, flush the pot with plain water.
- Match texture to cause: soft and mushy means water and rot, dry and crisp means light, salts, or dehydration.
- Decide urgency by speed: spreading over days means act now, stable for weeks means you have time to adjust care calmly.
Run through that list once and you’ll know exactly which fix to reach for. Most orchids that look this rough are still perfectly saveable once the water habit gets corrected.