Plant daylilies 18 to 24 inches apart, with the crown (where roots meet leaves) set no more than 1 inch below the soil surface. That’s the range that works for standard-size daylilies in a bed or border, and it’s the number that keeps them looking full without turning into a tangled mess by year three. Miniature varieties can go as close as 12 to 15 inches, while the big, vigorous types benefit from the full 24 inches or even a little more.
That’s the short answer. The longer answer is where most people go wrong, because daylilies are so forgiving early on that a bad spacing decision doesn’t show up for two or three seasons, by which point you’re digging up a solid mat of roots to fix it.
Before you grab the shovel, there are a few things worth knowing: the depth mistake that quietly stunts bloom for years, why “closer together looks fuller” is exactly backwards, and what your honest options are if you already planted too tight. Stick around to the bottom for the Daylilies at a Glance card, the numbers worth saving to your phone before you’re standing in the bed with dirt on your hands.
The Exact Spacing and Depth, and Why It’s Not Arbitrary
Daylilies spread outward from a central crown, adding new fans (the fan of leaves is one growth point) every year. An 18 to 24 inch gap gives a mature clump three to five years of room to expand before it bumps into its neighbor.
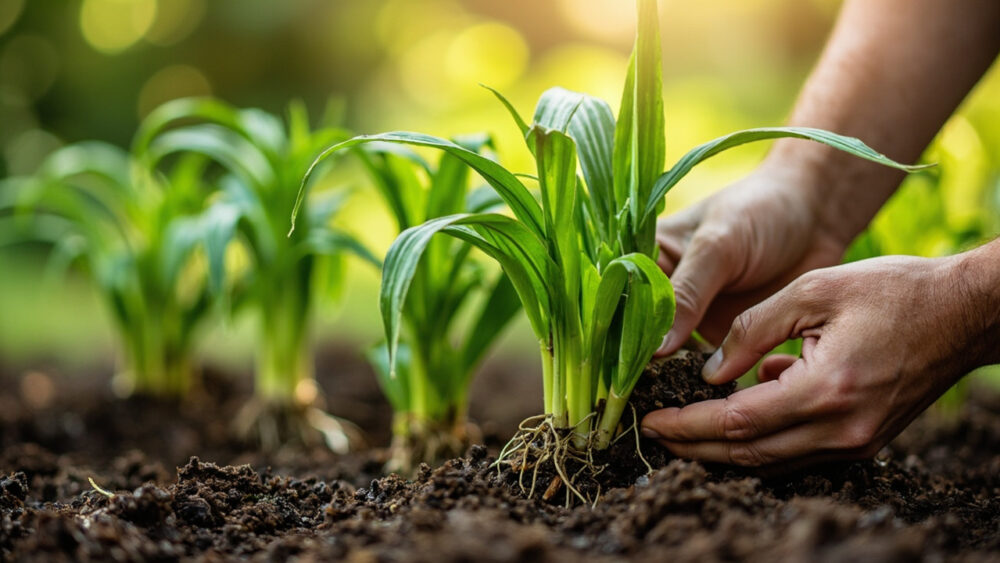
Depth matters more than people expect. The crown, that pale, fleshy junction where the roots fan out and the green growth begins, should sit right at or just barely below soil level, roughly half an inch to 1 inch deep. Bury it 3 or 4 inches down and the plant survives but blooms poorly for years while it works its way back toward the surface.
Plant it too shallow, crown exposed above the soil, and it dries out or heaves in winter in colder zones.
Get the depth right and the spacing is the only variable left to manage.
Row and Bed Layout: How to Actually Lay This Out
In a mixed border, stagger daylilies in a loose triangle or offset pattern rather than a straight military row. It reads more natural and it lets each fan get light from more than one side.
For a dedicated daylily bed or a cutting garden, rows 24 to 30 inches apart with plants 18 to 24 inches apart within the row gives you enough width to walk through and divide later without stepping on anything.
If you’re mass-planting for a hillside or a long border, you can tighten to 15 to 18 inches for a faster-filling look, but know you’re trading a quicker payoff now for a division job that arrives sooner, usually within three years instead of five or six.
Layout decided, the next question is what happens if you ignore all of this and just jam them in close.
What Actually Goes Wrong When Plants Are Too Close
Here’s the part that surprises people: overcrowded daylilies don’t just look messy, they bloom less. Each fan needs enough root room to store the energy that produces flower scapes, and a packed clump starts producing more leaves and fewer flowers as the fans compete underground.
If you assumed tight spacing just means a slightly denser, still-fine planting, that’s the guess that costs you blooms, not looks.
Crowding also traps moisture at the base of the foliage, which invites crown rot and leaf streak, especially in humid climates or a wet spring. Airflow between clumps is doing real work, not just cosmetic tidiness.
You’ll also lose the ability to tell where one plant ends and the next begins, which makes dividing later a genuine guessing game.
Too far apart has its own quieter cost, and it’s not the one people expect either.
The Honest Downside of Planting Too Far Apart
Space daylilies 3 or 4 feet apart expecting them to “fill in eventually” and you’ll get exactly that, eventually, meaning two or three seasons of bare mulch and weeds filling the gap instead. Daylilies are not fast spreaders in their first year.
The fix isn’t cramming them closer, it’s patience plus a temporary interplanting strategy: tuck in annuals or a fast, shallow-rooted perennial between young daylily starts for the first year or two, then let the daylilies take over the space as they mature.
Wide spacing is never wrong for the plant’s health, it just means managing appearances while you wait.
Containers change these numbers slightly, and that’s worth covering before you fix anything that’s already in the ground.
Daylilies in Containers: The Spacing Equivalent
One daylily fan per 12 to 14 inch pot is the safe baseline; for multiple fans in one large container, use the same 18 to 24 inch logic scaled down, meaning a 24 inch diameter planter comfortably holds two to three fans, not five or six.
Depth in a container follows the same rule as the ground: crown at or barely below the soil line, with drainage holes doing the work that garden soil structure normally does.
Containers dry out faster and concentrate roots quicker than garden soil, so a potted daylily will need dividing sooner, often within two years instead of four or five.
Whether it’s a pot or a bed, eventually every daylily planting reaches the point where it needs to be split.
Fixing an Overcrowded Planting
If your clump has stopped blooming well, or you simply can’t see where individual fans separate anymore, it’s time to divide, and the honest news is this fixes the problem completely rather than just slowing it down.
Dig up the whole clump in early spring as new growth emerges, or in late summer after bloom, and pull or cut it into sections with at least two or three fans and a healthy chunk of roots each.
Replant those sections at the same 18 to 24 inch spacing you’d use for new plants, same shallow crown depth, and water them in well.
- Fans have thinned and bloom count has dropped year over year
- You can no longer tell one plant’s roots from another’s when you dig near the base
- Foliage stays lush but flower scapes are noticeably fewer than three years ago
Any of those signs means division time, not more fertilizer.
All of that adds up to a short list worth keeping handy.
Daylilies at a Glance
- Spacing: 18 to 24 inches apart for standard daylilies, 12 to 15 inches for miniature types, 24 to 30 inches for extra-vigorous varieties.
- Planting depth: crown set at or no more than 1 inch below soil level, never buried 3 inches or deeper.
- Best planting time: early spring once soil is workable, or late summer to early fall, at least 6 weeks before your first hard frost.
- Row spacing: 24 to 30 inches between rows if planting in a dedicated bed or cutting garden.
- Containers: one fan per 12 to 14 inch pot, or two to three fans in a 24 inch planter, same shallow crown depth.
- Signs of overcrowding: declining bloom count, foliage that outpaces flowers, and roots you can no longer tell apart between plants.
- When to divide: every 3 to 5 years in the ground, every 2 years in containers, done in early spring or late summer.
Get the depth right and the spacing generous, and daylilies mostly take care of themselves for years.
The only real mistake is planting them like you’re in a hurry, when the plant is going to take its time regardless.