The best time to transplant daylilies is early spring, as soon as new growth pokes 2 to 4 inches out of the ground, or late summer through early fall, about six weeks before your first hard frost. Both windows give roots time to settle before extreme heat or hard freezes hit. If you’re standing over a clump right now wondering whether today counts, the soil test matters more than the calendar page.
Knowing when to transplant daylilies is really only half the job. The other half is the part almost nobody gets right: how much of the plant to actually dig, and how far down to bury the crown when you replant it.
Get the depth wrong and you’ll get a daylily that lives for years and never blooms once, which is its own kind of heartbreak. Stick around, because the exact fix for that, plus a save-able Daylilies at a Glance card with every number you need, is waiting at the bottom of this page.
The Real Timing Window, Not Just “Spring or Fall”
Daylilies forgive a lot, but they still have preferences. Spring transplanting works once soil temperature sits around 50°F and new foliage fans are showing, usually a few weeks after your last hard frost. Fall transplanting works from late summer into early autumn, as long as you finish at least four to six weeks before the ground freezes hard.
In warmer zones, 8 and up, you get a wider window and can even move daylilies through mild winters. In zones 3 through 5, fall transplants need that longer buffer since roots establish more slowly in cool soil.
Skip the deep heat of summer if you can. Transplanting during a 90°F stretch stresses roots badly, even though the plant often survives it looking sulky for a month.
The calendar gets you close, but the soil under your boot has the final word.
Choosing the Spot and Prepping the Soil
Daylilies want at least six hours of direct sun to bloom well, though they’ll survive in partial shade with fewer flowers and leggier growth. Good drainage matters more than soil richness. If water puddles for more than an hour after a hard rain, pick another spot or raise the bed.
Work the new hole’s soil down 10 to 12 inches, breaking up clumps and mixing in a couple inches of compost. Daylilies aren’t picky about pH, tolerating a range from mildly acidic to mildly alkaline, but they hate standing water far more than they hate mediocre dirt.
This is also where the biggest planning mistake shows up before you’ve even dug the plant.
The Spacing Mistake That Costs You a Season
Most people space new fans 12 inches apart because that’s what looks right on day one. It isn’t. Daylilies bulk up fast, and by year three a 12-inch spacing turns into a solid wall you’re fighting to divide.
Give standard-sized daylilies 18 to 24 inches between plants. Miniature varieties can go as close as 12 to 15 inches. That gap looks sparse the first season and exactly right by the second.
Spacing decided, now comes the dig itself.
How to Dig, Divide, and Replant Daylilies
Step 1: Water the day before
Soak the bed thoroughly 24 hours ahead of digging. Damp soil releases roots far more easily than dry, compacted ground, and you’ll snap fewer roots doing it.
Step 2: Dig a wide ring, not a stab
Start your shovel 6 to 8 inches out from the base of the clump and work in a full circle before you try to lift. Daylily root systems spread wide and fleshy, and cutting too close severs the roots you need.
Step 3: Divide if the clump is crowded
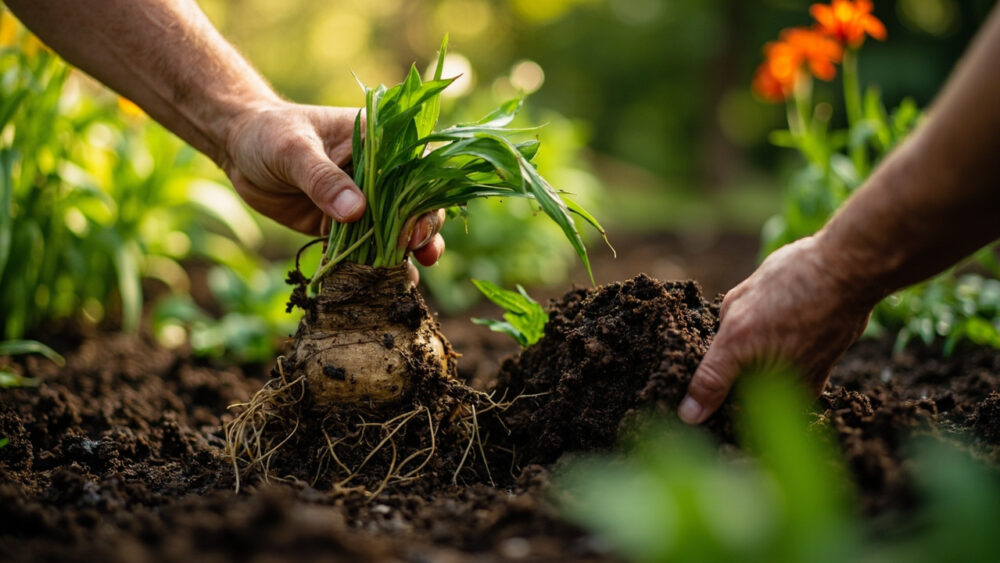
If the center of the clump has died out or bloom count has dropped, pull or cut the mass into sections of 3 to 5 fans each, using a sharp knife or your hands to gently separate the tuberous roots. Each division needs its own healthy roots and at least one growing point.
Step 4: Set the crown at the right depth
This is the step everyone gets wrong. The crown, where roots meet foliage, should sit no deeper than 1 inch below the soil surface. Bury it 3 or 4 inches down, which feels safer and sturdier, and you’ll get a daylily that grows leaves for years and refuses to flower.
Spread the roots downward and outward in the hole like a splayed hand, backfill, firm the soil gently, and water in well immediately.
Get the crown depth right and the rest of the season takes care of itself.
Watering and Feeding After the Move
Newly transplanted daylilies need consistent moisture for the first two to three weeks, roughly 1 inch of water a week between rain and irrigation. After that, established daylilies are genuinely drought-tolerant and only need supplemental water during extended dry stretches.
Hold off on fertilizer for the first few weeks after transplanting. Stressed roots don’t need a feeding push, they need time. Once new growth resumes, a light application of a balanced, slow-release fertilizer in early spring is plenty for the whole season.
Overfeeding, especially with high-nitrogen mixes, pushes leafy growth at the expense of blooms, which is the fertilizer version of the deep-planting mistake.
Feed light, water steady, and watch for the trouble signs that show up next.
What Actually Goes Wrong, and How to Head It Off
Daylilies are tough, but transplant shock, crown rot, and a few common pests can still knock them back. Here’s what to watch for:
- No blooms for a year or two: normal after a big move or division. Give it one full growing season before you worry.
- Yellowing, mushy crown: usually crown rot from soil that stays too wet. Improve drainage and avoid mulch piled directly against the crown.
- Ragged notches in leaves overnight: deer or slugs, depending on your region. Fencing or a slug bait following the product label works better than guessing.
- Stunted, distorted new growth: can indicate daylily leafminer or gall midge in some regions. Remove and destroy affected foliage and check with your local extension office if it spreads.
Most of these trace back to one root cause: too much standing water around the crown.
Handle drainage and spacing well, and you’ve already prevented most of what could go wrong.
When Your Transplanted Daylilies Will Bloom Again
Spring transplants often bloom the very same summer, especially if you moved large, undivided clumps and didn’t disturb the roots too much. Fall transplants and any freshly divided fans usually skip a bloom cycle and come back strong the following year.
That gap feels like failure the first time you see it. It isn’t. The plant is spending that first season rebuilding roots instead of flowers, and that’s exactly the trade you want it making.
By the second full season after transplanting, a healthy daylily should be back to its normal bloom count or better.
Save the numbers below so you’re not relearning any of this next time you’ve got a shovel in hand.
Daylilies at a Glance
- When to plant: early spring once soil hits about 50°F and new fans show 2 to 4 inches of growth, or late summer to early fall, at least four to six weeks before your first hard frost.
- Sun needs: at least six hours of direct sun for the best bloom count, tolerates partial shade with fewer flowers.
- Spacing: 18 to 24 inches apart for standard varieties, 12 to 15 inches for miniatures.
- Planting depth: crown no deeper than 1 inch below the soil surface, roots spread downward and outward.
- Water after transplanting: about 1 inch per week for the first two to three weeks, then drought-tolerant once established.
- Fertilizer: skip it for the first few weeks post-transplant, then a light balanced, slow-release feed in early spring only.
- First bloom after moving: often the same summer for spring transplants, usually delayed a year for fall transplants and fresh divisions.
If you remember only one number from this whole page, make it the crown depth: 1 inch, no deeper.
Everything else about daylilies is forgiving. That one isn’t.