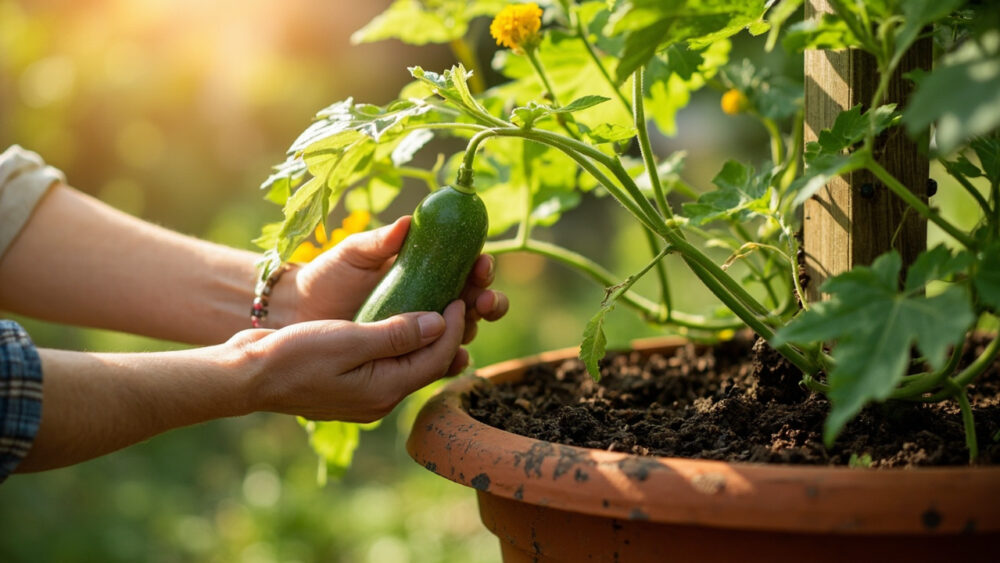
Growing bitter melon in containers works well if you give the vine a pot at least 15 to 20 gallons, a trellis at least 5 to 6 feet tall, and consistent moisture, since this is a fast, sprawling vine that punishes small pots and skipped waterings. Plant after your soil has warmed past 65 F, usually two to three weeks after your last frost. From there it’s mostly about feeding it right and staying ahead of two or three predictable problems.
Most people who fail with bitter melon make the same mistake, and it isn’t watering or sun. It’s the pot. A vine this vigorous in a container that’s too small will stall out right when it should be setting fruit, and no amount of fertilizer fixes a root system with nowhere to go.
There’s also a sign on the fruit itself that trips up almost every first-time grower, and a fertilizing habit that quietly kills flowers before they ever become melons. Both get sorted out below, and the full Bitter Melon at a Glance card is waiting at the bottom to save to your phone.
When to Plant Bitter Melon
Bitter melon is a tropical vine and it has zero tolerance for cold. Wait until nighttime temperatures stay above 55 F and soil temperature has climbed to at least 65 F, which is usually two to three weeks after your last spring frost date. In cooler zones (6 and below), don’t rush this. A cold-stressed seedling sits and sulks for weeks instead of growing.
If you want a head start, start seeds indoors 3 to 4 weeks before your outdoor planting window. Soak seeds in warm water for 24 hours first, and nick the hard seed coat lightly with a nail file. This vine germinates slowly and unevenly otherwise, sometimes taking two to three weeks.
Zone 9 and warmer can direct-sow straight into the container once soil is warm.
Once the soil is right, the container itself decides whether this season goes well.
Choosing the Container and Prepping the Soil
Go big. A 15 to 20 gallon container, at least 16 inches deep and wide, is the minimum for one healthy plant. Bitter melon roots run deep and the vine can easily reach 8 to 10 feet with support, so undersized pots lead to stunted growth, fewer flowers, and fruit that drops before it matures.
Drainage is non-negotiable. Use a pot with several large drainage holes, not the small factory ones, and set it on feet or bricks so water actually escapes.
Fill with a loose, rich potting mix, not garden soil straight from the yard, which compacts and suffocates roots in a container. Blend in a couple handfuls of compost per pot and a slow-release balanced fertilizer at planting time.
Pick the sunniest spot you have, 6 to 8 hours of direct sun minimum, and set up the trellis before you plant, not after.
Setting Up the Trellis First
Bitter melon climbs by tendrils and needs something to grab within the first couple weeks or it sprawls across the pot and tangles itself.
A tomato cage won’t cut it for long. Use a stake-and-string trellis, a piece of garden fencing, or a bamboo A-frame at least 5 to 6 feet tall, anchored into the pot or braced against a wall so it doesn’t tip once the vine loads up.
With the trellis in place, it’s time to actually get the plant in the ground.
Planting Step by Step
- Depth: Sow seed 1/2 to 1 inch deep, or transplant seedlings at the same depth they were growing in their nursery pot.
- Spacing: One vigorous plant per 15 to 20 gallon container. If your pot is on the larger end, two plants can share it, but expect more competition for water and nutrients.
- Technique: Water in gently right after planting, then keep soil evenly moist but not soggy for the first 10 to 14 days while roots establish.
- Early training: As soon as tendrils appear, guide the main vine toward the trellis by hand. It won’t find its own way in a container the way it might in open ground.
Once it’s climbing on its own, the season becomes about water, food, and timing.
Watering and Feeding Through the Season
Container-grown bitter melon dries out fast, especially in summer heat, because the pot heats up and the root zone is limited. Check soil moisture by pressing a finger down 1 to 2 inches, and water whenever it feels dry at that depth, often every day or two once the vine is established and temperatures climb.
Here’s where the guessable mistake comes in. Most people assume more fertilizer means more fruit, so they push nitrogen all season long. That’s exactly backwards once flowering starts.
Heavy nitrogen late in the season grows lush leaves and vigorous vine at the expense of flowers and fruit set. Switch to a fertilizer lower in nitrogen and higher in phosphorus and potassium once you see the first flowers, roughly 5 to 6 weeks after planting. A diluted balanced liquid feed every 2 weeks works well through fruiting.
Mulching the pot surface with straw or shredded leaves helps a lot here, cutting down on how often you need to water and keeping roots cooler.
Feed the flowers, not just the leaves, and the next stage takes care of itself.
Problems That Actually Show Up
The most common issue in containers isn’t disease, it’s blossom drop, and it’s almost always a watering or pollination problem, not a pest. Bitter melon has separate male and female flowers, and if pollinators aren’t visiting, female flowers can drop without setting fruit.
If you’re growing on a balcony or somewhere with little bee traffic, hand-pollinate: take a male flower (no small fruit-like bump behind it), and dab its center into the center of a female flower (which has that small bump), in the morning when flowers are open.
Powdery mildew is the disease most likely to hit, especially in humid weather or if leaves stay wet overnight. White, dusty patches on leaves are the tell. Improve airflow by thinning crowded foliage, water at the soil rather than overhead, and if it takes hold, an appropriate fungicide labeled for powdery mildew on vegetables works, applied exactly per the label.
Watch for aphids and cucumber beetles too, both manageable with insecticidal soap or a strong water spray, caught early.
Handle the flowers and the humidity, and you’ll get to the part everyone’s actually after.
When and How to Harvest
Here’s the sign that trips up nearly every new grower: bitter melon is harvested green and firm, well before it looks “ripe.” If you wait for it to turn yellow-orange and soft, you’ve waited too long. That stage is edible in small amounts but intensely bitter and mushy, more useful for saving seed than eating.
Harvest when the fruit is still green, has filled out to its full size for the variety (usually 4 to 8 inches for most common types), and the ridges or bumps on the skin are still pronounced and firm to the touch.
Most vines start producing 55 to 65 days after transplanting, and a healthy container plant will keep flowering and setting fruit for 8 to 10 weeks if you keep harvesting regularly. Leaving mature fruit on the vine signals the plant to slow down production, so pick promptly.
Cut fruit from the vine with scissors or a sharp knife rather than twisting, which can tear the stem and stress the plant.
Get the timing right on harvest, and everything above finally clicks into one simple routine, which is exactly what’s saved below.
Bitter Melon at a Glance
- When to plant: Two to three weeks after last frost, once soil is at least 65 F and nights stay above 55 F.
- Container size: 15 to 20 gallons, at least 16 inches deep and wide, one plant per pot.
- Planting depth and spacing: Seeds 1/2 to 1 inch deep, one vigorous plant per container, trellis at least 5 to 6 feet tall set up before planting.
- Watering: Check soil 1 to 2 inches down, water when dry, often daily in summer heat.
- Feeding: Balanced fertilizer at planting, then lower nitrogen, higher phosphorus and potassium once flowering starts.
- Main risks: Blossom drop from poor pollination, powdery mildew in humid or still air.
- Harvest: Pick green and firm, ridges still pronounced, usually 55 to 65 days after transplant, well before any yellowing.
Get the pot size and the trellis right on day one, and most of this crop takes care of itself.
Everything else is just picking the fruit before it tells you you’ve waited too long.