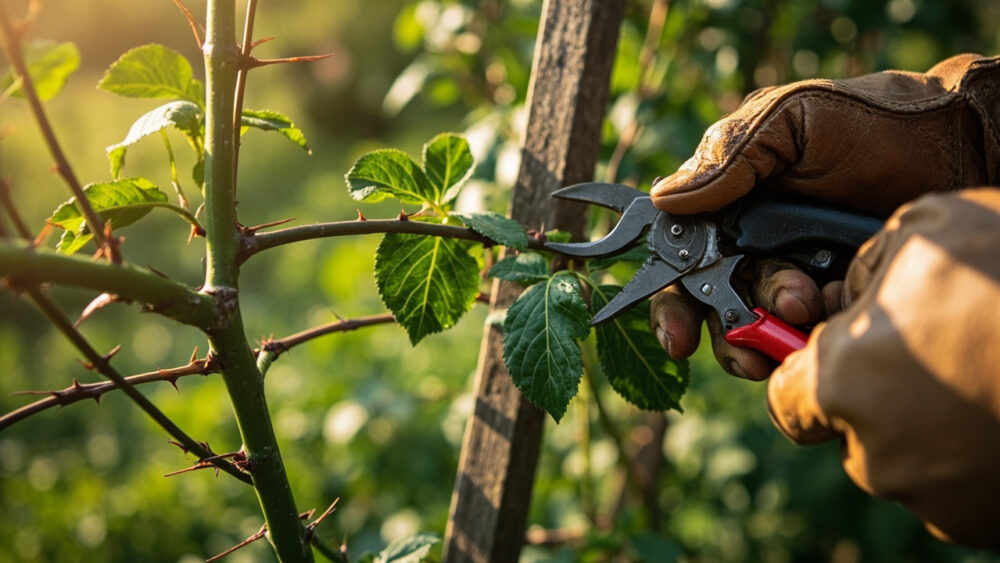
The core answer: prune climbing roses in late winter or very early spring while they’re still dormant, cutting side shoots back to two or three buds and removing no more than one or two of the oldest main canes at the base. That’s the whole job, once a year, plus a light tidy after the first flush of bloom. But how to prune climbing roses well is less about the cut itself and more about which canes you leave alone, and that’s where most people go wrong.
Here’s what trips up almost everyone the first few years: they prune the long main canes hard, thinking that’s how you control size, and then wonder why the plant barely flowers that summer. There’s also a sign most gardeners misread completely, something on the cane that looks like damage but is actually the plant setting up next year’s blooms. And there’s a timing question nobody asks until it’s too late: what happens if you missed the window and it’s already leafing out.
Stick around for all of that, plus the mistake that costs an entire season of flowers and the “Climbing Roses at a Glance” card at the very bottom, the kind of thing worth screenshotting before you walk out to the plant.
When to Prune, and When to Leave the Shears Alone
The main prune happens in late winter to very early spring, once the worst cold has passed but before the buds swell and break. In most climates that’s somewhere between six weeks before your last frost and the point the forsythia blooms. Look at the buds, not the calendar: you want them still tight and reddish, not yet pushing green growth.
Do not prune a climbing rose hard in fall. Fall pruning invites tender new growth right before winter, and that growth dies back anyway, wasting the plant’s energy and yours.
The other timing rule that surprises people: newly planted climbers, in their first one to two years, get almost no pruning at all beyond removing dead or damaged wood. You’re letting them build the long main canes, called the framework, that everything else gets trained onto later.
Once that framework exists, the yearly rhythm is simple, and the tools you grab next matter more than people expect.
Tools and the One Prep Step That Actually Matters
You need clean bypass pruners for anything pencil-thick or smaller, and loppers for old canes near the base that have gone woody and thick as a broom handle. Thick gloves that go past the wrist are not optional, climbing rose thorns will find every inch of exposed forearm you offer them.
The one prep step that matters: wipe your blades with rubbing alcohol before you start, and again if you move to a second, diseased-looking plant. Roses pass fungal problems like blackspot and canker from cut to cut on dirty blades, and that’s an easy way to spread a problem you didn’t have to have.
Before you cut anything, stand back and actually look at the plant’s structure for a minute. Find the oldest, thickest, grayest canes at the base first, because those are the ones you may remove entirely.
That structural read is also where the biggest misunderstanding about climbing roses gets cleared up.
The Mistake That Ruins the Flowers: Cutting the Wrong Canes
If you assumed pruning a climbing rose means shortening the long canes, that guess is exactly what costs people a season of bloom. Those long, arching main canes are the framework. They are not what you shorten hard every year, they’re what you keep and train sideways along a fence or trellis.
Climbing roses flower on the short side shoots that grow off those main canes, not usually on brand new canes from the base in the first year they appear. Cut the main canes back hard and you’ve removed the very structure that was about to throw dozens of flowering side shoots this summer.
What you actually shorten are the side shoots, called laterals, growing off the main canes. Those get cut back to two or three buds each, every year, and that’s what triggers heavy repeat flowering.
Once you know which canes are which, the actual step-by-step cutting is straightforward.
Step 1: Remove the Dead, Damaged, and Diseased Wood First
Cut out anything black, brown, shriveled, or clearly dead all the way back to healthy white or pale green pith. Do this before any shaping decisions, since dead wood removal alone often opens up the plant enough to see what you’re really working with.
Step 2: Cut One or Two of the Oldest Main Canes to the Base
Once a climber is established, three to five years old and mature, remove the one or two oldest, thickest, most unproductive main canes right down near the base, at ground level or where they meet the crown. This makes room for younger, more productive canes and keeps the whole plant from turning into a woody tangle. Never remove more than about a third of the main canes in one year.
Step 3: Shorten the Side Shoots to Two or Three Buds
Every lateral shoot coming off the main canes gets cut back to two or three buds from where it meets the main cane, roughly 2 to 4 inches. Cut at a slight angle, about a quarter inch above an outward-facing bud, so new growth heads away from the plant’s center.
Step 4: Re-Tie and Train the Main Canes Horizontally
This step is the one people skip and it’s a real loss. Bending main canes as close to horizontal as the structure allows, rather than letting them shoot straight up, forces the plant to push out side shoots along the whole cane’s length instead of just at the top.
A cane trained flat along a fence can flower top to bottom; a cane left to grow straight up usually only flowers near the tip.
Step 5: Do a Light Deadhead and Shape After the First Bloom
Once-blooming climbers need almost nothing here, just remove spent flower clusters. Repeat-blooming climbers benefit from cutting spent blooms back to the first strong leaf below the flower, which pushes another round of buds.
Now here’s what the plant looks like in the weeks right after you’ve done all of that, because it is not what most people expect.
What to Expect After Pruning, and the Sign That Looks Like Trouble
Right after a proper prune, the plant looks sparse and a little shocking, especially if it’s been years since anyone touched it. That’s normal. Give it two to four weeks and you’ll see new red or bronze-tinted shoots pushing from the buds you left behind.
Here’s the sign almost everyone misreads: small, hard, reddish-brown swollen bumps along older canes that look like disease or damage. Most of the time these are just dormant buds or old leaf scars, not a problem at all. Actual disease looks different, sunken cankers with dark centers, or cracked bark with orange-brown spore dust, and that’s worth a closer look or a call to a local extension office rather than a snip-and-hope.
Bloom timing depends on type: once-bloomers flower in one big spring show on the previous year’s wood, repeat-bloomers flower in waves through summer on new growth. Don’t panic if a hard-pruned once-blooming climber skips a big show the very next spring; it’s rebuilding wood it will flower on the following year.
That timing distinction is exactly where the last, most expensive mistake happens.
The Mistake That Costs You an Entire Year of Flowers
Pruning a once-blooming climbing rose hard in late winter is the single most common way to lose a year of flowers. Once-bloomers set their flower buds on the previous season’s growth, so a hard late-winter prune removes the wood that was about to bloom.
The fix is simple once you know it: prune once-bloomers right after their spring flush finishes, not in late winter. Repeat-bloomers are the ones that get the late-winter prune described above, since they flower on new growth made that same season.
If you genuinely don’t know which type you have, watch this year’s bloom pattern before you cut anything hard. One big spring show and nothing after means treat it as a once-bloomer next time.
And if you missed the dormant window entirely and the plant has already leafed out, don’t try to force it back on schedule.
What If You Missed the Window
Missing late winter isn’t a disaster. If buds have already broken and leaves are out, skip the hard structural cuts this year and stick to removing dead wood and lightly shortening laterals that are clearly overgrown.
Save the real framework pruning, the base cane removal and hard cane thinning, for next year’s dormant window. Pushing hard cuts on a plant that’s already actively growing costs it energy it needs for this year’s bloom.
With the timing sorted and the cuts made, here’s everything worth keeping on your phone for next season.
Climbing Roses at a Glance
- When to prune: late winter to very early spring, buds still tight and reddish, before green growth pushes, roughly six weeks before your last frost.
- Exception: once-blooming climbers get pruned right after their single spring flush finishes, not in late winter.
- How much to remove: shorten side shoots to two or three buds, about 2 to 4 inches from the main cane, and never remove more than a third of the oldest main canes in one year.
- First two years: little to no pruning beyond dead wood, let the main framework canes establish.
- Training: tie main canes as close to horizontal as possible to force flowering along the whole length, not just the tip.
- After bloom: deadhead repeat-bloomers to the first strong leaf below the spent flower to push another flush.
- Tools: clean bypass pruners and loppers, wiped with rubbing alcohol between plants, plus long gloves.
Get the framework canes trained flat and the timing right for your rose’s bloom type, and the actual cutting takes care of itself.
When in doubt, prune less this year and watch how it blooms, that tells you everything you need for next year’s cuts.