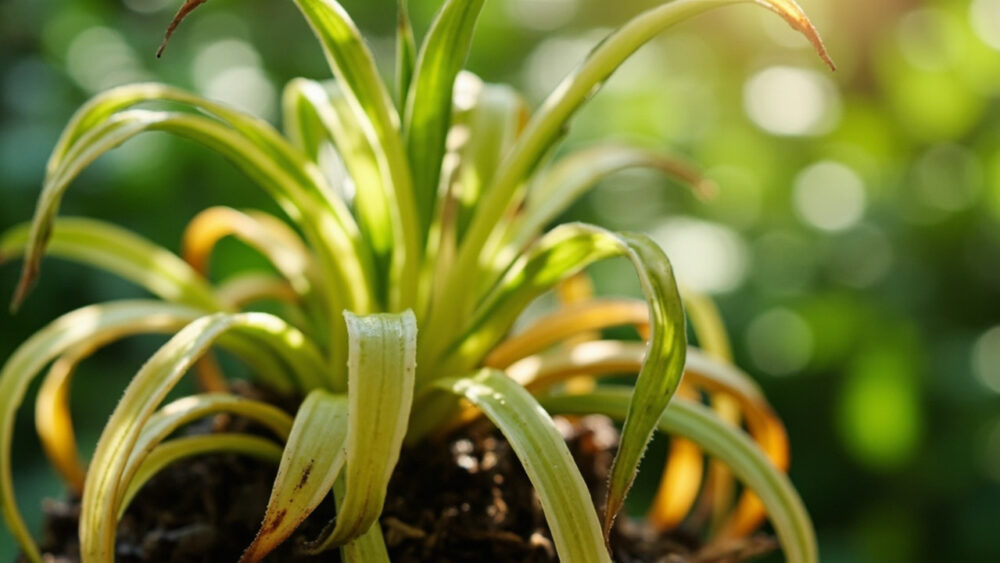
Nine times out of ten, a yellowing spider plant is sitting in soggy soil or a pot with nowhere for water to drain. The fix is to stop watering on a schedule and start watering by feel, letting the top half of the soil dry out between drinks. But that is not the only cause, and it is not even always the right one.
Most people blame the tap water first, and sometimes that is fair, but it is usually low on the actual list of culprits. The detail that tells you which cause you have is not the color of the yellow, it is where on the plant it started and whether it is the old leaves or the new ones going first.
Will it bounce back? Often, yes, spider plants are forgiving and built to shrug off a bad month. Stick with this, because the save-able diagnosis checklist at the bottom will let you confirm your exact cause in about two minutes flat, standing right there at the pot.
Causes, Ranked Most to Least Likely
1. Overwatering or Poor Drainage
Confirm it: stick a finger 1 to 2 inches into the soil. If it feels wet, cool, or sticks to your skin days after the last watering, this is your problem. Check the pot too. No drainage hole, or a saucer that holds standing water, seals the deal.
Roots sitting in wet soil suffocate and start to rot, and a rotting root cannot feed the leaf, so the leaf yellows and often goes limp before it browns.
Fix it: let the soil dry out fully before the next watering. If the pot has no drainage hole, repot into one that does. If roots are brown and mushy when you check them, trim the dead ones and repot into fresh, fast-draining mix.
That mushy-root check matters more than anything else on this list, so keep it in mind as you read on.
2. Underwatering and Drought Stress
Confirm it: the soil has pulled away from the pot’s edge, feels bone-dry more than an inch down, and the leaf tips are crispy and brown before the yellowing even shows up.
Spider plants tolerate missed waterings better than most houseplants, but go too long and the oldest, outermost leaves yellow and die back to save the plant’s energy for the center.
Fix it: water thoroughly until it runs from the drainage hole, then get on a check-by-feel routine instead of guessing. A consistently underwatered spider plant recovers fast once you catch up.
If the soil feels fine and the yellowing still spreads, the cause is probably not water at all.
3. Too Much Direct Sun
Confirm it: yellowing shows up mainly on the side of the plant facing a bright south or west window, often with a bleached, washed-out look rather than a clean gold color, sometimes with crispy patches that look scorched.
Spider plants like bright, indirect light. Hours of direct sun through unfiltered glass will fade and eventually kill leaf tissue.
Fix it: move the plant back from the window a few feet, or add a sheer curtain between the plant and the glass. Leaves already scorched will not turn green again, but new growth will come in fine.
If your plant sits in a dim corner instead, flip to the opposite cause below.
4. Too Little Light
Confirm it: growth is leggy, the plant is stretching toward the nearest light source, and new leaves are coming in paler than the old ones, sometimes yellow-green from the base.
Low light does not usually cause dramatic yellowing on its own, but it weakens the plant enough that other stress shows up faster and lingers longer.
Fix it: move it to a spot with bright, indirect light for most of the day, near an east-facing window or a few feet back from a south or west one.
Light problems often travel with a fertilizer problem, since a starved plant and a light-starved plant can look surprisingly alike.
5. Fertilizer Buildup or Deficiency
Confirm it: for buildup, check for a white or gray crust on the soil surface or pot rim, plus yellowing and browning that starts at the leaf tips and edges. For deficiency, look for pale, uniform yellowing across older leaves on a plant that has not been fed in six months or more and has been in the same soil for over a year.
Fix it for buildup: flush the pot with plain water, running roughly triple the pot’s volume through the drainage hole, and cut back to feeding at quarter-strength every 4 to 6 weeks during active growth.
Fix it for deficiency: resume light feeding in spring and summer with a balanced houseplant fertilizer, and repot if the plant has been in the same soil for more than 18 months to 2 years.
If the pot and light both check out fine, look lower, because the answer might be sitting right in the potting mix itself.
6. Natural Old-Leaf Die-Off
Confirm it: only one or two of the oldest leaves near the base are yellowing, evenly and slowly, while everything else on the plant looks healthy and new growth keeps coming.
This is not a problem. Spider plants shed old leaves the way most plants do, especially mature, dense ones putting out plantlets.
Fix it: snip the yellow leaf at the base with clean scissors and move on. Nothing else to do here.
Once you have ruled that one out, the tell-apart guide below will nail down which of the real causes you are actually looking at.
How to Tell the Causes Apart
Where the yellowing starts is the single best clue you have. Old, lower leaves going first points to overwatering, underwatering, natural shedding, or long-term nutrient deficiency. New growth coming in pale or yellow points to low light or, less often, a fertilizer or soil issue.
Pattern matters too. An even, gradual fade across the whole leaf suggests water or nutrients. A one-sided fade toward a window suggests light. Crispy brown tips with otherwise green leaves point to underwatering, dry air, or fertilizer salt buildup rather than root rot.
Feel the soil before you do anything else.
Will It Recover?
Overwatering, caught early: excellent odds, especially if roots are still mostly white and firm once you check them. Caught late, with widespread brown mush, you may be restarting from healthy plantlets instead of saving the parent.
Underwatering: very good odds. Spider plants are built for this kind of stress and usually rebound within a couple of weeks of consistent watering.
Sun scorch: the damaged leaves are done, but the plant itself recovers fully once moved, growing fresh healthy leaves within a month or two.
Low light or fertilizer issues: good odds, slow timeline. Expect gradual improvement over several weeks rather than an overnight fix.
Cut your losses only when the crown itself, the dense center the leaves grow from, has gone soft, black, or mushy. At that point no watering fix saves it, though you can often still root a healthy plantlet from the same plant.
Whatever the outlook, the fix that keeps it from happening again is worth more than any single rescue.
How to Keep It From Happening Again
Water by feel, not by calendar. Check the top inch or two of soil before every watering and only water when it is dry there.
Use a pot with a drainage hole, always. It is the single biggest factor separating spider plants that thrive from ones that slowly rot.
Give it bright, indirect light, an east window or a few feet back from stronger southern or western sun. Feed lightly during spring and summer, skip it in fall and winter, and flush the soil with plain water every few months to clear salt buildup.
Now confirm your exact cause with the checklist below.
Diagnosis Checklist
- Check the soil an inch down: if wet or soggy, suspect overwatering or drainage, if bone-dry, suspect underwatering.
- Confirm the pot has a working drainage hole and the saucer is not holding standing water.
- If overwatering seems likely, slide the plant out and check the roots: white and firm means recoverable, brown and mushy means trim and repot now.
- Note which leaves are yellow: oldest and lowest points to water, shedding, or nutrients, newest and palest points to light.
- Check the plant’s position relative to the window: direct sun touching the leaves for hours means scorch, a dim corner means too little light.
- Look for a white or gray crust on the soil surface: if present, flush the pot with plain water to clear fertilizer salts.
- Count the affected leaves: just one or two old ones, evenly yellow, with everything else healthy, means normal shedding, snip and move on.
- Check the crown at the base of the leaves: soft, black, or mushy means the plant is past saving, healthy and firm means it is not.
Run through those eight checks in order and you will land on your cause before you finish the pot.
Most spider plants pull through this. Fix the water and light, and yours should be putting out new leaves within a few weeks.