The best time to transplant hostas is early spring, just as the pointed shoots (gardeners call them “noses”) break the soil surface, or late summer into early fall, about four to six weeks before your first frost. Both windows give roots time to settle before heat or cold stresses the plant. Fall works almost as well as spring in most zones, and in hot-summer climates it actually works better.
That is the answer. But the timing is the easy part, and it is not where most transplant attempts fall apart.
The real mistakes happen after the calendar decision: how deep you set the crown, how much root ball you actually take, and what you do (or do not do) the first week after moving it. Get the timing right and botch the depth, and you will spend a full season wondering why a plant that used to be a fountain of leaves is sulking with three. Stick around for the “Hostas at a Glance” card at the bottom, it is built to save to your phone before you grab the shovel this weekend.
When to Transplant, By Season and Sign
Spring transplanting is best done when the noses are just poking up, usually one to three inches tall, before the leaves have fully unfurled. This is typically two to four weeks after your last hard frost, once soil is workable and no longer soggy. Moving a hosta after it has fully leafed out is not fatal, but you will see more wilting and a slower recovery.
Fall transplanting works on the opposite logic: you want enough time left before the ground freezes for new roots to establish, generally four to six weeks before your average first frost date. In zones 3 and 4, that means acting in late August or early September. In zones 7 and up, you have well into October.
Summer moves are the one window to genuinely avoid. Hot, actively growing hostas transplant poorly and sulk hard.
Soil temperature matters more than the date on the calendar.
Choosing the Spot and Prepping the Soil
Hostas want part shade to full shade, though gold and yellow-leaved varieties tolerate more morning sun without scorching. Deep shade all day tends to produce fewer, smaller leaves and weaker color, especially on variegated types.
Soil drainage is the detail beginners skip. Hostas hate sitting in standing water; soggy crowns rot. Work compost into the new bed to a depth of ten to twelve inches, and if the spot holds water after rain, raise the bed or pick somewhere else.
Check the soil a few inches down with your hand before you commit to a spot. It should feel like a wrung-out sponge, damp but not muddy, crumbly not compacted.
The spot is only half of it, the way you actually get the plant into the ground decides the rest.
How to Transplant a Hosta, Step by Step
1. Dig generously, not tight
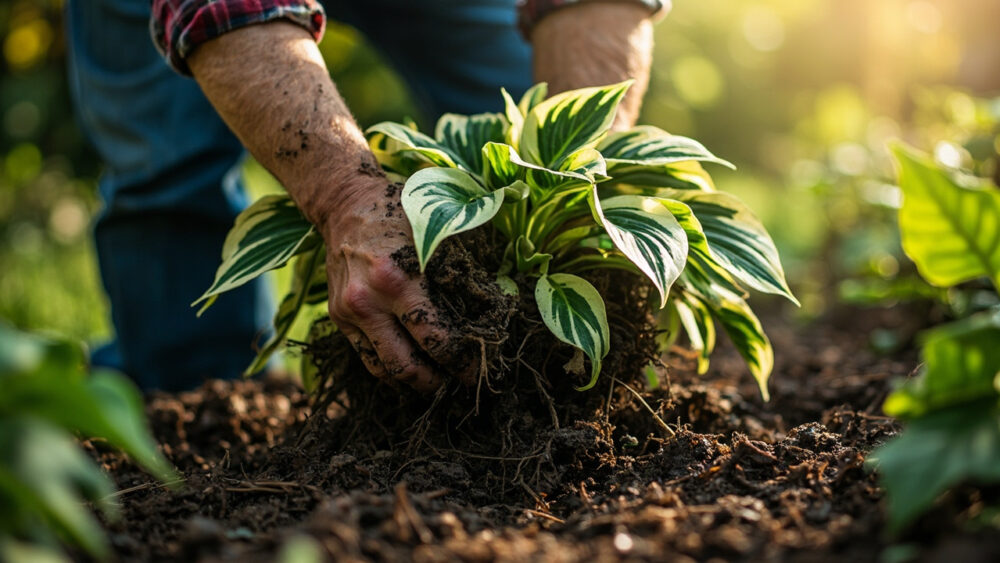
Cut a circle six to eight inches out from the visible leaf edge, straight down, then lever the whole root ball up from underneath. Hostas have a dense, fibrous root mass, and slicing through it aggressively is the single most common way people set the plant back a full year.
2. Divide only if you want more plants
If dividing, use a sharp spade or knife to split the crown into sections, each with at least two or three eyes (growth points) and a fair share of roots attached. A hosta does not need dividing on any schedule; do it only when you want more plants or the clump has stopped thickening in the middle.
3. Set the depth by the crown, not the pot
Plant so the crown sits at the same depth it was growing before, roughly level with the soil surface. Bury it too deep and new shoots struggle to push through. Plant it too shallow and roots dry out and heave in winter.
4. Space for the mature size, not the current size
Small varieties need 12 to 18 inches between plants. Large types can spread three feet across or more at maturity. Crowded hostas look fine for a year or two, then compete hard for water and light.
5. Water in immediately
Soak the new hole thoroughly right after planting, before you even finish backfilling around the edges. This settles soil against the roots and closes air pockets that cause dieback.
Getting it in the ground correctly is not the finish line, the first few weeks of care decide if it actually takes.
Watering and Feeding After the Move
If you assumed a transplanted hosta needs light, frequent sprinkles to “ease it in,” that guess is what leaves roots shallow and the plant vulnerable to the first dry spell. What it actually needs is deep, infrequent watering, about one inch per week, applied slowly so it soaks past the root zone rather than running off.
The first two weeks after transplanting are the critical stretch. Water every two to three days if rain does not do it for you, then taper to a normal weekly schedule once you see new growth pushing.
Skip fertilizer at planting time. Wait three to four weeks, then use a balanced, slow-release fertilizer worked lightly into the soil surface, not piled against the crown.
Even a well-planted hosta will tell you if something is wrong, and most of what strikes next is preventable.
The Problems That Actually Show Up
Slugs and snails are the number one hosta problem, full stop. Ragged, irregular holes in the leaves, especially discovered in the morning, are the signature sign. Reducing mulch right against the crown, watering in the morning instead of evening, and using an iron phosphate slug bait per the product label all help.
Crown rot and root rot show up as a mushy, discolored base and leaves that yellow and collapse all at once rather than gradually. This is almost always a drainage problem, not a disease you can spray your way out of. The fix is improving soil drainage before you replant, not treating the same spot again.
Deer and rabbits will strip a hosta bed overnight in areas where they are common. Fencing or repellents applied per label are the realistic defenses, since hostas offer little natural resistance.
None of this is toxic to you, but it is worth knowing hostas are toxic to dogs and cats if chewed or eaten, and can cause vomiting, diarrhea, or lethargy. If you suspect a pet has eaten hosta, call your veterinarian rather than waiting to see what happens.
Once the plant is settled and healthy, the last thing to know is what to expect as it matures.
When Hostas “Mature” and Bloom
A transplanted hosta typically needs one full growing season to look fully re-established, and two to three years to reach its true mature spread. Do not judge success by year one. A smaller, slightly sparse plant the first summer after transplanting is normal, not a failure.
Bloom timing runs midsummer into early fall depending on variety, sending up tall flower spikes with trumpet-shaped white or lavender blooms, some fragrant. Blooming is not really the point with hostas, most gardeners grow them for foliage, and cutting spent flower stalks back does not harm the plant.
You now know the timing, the technique, and the traps, so here is everything condensed to what you actually need standing at the plant.
Hostas at a Glance
- When to plant: early spring as noses emerge, one to three inches tall, or late summer to early fall, four to six weeks before first frost.
- Soil and light: part to full shade, well-drained soil enriched with compost ten to twelve inches deep, never a spot that holds standing water.
- Depth: crown level with the soil surface, not buried, not raised.
- Spacing: 12 to 18 inches for small varieties, up to three feet for large mature types.
- Watering: about one inch weekly, deep and infrequent, extra water for the first two weeks after transplanting.
- Biggest threats: slugs (ragged holes in leaves), crown rot from poor drainage, deer and rabbit browsing.
- Time to maturity: one season to recover, two to three years to reach full mature size and spread.
If you remember one thing, remember the crown depth: level with the soil, no deeper.
Everything else about hosta transplanting is forgiving as long as that one detail is right.