Butternut squash is ready to harvest when the skin turns a deep, even tan and loses its greenish tint, the rind resists a fingernail scratch, and the vine leading to it has started to shrivel and die back. That’s usually 80 to 110 days after planting, depending on the variety, which puts most gardeners harvesting somewhere in late summer to mid fall, well before your first hard frost.
Simple as that sounds, this is one of the easier winter squash to get wrong in both directions. Pull it too early and you get a bland, watery squash that won’t store past a few weeks. Leave it out through a hard freeze and the whole thing can turn to mush from the inside before you even notice.
There’s also a fingernail test almost everyone does wrong, a stem mistake that costs people their whole stored crop by January, and an honest answer to whether you can ripen an underdeveloped squash on the counter. All of it’s coming up, and the printable Butternut Squash at a Glance card is waiting at the bottom once you’ve got the full picture.
The Real Ready Signs
Color is the first thing to check, but it lies to you if you check it alone. A butternut squash is ready when its skin has gone from pale green or streaky to a solid, matte tan, almost like unfinished wood. Any lingering green patches mean it needs more time on the vine.
The fingernail test
Press a fingernail into the skin near the stem end. If it scratches through easily, the squash is still immature and needs more time.
A rind that resists your nail and feels hard all the way around is the real signal, not the color alone. This is the test most people skip, and it’s the one that actually matters.
The stem and vine
Look at the stem where it meets the fruit. It should be dry, woody, and tan, not green and fleshy.
The vine itself usually starts dying back naturally around this same time, especially the leaves nearest the fruit.
Get all three signs lined up before you cut anything.
The Timing Window, and What Happens If You Miss It
Most butternut varieties need 80 to 110 days from transplant to maturity, so count forward from your planting date rather than guessing off the calendar. In most regions that lands harvest somewhere between late August and early October, but your actual window is set by frost, not by the date on a seed packet.
Harvest before your first hard frost, not just the first light frost warning. A light frost that only touches the leaves usually won’t hurt the fruit, but temperatures dropping into the mid 20s Fahrenheit will damage the flesh even if the rind looks fine from outside.
If you assumed an underripe squash will keep ripening on the counter like a tomato, that guess is the expensive one. Winter squash pulled early stops developing sugar and starch almost entirely once it’s off the vine. It’ll last a few weeks in the kitchen, then go soft and hollow-tasting, not sweet and dense like a properly matured one.
Go too late, on the other hand, and a hard freeze can turn the flesh watery and short-lived in storage even though the outside still looks perfect.
Neither mistake is fixable after the fact, which is exactly why the harvest step itself deserves more care than most people give it.
How to Cut It Without Wrecking Your Storage Window
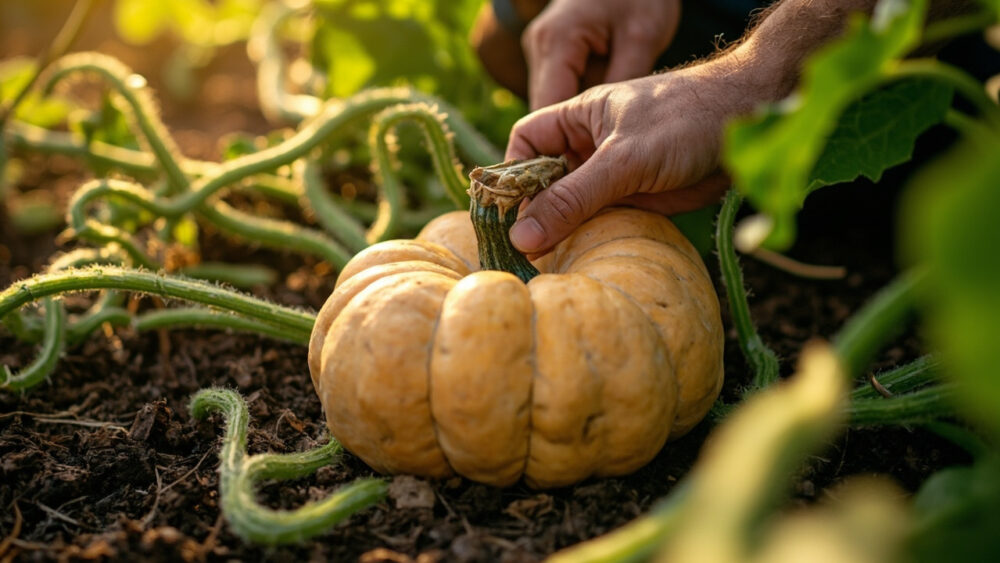
Use pruning shears or a sharp knife, never a twist-and-pull. Twisting tears the stem and opens a wound that invites rot within days.
Leave two to three inches of stem attached to the fruit. This is the detail that quietly ruins more stored squash than anything else on this list.
A squash harvested with a short, broken, or missing stem loses its natural seal at that end. Moisture and bacteria get in, and a squash that should have kept for months instead goes soft within a few weeks in storage.
Handle each fruit gently once it’s cut. Bumps and dropped squash bruise the flesh even when the skin looks undamaged, and bruised spots are where rot starts first.
Set the harvested squash somewhere dry while you finish the rest of the bed.
Right After the Cut: the Curing Step Nobody Wants to Skip
Curing is not optional if you want this squash to last past Thanksgiving. Set the harvested fruit in a warm, dry spot, ideally 80 to 85 degrees Fahrenheit with decent airflow, for 7 to 10 days.
A sunny porch, a garage with a fan, or a warm greenhouse bench all work. Direct hot midday sun on bare fruit for hours can scald the skin, so bright and warm beats scorching.
Curing hardens the rind further and lets any small nicks from harvesting seal over, which is the actual reason cured squash outlasts uncured squash by months, not weeks.
Skip curing because you’re impatient to eat one, and it’ll still taste fine. Skip it on your whole storage crop, and you’ll be losing squash to soft spots by early winter instead of late winter.
Once cured, where and how you keep them decides whether this harvest feeds you through spring or through January.
Storing the Harvest, and Keeping More Coming
After curing, move squash to a cool, dry spot between 50 and 55 degrees Fahrenheit with moderate humidity, out of direct light. A basement, unheated closet, or cool pantry shelf all work better than a refrigerator, which is actually too cold and humid for long-term winter squash storage.
Stored this way, properly cured butternut squash commonly keeps 3 to 6 months, sometimes longer for a thick-necked, well-matured fruit.
Check stored squash every couple of weeks and pull any with a soft spot or wrinkled skin to use first, before it takes down its neighbors.
If your vine still has small squash on it when frost is closing in, you have a choice to make. Fruit smaller than about 8 inches long or still green rarely finishes well and is better used fresh soon after picking rather than stored.
The mature ones, though, are worth every bit of the attention above, which is why the quick reference below is worth saving before you head back out to the garden.
Butternut Squash at a Glance
- When to plant: after all frost danger has passed and soil has warmed to at least 65 degrees Fahrenheit, since cold soil stalls germination badly.
- Days to maturity: 80 to 110 days from transplant, depending on variety, so count forward from your own planting date.
- Spacing and depth: seeds sown about 1 inch deep, plants thinned to 18 to 36 inches apart in rows spaced 4 to 6 feet apart for vining types.
- Ready signs: solid tan rind with no green, skin that resists a fingernail scratch, and a dry, woody, tan stem.
- How to cut: use shears, leave 2 to 3 inches of stem attached, and never twist the fruit off the vine.
- Curing: 7 to 10 days in a warm, dry, airy spot around 80 to 85 degrees Fahrenheit before long-term storage.
- Storage: cool, dry, dark spot around 50 to 55 degrees Fahrenheit, where cured squash typically holds 3 to 6 months.
Get the stem length and the curing step right, and the ready signs almost take care of themselves.
Everything else on this list is just protecting the harvest you already worked all summer to grow.