Kale moves through five distinct growing stages between seed and harvest: germination, seedling, vegetative growth, mature leaf production, and bolting. From seed, expect your first baby leaves in 5 to 8 days, your first real harvest around 6 to 8 weeks, and a plant that keeps producing for months if you pick it right. Understanding these kale growing stages is really about knowing what to check at each one, because kale gives you clear visual signals the whole way through.
Most people lose a kale planting at the same stage, and it is not the one they worry about. There is also a sign at the seedling stage that looks like disaster but usually is not, and a very specific point where kale quietly shifts from “growing” to “surviving” without the leaves ever looking bad.
I will walk through every stage in order, tell you exactly what a stall looks like versus normal slow growth, and stick a save-able Kale at a Glance card at the very bottom with the numbers you will actually want pulled up on your phone this weekend.
Germination: Days 1 to 8
Kale seeds need soil temperature between 45 and 75 F to germinate, and they sprout fastest around 60 to 70 F. Plant seeds a quarter to half inch deep, and keep the soil consistently damp, not soaked, the whole time. In cool spring soil, expect closer to 8 to 10 days; in warm soil, you will see loops of stem breaking the surface in 5 days.
Nothing above ground yet does not mean nothing is happening. Resist the urge to dig and check. Disturbed seeds germinate unevenly or not at all.
The real test of whether you did this stage right shows up the moment the seedlings actually appear.
Seedling Stage: Weeks 1 to 3
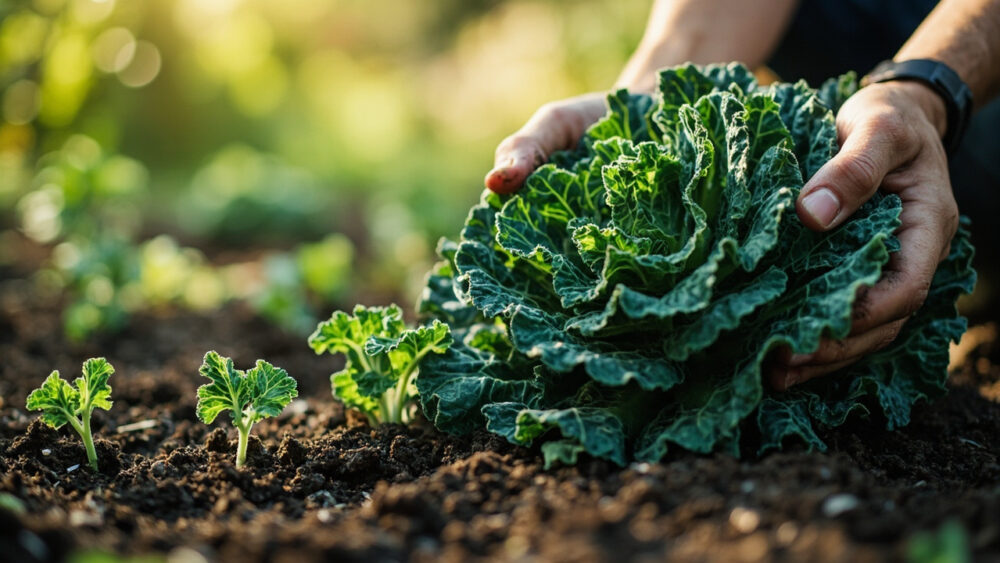
The first leaves to unfold are the cotyledons, rounded and a bit pale, and they are not true kale leaves at all. True leaves, with the ruffled or flat shape you recognize as kale, follow within a week. This is the stage everyone misreads.
If your seedlings look thin, pale, and stretched with long gaps between leaves, that is not disease. It is legginessand it means the seedlings did not get enough light, usually because they were started indoors on a windowsill instead of under strong direct light.
Leggy seedlings can sometimes be saved by transplanting them deeper, burying the stretched stem up to the first true leaves, but a badly leggy seedling planted outdoors into wind and sun often just topples. If yours are leggy, plant them extra deep and expect to baby them for a week.
At 3 to 4 true leaves and about 3 to 4 inches tall, seedlings are ready to go into the garden or their final container, hardened off over 5 to 7 days if they were started indoors.
Getting seedlings into the ground at the right size matters less than what happens to them in the two weeks right after.
The Stage Where Most Kale Plantings Actually Fail
If you guessed transplant shock kills most kale, you are half right, but the bigger killer is what happens in the first 10 to 14 days after transplant, when the plant looks fine on the surface while flea beetles or cabbage worms shred it from underneath. This is the stage where inexperienced gardeners lose the whole planting without ever seeing an obvious villain.
Small, shot-hole perforations across young leaves are flea beetles, tiny and fast, worse in hot dry spells right after transplant. A floating row cover laid over the bed from transplant day until plants are established blocks them completely, and it is the single most effective fix.
Ragged, larger chewed holes with visible green or black droppings mean cabbage worms or loopers. Hand-picking works on small plantings; for larger infestations, a product containing Bacillus thuringiensis (Bt) applied according to the label is the standard cultural fix and is considered safe around most beneficial insects when used as directed.
Space transplants 12 to 18 inches apart, in soil amended with compost, and water at the base rather than overhead to keep the leaves dry and less inviting to pests and fungal spots.
Survive this window and kale gets noticeably easier from here on out.
Vegetative Growth: Weeks 3 to 6 After Transplant
Once established, kale puts on visible growth every few days. You will see a rosette of leaves widening from the center, with new leaves emerging paler green at the core and darkening as they mature outward.
This is the stage to feed the plant. Kale is a heavy nitrogen feeder, and a side dressing of compost or a balanced vegetable fertilizer every 3 to 4 weeks keeps leaf production steady. Skip this and leaves come in smaller and yellow faster.
Consistent moisture matters more than volume. Kale wants about 1 to 1.5 inches of water a week, from rain or irrigation combined, and soil that stays evenly moist an inch down rather than swinging between soaked and bone dry.
Somewhere in this window the plant crosses into a size where you can start taking leaves without slowing it down.
Mature Harvest Stage: Week 6 Onward
Kale is ready for its first real harvest once the plant has 8 to 10 leaves and the lower leaves are a full hand’s width, roughly 6 to 8 inches long. Harvest from the bottom up, taking only the oldest outer leaves and always leaving the top rosette, the growing point, intact.
Leaves should be firm and deeply colored, whether that is blue-green, deep green, or the purple-tinged ruffle of Redbor types. Limp, pale, or yellowing lower leaves are normal aging and fine to remove. Yellowing that spreads upward into new growth signals a nitrogen or watering problem, not just old age.
A well-tended kale plant will keep producing new leaves from the center for 2 to 3 months of harvest, sometimes longer in cool weather, as long as you never strip more than a third of the leaves at once.
Cool weather does not slow kale down the way most vegetables slow down, and that is where the next stage surprises people.
How to Tell a Stall From a Cold Kale That Is Just Fine
If you assumed kale sitting still in cold weather means it stopped growing, that guess is wrong more often than right. Kale actually sweetens and holds its size through light frosts down to about 20 F, and growth simply slows rather than stopping, which is not the same as a stall.
A true stall looks different: leaves that stay small at the same size for weeks in warm growing weather, a rosette that stops widening, or lower leaves yellowing and dropping faster than new ones appear at the center. That pattern points to nutrient deficiency, root crowding in too-small a container, or heat stress above 80 F, which slows kale and can turn it bitter.
The fix depends on the cause. Feed a stalled plant in the ground, repot a crowded container plant, and in real heat, focus on afternoon shade and consistent water rather than expecting fast recovery until temperatures drop.
There is one more stage every kale plant eventually reaches, and it is the one you cannot feed or water your way out of.
Bolting: The Final Stage
Bolting is when kale sends up a tall central flower stalk, and it is triggered by sustained warm weather after a cold spell, or simply by the plant’s age, usually in its second season. You will see the center of the rosette stretch upward and thin, with smaller, more jagged leaves and eventually small yellow flower clusters.
Once flowering starts, leaf quality drops fast and turns bitter. Kale is a biennial, so most plants that make it through a mild winter will bolt the following spring regardless of how well you care for them.
There is no reversing a bolted plant. Harvest whatever decent leaves remain, then pull it and replant, or let a couple of plants flower on purpose since kale flowers draw pollinators and the seed pods are easy to save for next season.
Everything above is the full arc, and here is the whole thing condensed onto one card.
Kale at a Glance
- When to plant: direct seed or transplant 3 to 4 weeks before your last frost, soil temperature between 45 and 75 F, with a second fall planting 6 to 8 weeks before first frost.
- Seed depth and spacing: quarter to half inch deep, thinned or transplanted to 12 to 18 inches apart in rows 18 to 24 inches apart.
- Time to first harvest: 6 to 8 weeks from transplant, or 55 to 75 days from seed depending on variety.
- Watering needs: 1 to 1.5 inches per week, evenly moist soil, never allowed to fully dry an inch down.
- Feeding schedule: compost at planting, then a nitrogen-rich feed every 3 to 4 weeks through the growing season.
- Cold tolerance: survives light frosts down to about 20 F and improves in flavor after a cold snap.
- Signs of trouble: shot-holes mean flea beetles, ragged chewed leaves mean caterpillars, upward yellowing means a feeding or watering problem, a stretching center stalk means bolting has started.
Kale rewards attention in the first three weeks after transplant more than at any other point, so watch that window closely.
Get seedlings established and fed, and the plant will hand you leaves for months with very little else asked of you.