Water propagation is how to propagate tradescantia, and it works faster and more reliably than soil for this plant. Snip a 4 to 6 inch stem just below a leaf node, strip the bottom leaf or two, and set it in a glass of water on a bright windowsill. Roots show up in 5 to 10 days, and you can pot it up once they hit an inch long.
That sounds simple, and it mostly is. But there’s one mistake that ruins a good chunk of attempts before the cutting even gets a chance to root, and it has nothing to do with water or light.
There’s also a sign people misread constantly, mistaking a healthy transition phase for a dying cutting and yanking it out of water right when it was about to take off. And once roots appear, there’s a timing question almost nobody gets right on the first try: exactly when to move it to soil, and how to do that without losing everything you just grew. All of that is below, and the save-able Tradescantia at a Glance card is waiting at the very bottom once you’ve got the full picture.
Why Water Rooting Beats Soil for Tradescantia
Tradescantia is one of the easiest houseplants to root precisely because its stems are built for it. Every leaf node already carries the beginning of a root structure, waiting for moisture to trigger it.
Soil propagation works too, but you’re rooting blind. You can’t see rot starting, you can’t see roots forming, and overwatering a cutting with no roots yet is the single fastest way to lose it in dirt.
Water lets you watch the whole process. You see exactly when roots start, how many, and how healthy they look, and you pot up on the plant’s schedule instead of guessing.
Next comes the part most people skip past too fast: actually taking the cutting correctly.
Taking the Cutting
Choose a stem that’s healthy and actively growing, not woody or bare at the base. Cut 4 to 6 inches from the tip, using clean scissors or pruning snips.
Make the cut just below a leaf node, that little swollen ridge where a leaf meets the stem. This is where roots emerge, so a cutting with 2 to 3 nodes below the soil line gives you multiple root sites instead of just one.
Strip the bottom one or two leaves so no foliage sits underwater. Submerged leaves rot, and rotting leaves foul the water fast enough to take a healthy cutting down with them.
That stripped leaf step is exactly where the most common mistake happens.
Rooting Medium and Conditions
Use a clean glass or jar, plain tap water is fine, and submerge only the bare stem and nodes, never the leaves. Set it somewhere with bright, indirect light, a windowsill that gets filtered sun works well, but avoid harsh direct afternoon rays that can cook a leafless cutting.
Room temperature water, roughly 65 to 75°F, roots fastest. Change the water every 3 to 4 days if it starts to look cloudy or you’ll grow algae instead of roots.
Now here’s the mistake that actually derails most attempts, and it isn’t about light or water temperature at all.
The Mistake That Kills Most Cuttings
If you assumed the biggest risk is not enough light, that guess is reasonable but wrong. The real killer is leaving leaf matter submerged, and it happens because people don’t strip enough of the lower stem before setting it in water.
A single leaf tip touching the water line will start to soften and brown within a couple of days. That decay spreads bacteria through the whole glass, and the cutting rots at the base before roots ever form.
The fix is mechanical, not magical: strip generously, submerge only bare stem, and check the water level daily since evaporation can let a leaf dip in that wasn’t touching it yesterday.
Avoid that, and the rest of the timeline is almost boring in how predictably it goes.
Week by Week: What to Actually Expect
Days 1 to 4, nothing visible happens, and this is the stretch where people panic and pull the cutting to check it, which only stresses it further. Leave it alone.
Days 5 to 10, tiny white or pale root nubs appear at the nodes underwater. This is also the point where lower leaves sometimes yellow or the stem looks slightly limp, and that’s the sign everyone misreads as failure.
It’s not failure, it’s redirection. The cutting is putting its energy into roots instead of maintaining every leaf, and a little yellowing on one lower leaf during this window is completely normal, not a reason to give up.
By week 2 to 3, roots reach an inch or more and start branching, and that’s your real cue to move forward.
When and How to Pot Up
Pot up once roots are at least 1 to 2 inches long with some visible branching, usually 2 to 3 weeks in. Rooting longer than that in water doesn’t help, water roots are thinner and more brittle than soil roots and don’t always transition cleanly if you wait too long.
Use a well-draining potting mix, a standard houseplant blend with some perlite works fine. Plant at the same depth the cutting sat in water, and water it in thoroughly right away.
Keep it out of direct sun for the first week after potting, since the plant is adjusting from water roots to soil roots and can wilt temporarily even when it’s doing fine underground.
You’ll usually see new top growth within 2 to 3 weeks of potting, which is the real sign it’s settled in, not just surviving.
That new growth is also your cue that division, the other method worth knowing, might be faster next time.
Dividing an Existing Plant
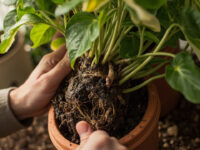
If you’ve got a mature, full pot of tradescantia already, division is faster than rooting individual cuttings. Tip the plant out, and you’ll see it’s really a cluster of separate stems sharing one root mass.
Gently pull or cut the root mass into sections, each with several stems and a healthy chunk of roots attached. Repot each section immediately in fresh soil and water well.
Division skips the rooting wait entirely since each piece already has functioning roots, so there’s no vulnerable stretch where the plant has stems but no root system yet.
Either method gets you a new plant, but most failures trace back to one of a short list of habits.
Why Attempts Fail (and the Honest Fixes)
Beyond submerged leaves, a few other habits quietly sink tradescantia propagation:
- Cutting from a leggy, stressed parent plant: weak stock roots slowly if at all, so take cuttings from vigorous, healthy growth.
- Low light during rooting: a dim corner slows root formation dramatically, move it somewhere genuinely bright.
- Skipping water changes: stagnant water breeds bacteria that rot stems from the base up.
- Potting up too early, before roots exist: soil offers no visible feedback, so an unrooted cutting just sits and rots unseen.
- Overwatering right after potting: new soil roots need air as much as moisture, soggy mix suffocates them fast.
Fix those five habits and tradescantia propagates about as reliably as any houseplant gets.
Tradescantia at a Glance
- Best method: water propagation from stem cuttings, division works well if you already have a full mature plant.
- Cutting size: 4 to 6 inches long, with 2 to 3 leaf nodes stripped bare below the water line.
- Rooting conditions: bright, indirect light, room temperature water around 65 to 75°F, water changed every 3 to 4 days.
- Timeline: roots visible in 5 to 10 days, ready to pot up at 2 to 3 weeks once roots reach 1 to 2 inches.
- Potting mix: standard well-draining houseplant soil with added perlite.
- After potting: keep out of direct sun for about a week, expect new growth within 2 to 3 weeks as the true sign it’s settled.
- Biggest risk: submerged leaves rotting the stem, so strip generously and check the water line daily.
Strip the stem bare below the waterline and leave the cutting alone for the first few days. Get that part right and tradescantia does almost all the rest of the work itself.