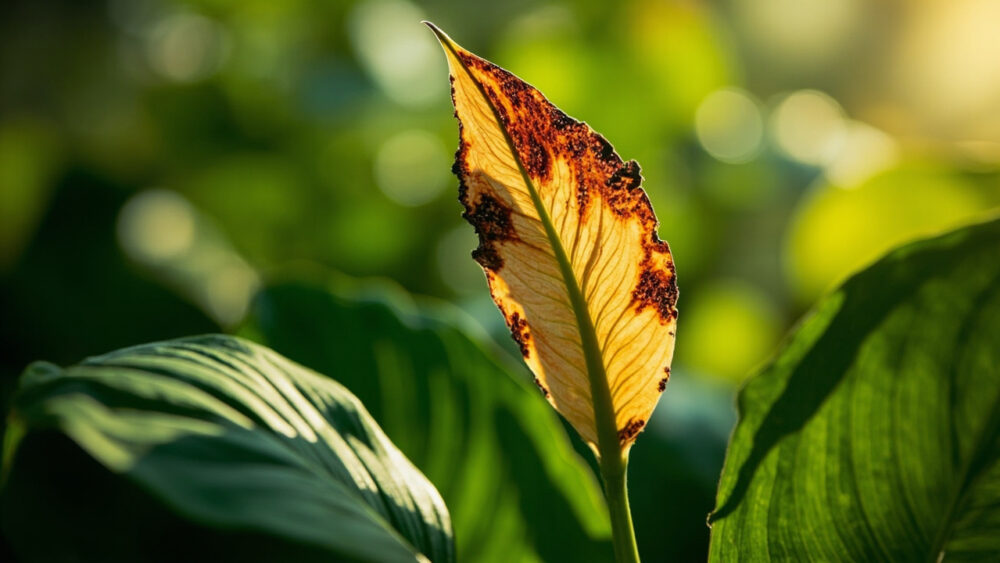
Nine times out of ten, peace lily leaves turning brown means one of two things: the soil dried out completely at some point and scorched the tips, or the plant is sitting in water and drowning at the roots. Both show up as brown, but they start in different places and feel different when you check the soil. Get that one distinction right and the fix is usually simple.
Here is what trips people up. Most folks blame the water first, but low humidity and hard tap water quietly cause just as much browning, and they get missed constantly because nobody thinks to check them. The real tell isn’t whether the plant got water on schedule, it’s exactly where on the leaf the brown starts and whether it hits old growth or new.
Stick with this page and you will know which of the five real causes you are dealing with, whether the damaged leaves are coming back or not, and there’s a two-minute diagnosis checklist waiting at the bottom you can run right now standing next to the plant.
The Likely Culprits, Ranked
1. Underwatering (the soil went bone dry)
Confirm it: stick a finger two inches into the soil. If it’s dry all the way down and the pot feels light for its size, this is your cause. Peace lilies droop dramatically before they brown, so if you’ve seen the whole plant flop over recently, that’s the giveaway.
Tips and edges of leaves turn crispy brown first, often with a slight yellow halo before the brown sets in.
Fix it: water thoroughly until it runs out the drainage holes, then get on a real schedule, checking soil moisture weekly rather than watering by the calendar.
That fixes the drought side of things, but overwatering causes the exact same brown tips for the opposite reason.
2. Overwatering or poor drainage (root rot)
Confirm it: soil stays wet for more than a week between waterings, or the pot has no drainage hole at all. Pull the plant and check the roots if you can: healthy roots are firm and pale, rotted ones are brown, mushy, and smell sour.
Leaves often yellow first, then develop brown patches that can appear anywhere on the leaf, not just the tips, and the base of the plant may feel soft.
Fix it: stop watering immediately. If roots are rotted, unpot the plant, trim away any mushy roots with clean scissors, and repot into fresh, well-draining potting mix in a pot with drainage holes.
If the roots are still mostly healthy, just let the soil dry out properly before you water again.
3. Low humidity or dry indoor air
Confirm it: this shows up most in winter near heating vents, or in dry climates year-round. The brown starts specifically at leaf tips and margins, spreading inward in a thin, papery edge while the rest of the leaf stays green and otherwise healthy.
New growth often unfurls with brown tips already present, which is the giveaway that humidity, not watering, is the driver.
Fix it: group plants together, run a humidifier nearby, or set the pot on a tray of pebbles and water (keeping the pot above the waterline, not sitting in it).
Humidity fixes the tips, but if the brown looks more like a hard, sharp-edged burn than a papery fade, look at what’s in your water next.
4. Fertilizer buildup or hard tap water
Confirm it: check for a white or gray crust on the soil surface or pot rim, that’s mineral salt buildup. Brown shows up as sharply defined patches or a solid brown band across the tip, often with the healthy green tissue ending abruptly rather than fading.
This is common if you fertilize often or use municipal tap water heavy in chlorine, fluoride, or salts.
Fix it: flush the pot with a large volume of distilled or rain water to wash out built-up salts, and cut fertilizer back to a light feeding every four to six weeks during active growth, none in winter.
Switching to filtered or distilled water going forward prevents the buildup from returning.
5. Too much direct sun or old age
Confirm it: if the plant sits in a south or west-facing window with unfiltered afternoon sun, check for brown, bleached patches specifically on the side of the leaf facing the light. That’s scorch, not a watering issue.
Separately, if it’s just one or two of the oldest, lowest leaves going uniformly brown while everything else looks fine, that’s simple old age, not a problem at all.
Fix it: move scorched plants to bright, indirect light a few feet back from direct sun. For old leaves, just snip them off at the base.
Once you’ve ruled these five in or out, the next step is comparing them side by side so you’re not guessing.
How to Tell the Causes Apart
Location on the plant matters more than the color itself. Old, lower leaves browning uniformly points to natural aging or long-term underfeeding. New growth emerging with brown tips points to humidity or mineral buildup.
Pattern matters too. A crisp, dry, curling brown edge means underwatering or humidity. A soft, spreading brown patch anywhere on the leaf, especially paired with yellowing, means overwatering or root rot.
Sun scorch is directional, it appears on whichever side faces the window. Rot and drought affect the whole plant fairly evenly.
Once you’ve matched your symptom to a cause, the next honest question is whether the leaf itself is coming back.
Will It Recover?
Brown leaf tissue never turns green again. No fix reverses damage already done to a leaf; the win is stopping new leaves from doing the same thing.
For underwatering, humidity, and mineral buildup, the prognosis is good. Trim the damaged brown parts with clean scissors, correct the care issue, and new growth should come in clean within a few weeks to a couple of months.
Overwatering and root rot are more serious. Caught early, with firm roots and just a few affected leaves, the plant usually bounces back within a month of repotting into dry, fresh soil.
Caught late is different. If most of the root system is mushy and brown, or the crown of the plant (where leaves meet soil) is soft and dark, that plant is often past saving, and it’s fair to cut your losses and start a new one from a healthy division if you have one.
Sun scorch and old age are cosmetic; snip the ugly leaves and the plant is otherwise unaffected long-term.
Recovery is realistic for most of these, but prevention is what keeps you from doing this diagnosis again next month.
How to Keep It From Happening Again
Water on feel, not schedule. Check the top two inches of soil with your finger. Water when it’s dry there, skip it when it’s still damp.
Use a pot with drainage holes, always. It’s the single biggest predictor of whether root rot happens at all.
Keep the plant in bright, indirect light, a few feet from a sunny window rather than in it. Feed lightly every four to six weeks in spring and summer, and stop entirely in fall and winter.
If your tap water is heavily treated or you have hard water, switch to distilled or rainwater, or at minimum let tap water sit out overnight before using it.
With the causes sorted and prevention in place, here’s the fast checklist to run right now at the plant.
Diagnosis Checklist
- Check the soil two inches down: if it’s bone dry, suspect underwatering, water thoroughly and set a moisture-check routine.
- If the soil has stayed wet for over a week, or there’s no drainage hole, suspect root rot, unpot and inspect the roots.
- If roots are brown, mushy, or smell sour, trim them and repot in fresh, well-draining soil, or start over if most roots are gone.
- If only leaf tips and edges are crisp and papery, especially on new growth, suspect low humidity, add a humidifier or pebble tray.
- If you see white or gray crust on the soil or pot rim, suspect mineral buildup, flush the pot with distilled water and ease off fertilizer.
- If brown patches sit only on the side of the leaf facing a sunny window, suspect scorch, move the plant back from direct light.
- If it’s just the oldest, lowest leaves and everything else looks healthy, call it natural aging, snip the leaves and move on.
- Trim any brown tissue you find with clean scissors regardless of cause, since it will not turn green again.
Run through those eight checks and you will land on the real cause within two minutes, not a guess.
Fix the water first, the light second, and this plant will forgive almost everything else.