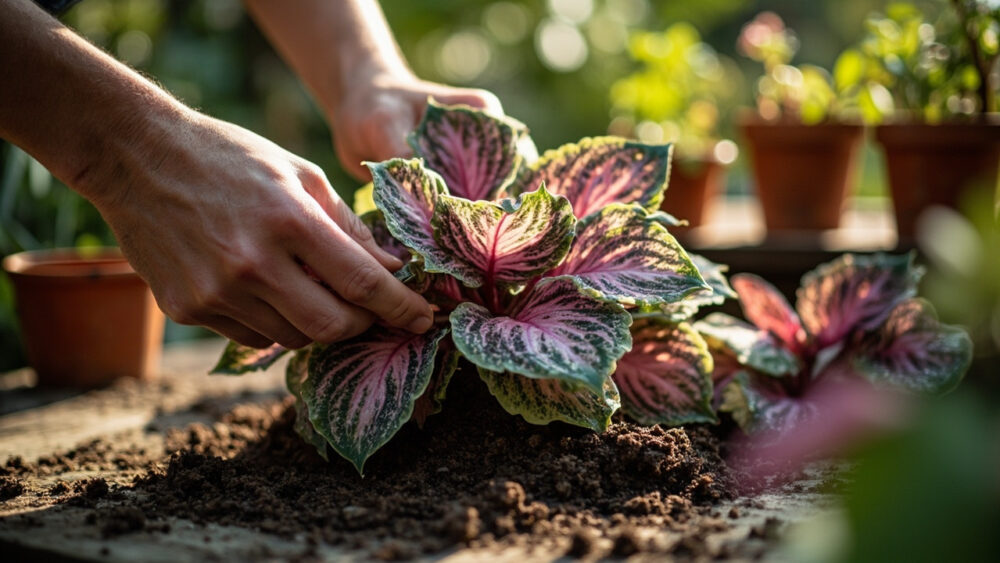
The method that actually works for rex begonia is a leaf cutting with the veins scored on the underside, laid flat on damp medium in a closed container with bottom heat around 70 to 75°F. That’s how nearly every serious grower does it, and it’s how you get a dozen new plants off of one healthy leaf instead of one shaky rooted stem. If you’re standing over your rex begonia right now wondering how to propagate it, this is the answer, and the rest of this covers exactly how to do it without losing the leaf to rot before it ever roots.
Here’s the part almost nobody tells you going in: the leaf you pick matters more than anything else in the process, and most people grab the wrong one. There’s also a specific point in week two or three where the leaf looks worse, not better, and that’s when most beginners panic and toss a batch that was actually fine.
Stick around, because the Rex Begonia at a Glance card at the bottom of this page has the exact temperature, timeline, and potting-up cues saved in one place, worth screenshotting before you start cutting.
Why Leaf Cuttings Beat Stem Division for Rex Begonia
Rex begonias grow from a shallow, creeping rhizome, not a single upright stem, which is exactly why leaf propagation outperforms division here. Every vein on that leaf is a potential new plant, because rex begonia leaves root and sprout new plantlets directly from the wounded vein tissue, not just from a cut stem base.
Division works, technically, but it gives you one plant per cut and it stresses the mother plant hard, especially on a variety that already sulks over inconsistent humidity. Leaf propagation is slower to show results but gives you far more plants for the risk, and it doesn’t touch the parent plant at all if you take the leaf carefully.
The tradeoff is patience. Leaf propagation takes longer to produce something pottable than stem cuttings do on an easier plant like pothos or coleus.
That patience only pays off if you pick the right leaf and cut it the right way, which is where most people go wrong first.
Step by Step: From Leaf to New Plant
Choosing and Taking the Cutting
Pick a mature, fully colored leaf with no soft spots, no yellowing edges, and a firm petiole. A leaf that’s still glossy and taut but not brand new is ideal; very young leaves don’t have enough stored energy to push out plantlets.
Cut the petiole close to the rhizome with a clean, sharp blade. Trim the petiole down to about half an inch to an inch if you’re doing the petiole-in-medium method, or remove it entirely if you’re doing the flat-leaf method described next.
Scoring the Veins
Flip the leaf over. With a clean razor or sharp knife, make small shallow cuts, about half an inch long, across four or five of the thickest main veins on the underside.
You’re cutting through the vein itself but not slicing the leaf in half. This is the single most guessed-wrong step: people either skip it entirely or cut too deep and sever the leaf into pieces.
Rooting Medium and Placement
Lay the leaf flat, cut-side down, on a shallow tray of damp seed-starting mix, perlite, or a 50/50 perlite-and-peat blend. Pin it flat against the medium with a few toothpicks or small stones so the scored veins stay in full contact with moisture.
Some growers skip the flat method and instead cut the leaf into wedge-shaped sections, each with a piece of vein, and stand them upright in the medium like tiny sails. Both work; the flat method usually gives more plantlets per leaf.
Once it’s placed, the environment you build around it decides whether this works or rots.
Conditions That Make or Break the Rooting
Cover the tray with a clear plastic dome, a propagation lid, or even a loose plastic bag tented on sticks so it doesn’t touch the leaf. Rex begonia cuttings need consistently high humidity, well above what open room air gives you, and they need it for weeks, not days.
Bottom heat matters more than light here. Keep the medium around 70 to 75°F using a seedling heat mat if your room runs cooler than that. Bright, indirect light is enough. Skip direct sun, which will cook a leaf sealed under plastic in an afternoon.
Keep the medium moist but never soggy. Standing water at the base of the tray is the fastest route to a leaf that rots before it roots, which is more common than a leaf that simply dries out.
Get the humidity and heat right and the waiting game starts, and this is where most people misread what they’re seeing.
What to Expect, Week by Week
In the first one to two weeks, nothing visible happens, and the leaf may actually look a little duller or slightly limp. This is normal and it’s the point where most beginners assume failure and pull the leaf to check, which disturbs the veins right when they’re trying to callus and root.
If you assumed a dulling leaf means it’s dyingthat guess costs more attempted propagations than actual rot does. Leave it alone.
Around week three to four, look for tiny nubs or bumps forming right at the scored vein cuts, sometimes with a faint reddish or pale tint. Small roots usually show first, followed by the first true plantlet within another one to two weeks.
By week six to eight, you should see small leaves poking up from several of the scored points, each one a separate baby plant still attached to the mother leaf. The original leaf itself may be yellowing or even mostly collapsed by this point, and that’s expected, not a failure sign.
Once those plantlets have their own leaves and a bit of root, it’s time to think about separating and potting.
Potting Up and Moving to Regular Care
Wait until each plantlet has at least two small leaves and visible roots of its own, usually somewhere around eight to twelve weeks from when you started, before separating it from the mother leaf. Pulling them too early, before real roots have formed, is the second most common way people lose a batch.
Gently separate each plantlet with a small tool, keeping as much root intact as possible, and pot into a small container, a 2-inch pot is plenty, using a light, well-draining mix with extra perlite. Rex begonias hate wet feet and heavy soil at every stage of life, not just as adults.
Keep humidity elevated for another one to two weeks after potting, then gradually reduce it over seven to ten days rather than pulling the dome off all at once. Sudden exposure to dry room air right after separation is a fast way to lose a plant you waited two months for.
Once it’s adjusted, treat it like any established rex begonia: bright indirect light, even moisture, and no cold drafts.
Getting this far feels like the finish line, but most failures actually happen earlier, for reasons that are easy to fix once you know them.
Why Most Rex Begonia Propagation Attempts Fail
The number one cause of failure is rot, not dryness, and it almost always comes from standing water under the leaf or medium that’s kept soaked instead of just damp. Damp like a wrung-out sponge is the feel you want, not visibly wet.
The second cause is low humidity that lets the cut leaf edges dry and curl before the veins can callus and root. A loosely draped bag that lets air exchange too freely won’t hold enough moisture. You want a real seal with occasional venting to prevent fungal buildup.
The third cause is impatience: checking constantly, lifting the leaf to peek at the veins, or giving up at week two when nothing shows yet. Rex begonia propagation runs on a slower clock than most houseplants people are used to.
Fix those three things and your success rate jumps from occasional to reliable.
Rex Begonia at a Glance
- Best method: leaf cutting with scored veins, laid flat cut-side down on damp medium.
- Ideal temperature: 70 to 75°F at the medium, using bottom heat if your room runs cooler.
- Humidity needed: high and consistent, under a clear dome or tented plastic for the first six to eight weeks.
- First visible progress: small nubs or plantlets at the scored veins around three to four weeks in.
- Time to pot up: eight to twelve weeks, once plantlets have two leaves and their own roots.
- Potting mix: light and well-draining, extra perlite mixed into a standard houseplant soil.
- Biggest risk: rot from overly wet medium, far more common than the leaf drying out.
Patience beats fussing every time with this plant. Get the humidity and heat right, leave it alone, and let the leaf do what it’s built to do.