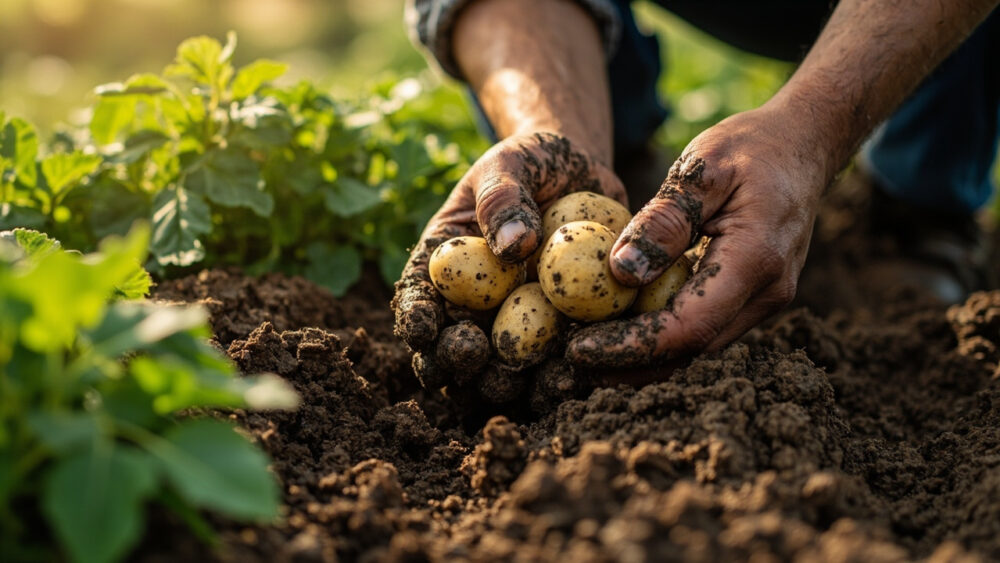
You grow potatoes by planting certified seed potatoes, not grocery-store spuds, in loose soil about 3 to 4 inches deep and 12 inches apart, then covering them with more soil as the plants grow so the tubers form in the dark. Plant two to three weeks after your last frost, once soil temperature holds above 45°F. From there it is mostly patience: 70 to 120 days depending on the variety, with the plant itself telling you when it is done.
That part is simple. What trips people up is everything around it. The one mistake that wrecks most first attempts is planting too early or too deep and losing the whole start to rot. There is also a hilling mistake almost everyone makes without knowing it, and a harvest sign that looks like trouble but is actually exactly what you want to see.
Stick with me through each stage and you will know precisely when to plant, how to hill, what pest to watch for before it wrecks your leaves, and how to tell a potato plant that is finishing on schedule from one that is failing. The full save-able rundown, Potatoes at a Glanceis waiting at the bottom once you have the reasoning behind it.
When to Plant Potatoes
Potatoes go in the ground two to three weeks before your average last frost date, as soon as the soil can be worked and hits roughly 45°F at a 4-inch depth. Cold, wet soil is the real enemy here, not a light frost on the leaves. Seed pieces sitting in soggy, cold ground will rot before they ever sprout.
If you garden somewhere with a short season, zones 3 to 5, aim for that early window since potatoes need the long cool stretch of spring before summer heat arrives. In hot-summer regions, zones 8 and warmer, plant in late winter or very early spring, or even skip to a fall crop, since potatoes stop bulking up once soil temperatures push past 80°F.
A light frost after planting will not kill emerged sprouts outright, it just knocks the tops back and they regrow from below the soil line.
Choosing the Spot and Prepping the Soil
Potatoes want full sun, at least 6 hours, and loose, well-drained soil with a slightly acidic pH around 5.8 to 6.5. Heavy clay is the setup that causes the most trouble: it holds water against the tubers and invites rot, and it also makes for a lumpy, scabby harvest.
Work in compost or aged manure before plantingbut go easy on fresh manure and high-nitrogen fertilizer. Too much nitrogen grows you a jungle of leafy top growth and a disappointing handful of small tubers underneath. Raised beds, mounded rows, or even large grow bags all solve the drainage problem if your native soil is dense.
Rotate the spot too. Avoid planting where you grew potatoes, tomatoes, peppers, or eggplant in the last two to three years, since they share the same soil-borne diseases.
Get the bed right and the planting step itself takes ten minutes.
Planting Potatoes Step by Step
Start with certified seed potatoes from a garden center or seed company, not the ones sprouting in your pantry. Grocery-store potatoes are often treated with a sprout inhibitor and can carry diseases that stay in your soil for years.
1. Cut and cure the seed potatoes
A few days before planting, cut larger seed potatoes into chunks about the size of a golf ball, making sure each piece has at least one or two eyes. Let the cut pieces sit at room temperature for one to two days so the cut surface calluses over. This callus is what keeps the piece from rotting in the ground. Golf-ball-sized whole potatoes can go in uncut.
2. Dig the trench
Dig a trench 3 to 4 inches deep. Deeper planting risks rot in cool, wet spring soil; shallower and the developing tubers push up out of the ground and turn green.
3. Space and set the seed pieces
Place pieces cut-side down, eyes facing up, 12 inches apart within the row, with rows spaced 24 to 36 inches apart. That row spacing feels excessive at planting time but you will need it later for hilling.
4. Cover and wait
Backfill the trench and water it in. Sprouts usually show in 2 to 3 weeks, longer in cold soil. If nothing shows by week 4, check a seed piece; if it is mushy and black, it rotted and needs replacing.
Once those first green shoots break the surface, the job shifts from planting to hilling.
Hilling, Watering, and Feeding
Here is the hilling mistake almost everyone makes: they hill once, early, and call it done. Potatoes actually need two to three rounds of hilling as the plant grows.
When the plant reaches about 6 inches tallmound soil up around the stem until only the top few inches of leaves show. Repeat this every two to three weeks as the plant keeps growing, until you have a hill 8 to 10 inches high. Tubers form above the seed piece, along the buried stem, so the more properly buried stem you give the plant, the more potatoes it can set. Skip this step and you get a handful of small, sunburned, green-shouldered potatoes sitting near the surface.
Water consistently, about 1 to 2 inches per week, with the goal of evenly moist soil, never soggy. The most critical window is once tubers start forming, roughly when plants begin flowering. Drought stress here causes small, misshapen potatoes, while erratic wet-dry swings cause hollow heart and cracking.
Feed lightly with a balanced or low-nitrogen fertilizer at planting and again when hilling, but do not overdo nitrogen for the reason mentioned earlier: it is all leaves, no tubers.
Get watering and hilling right and most of your problems never show up, but a few still find their way in.
Problems That Actually Cost You a Harvest
The pest to watch for first is the Colorado potato beetle, a yellow-and-black striped beetle that strips leaves fast. Check the undersides of leaves weekly for its orange egg clusters and hand-pick both eggs and beetles early in the season before populations explode. For heavy infestations, an insecticide labeled for Colorado potato beetle on potatoes works, applied exactly per the product label.
Late blight is the disease that actually ends seasons, showing up as dark, water-soaked spots on leaves during cool, damp weather that spread fast and can rot tubers in the ground. Good air circulation, avoiding overhead watering late in the day, and removing infected plants immediately all help contain it. A copper-based fungicide applied per label directions can slow it if caught early.
Scab, that rough, corky skin texture, comes from soil that is too alkaline or too dry during tuber set. It is cosmetic, the potato is still fine to eat, just less pretty.
Green potatoes are the sign that looks alarming but has a simple fix. Sunlight hitting exposed tubers triggers chlorophyll and a bitter compound called solanine, which is mildly toxic. Just hill higher next time, and cut off and discard any green parts before cooking. Do not eat them.
Handle those two threats and hilling well, and you’re mostly just waiting on the calendar and the leaves now.
When and How to Harvest
If you guessed you harvest once the plant flowers, that is close but early. Flowering means tubers have started forming, which is exactly when you can sneak a few small “new potatoes” from the edge of the hill without disturbing the rest.
The real harvest signal is the foliage. When the lower leaves yellow and the plant’s top growth dies backusually 70 to 120 days after planting depending on variety, the potatoes are mature and ready for a full dig. Stop watering once you see that die-back begin.
Dig carefully with a fork, starting well outside the plant’s base so you do not spear the tubers, and work inward. Do this on a dry day. Wet-soil digging bruises the skins and shortens storage life.
For long storage, cure the dug potatoes in a cool, dark spot around 50 to 60°F for one to two weeks before brushing off soil, gently, without washing, and moving them to storage around 40°F in the dark. Never store them in direct light, which brings back that green, bitter skin problem.
That is the whole arc, and here is the short version to keep on your phone.
Potatoes at a Glance
- When to plant: two to three weeks before your last frost, once soil hits about 45°F at 4 inches deep.
- Depth and spacing: plant seed pieces 3 to 4 inches deep, 12 inches apart, rows 24 to 36 inches apart.
- Soil and sun: loose, well-drained soil, pH 5.8 to 6.5, at least 6 hours of full sun, avoid heavy clay.
- Hilling: mound soil around stems two to three times through the season, building an 8 to 10 inch hill.
- Water: about 1 to 2 inches per week, steady moisture, critical once flowering starts.
- Watch for: Colorado potato beetle eggs on leaf undersides, and dark water-soaked spots signaling late blight.
- Harvest: 70 to 120 days after planting, once lower leaves yellow and top growth dies back.
If you remember one thing, remember the hilling, not the harvest date. A properly buried stem grows more potatoes than any fertilizer you could add.