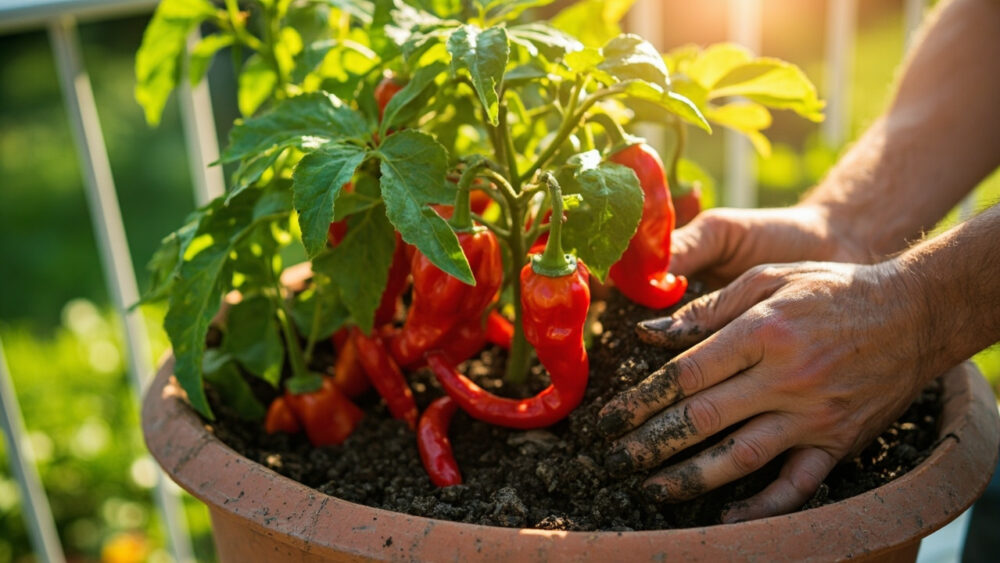
Growing peppers in containers works if you get three things right: a pot big enough to hold moisture without waterlogging, soil that stays warm, and a feeding schedule that doesn’t quit once the first flowers show up. A 5-gallon container is the practical minimum for full-size bell and chili varieties, soil temperature needs to sit at 65F or warmer before transplants go in, and most peppers want at least six hours of direct sun to set fruit heavily. Get those three right and the rest is maintenance.
Here’s what trips people up. Most container pepper failures aren’t disease, they’re a pot that’s too small, planted too early into cold soil, then starved of food right when the plant needs it most. There’s also a sign almost everyone misreads in midsummer that looks like a disaster but usually isn’t, and I’ll walk you through it later. And if you’re wondering the thing every pepper grower eventually asks, which is why a plant loaded with blossoms is dropping every single one, that’s got a specific, fixable answer too.
Stick with me through the sections below and I’ll cover timing, potting, feeding, and the pests and problems that actually show up in containers. At the bottom you’ll find a save-able Peppers at a Glance card with the numbers you’ll want to check back on all season.
When to Plant Peppers in Containers
Peppers are tropical perennials grown as annuals, and they hate cold soil more than almost any vegetable you’ll grow. Wait until nighttime temperatures reliably stay above 55F and soil temperature is at least 65F, which is usually two to three weeks after your last spring frost date. Planting earlier doesn’t get you earlier peppers, it just stalls the plant.
A pepper transplant set into 50F soil can sit there sulking for a month, sometimes with a purplish tint on the leaves from cold stress, while a plant set out three weeks later in warm soil catches up and passes it. In zones 3 through 6, that’s often mid to late May. In zones 7 through 9, late March into April is realistic. In zones 10 and 11, you can plant almost anytime outside of the hottest stretch of summer.
Containers actually give you an edge here since the soil in a dark pot warms faster than garden ground, and you can move pots to a sunny wall or bring them in if a late cold snap threatens.
Soil temperature, not the calendar, is what actually starts the clock on your pepper season.
Choosing the Right Pot and Soil
Size is the decision that matters most. Use at least a 5-gallon container for full-size peppers like bells, poblanos, and jalapenos; smaller peppers like Thai chilis or ornamental types can get by with 3 gallons, but bigger is almost always better since it buffers against the fast drying that kills container plants.
Every pot needs real drainage holes, not just one or two but several, because peppers despise sitting in wet soil far more than they mind drying out slightly between waterings.
Skip garden soil entirely. It compacts in a container and suffocates roots. Use a quality potting mix, ideally one with compost worked in, and consider blending in a handful of perlite for extra drainage if your mix seems dense.
Dark-colored pots (black or dark grey plastic or glazed ceramic) absorb heat and push soil temperature up faster in spring, which peppers reward with quicker growth.
Get the container right and the soil right, and planting day itself is almost foolproof.
Planting Peppers Step by Step
1. Harden off transplants first
If you started seedlings indoors or bought nursery starts, give them 5 to 7 days outside in a sheltered, partly shaded spot before transplanting, increasing sun exposure a little each day. Skipping this step often causes scorched or wilted leaves in the first week.
2. Fill and pre-moisten the pot
Fill your container with potting mix to about an inch below the rim and water it thoroughly before planting, so the seedling goes into evenly damp soil rather than dry mix that wicks moisture away from young roots.
3. Plant at the right depth
Dig a hole slightly deeper than the seedling’s root ball and set the plant so the soil line sits at or just slightly above where it was in the nursery pot. Unlike tomatoes, peppers don’t need to be buried deep along the stem.
4. Space for airflow
One plant per 5-gallon pot is standard. If you’re using a larger container or grow bag for multiple plants, space them 12 to 18 inches apart so leaves aren’t constantly touching, which invites fungal problems.
5. Water in and mulch
Water gently right after planting, then add an inch of mulch, straw, or shredded leaves on top of the soil to slow evaporation and keep roots at a steadier temperature.
Once the plant is in the ground and settled, the real work shifts to keeping it fed and watered through the heat of summer.
Watering and Feeding Through the Season
Container soil dries out fast, often within a day or two in summer heat, and inconsistent watering is a major cause of blossom drop and blossom end rot in peppers. Check the top inch or two of soil daily once temperatures climb, and water deeply when it’s dry to the touch rather than splashing a little water on top every day.
A deep soak until water runs from the drainage holes, then letting the surface dry slightly before watering again, builds stronger roots than frequent shallow sips.
Feeding matters more in containers than in garden beds because nutrients wash out with every watering. Start with a balanced fertilizer at planting, then switch to something lower in nitrogen and higher in phosphorus and potassium once flowering begins.
Too much nitrogen late in the season gives you a bushy, dark green plant with plenty of leaves and disappointing fruit set, since the plant is putting its energy into foliage instead of flowers.
Feed every two to three weeks through the growing season, following the product label’s rate rather than guessing.
Now here’s the part almost every pepper grower runs into and misreads.
Why Peppers Drop Flowers, and Other Problems to Watch For
If your plant is covered in blossoms one week and bare of them the next, your first guess is probably a pest or disease. It usually isn’t. Blossom drop in peppers is most often caused by temperature stressspecifically nighttime temperatures above 75F or below 55F, or by a sudden dry spell between waterings.
The fix isn’t a spray, it’s consistency: steady watering, some afternoon shade during extreme heat waves, and patience until temperatures moderate. The plant will resume setting fruit once conditions settle.
Beyond that, watch for a few recurring container issues:
- Blossom end rot: dark, sunken patches on the fruit’s bottom end, usually from uneven watering rather than a true calcium shortage in most container mixes.
- Aphids and spider mites: look for curled leaves or fine webbing on leaf undersides; a strong water spray or insecticidal soap applied per the label handles most infestations early.
- Sunscald: white or papery patches on fruit exposed to intense afternoon sun, more common on plants pruned too aggressively.
- Yellowing lower leaves: often just normal aging or a nitrogen dip, not automatically a disease. Check soil moisture and feeding schedule before assuming the worst.
Most of these problems are manageable if you catch them early, which means once fruit starts forming is exactly when you should be checking the plant closely.
When and How to Harvest Peppers
Peppers are ready to pick as soon as they reach full size and firm up, typically 60 to 90 days after transplanting depending on variety, but color is your real signal. A green bell pepper is fully ediblebut if you leave it another 2 to 3 weeks it will usually turn red, yellow, or orange and taste noticeably sweeter, since that color change means more sugar has developed.
Hot peppers follow the same rule: a jalapeno is fine to pick green, but letting it ripen to red intensifies both sweetness and heat.
Cut peppers from the plant with scissors or pruners rather than pulling, since yanking can snap branches or uproot a shallow container plant entirely.
Regular picking, rather than letting fruit sit and fully ripen on the plant every time, actually encourages more flowers and a longer harvest window, especially in container plants with a shorter root run than in-ground plants.
Keep that in mind and you’ll get several more weeks of production before the season winds down.
Peppers at a Glance
- When to plant: two to three weeks after last frost, once soil is at least 65F and nights stay above 55F.
- Container size: minimum 5 gallons for full-size peppers, 3 gallons acceptable for small varieties.
- Spacing: one plant per 5-gallon pot, or 12 to 18 inches apart in larger containers.
- Sun and water: at least six hours of direct sun daily, deep watering whenever the top inch or two of soil is dry.
- Feeding: balanced fertilizer at planting, then lower nitrogen and higher phosphorus and potassium every two to three weeks once flowering starts.
- Watch for: blossom drop from heat or inconsistent watering, blossom end rot, aphids and spider mites.
- Harvest window: 60 to 90 days after transplanting, pick at full size in green or wait 2 to 3 weeks for full color and sweetness.
If you remember nothing else, remember this: consistent water and warm soil solve more pepper problems than any fertilizer or spray ever will.
Everything else in this guide is just details in service of that one habit.