How to grow peppers comes down to three things most gardeners get wrong before they ever plant: they go in the ground too early, too shaded, and too close together. Peppers want warm soil (65 to 70°F at planting), at least 6 to 8 hours of direct sun, and 12 to 18 inches of breathing room per plant. Get those three right and the rest of the season is mostly patience and steady watering.
But there’s a mistake that costs even careful gardeners a full crop, and it happens weeks before harvest, not at planting time. There’s also a sign on the plant everyone reads backwards, one that looks like a nutrient problem but almost never is. And if you’re wondering how a pepper that looks perfectly ripe can still taste flat, that answer surprises most people too.
All of that is coming, section by section. Stick around to the bottom for the saveable Peppers at a Glance card, the one you’ll actually want pulled up on your phone the next time you’re standing in the garden center or staring at your bed wondering if it’s time.
When to Plant Peppers
Peppers are tropical perennials grown as annuals almost everywhere, and they take frost as a death sentence, not a setback. Don’t transplant outdoors until night temperatures reliably stay above 55°F and soil has warmed to at least 65°F a few inches down. That’s usually two to three weeks after your last spring frost date, not the same weekend as it.
Start seed indoors 8 to 10 weeks before that outdoor date, since peppers are slow to germinate, often taking 7 to 14 days even with bottom heat around 80°F. In cooler zones (5 and below), many gardeners just buy started transplants rather than fight a short season with slow seed.
Planting into cold soil is the single most common reason a pepper plant sulks all summer and never catches up, even if it survives.
Choosing the Spot and Prepping the Soil
Peppers want full sun, meaning 6 hours minimum, 8 or more if you’ve got it. Less than that and you’ll get a leafy plant with disappointing fruit set.
Soil matters more than most people expect. Peppers like loose, well-drained soil with a pH between 6.0 and 6.8, amended with a couple inches of compost worked into the top 8 inches. Heavy clay that stays wet will rot roots and stunt growth long before disease even shows up.
Skip the urge to go heavy on nitrogen up front. Rich soil pushed hard with nitrogen grows gorgeous dark green plants that flower late and set little fruit, which is the nutrient sign everyone reads backwards. Lush leaves are not the goal. Fruit is.
Next comes the part that actually determines how many peppers you get: the planting itself.
Planting Peppers Step by Step
1. Harden off transplants first
Set indoor-grown or nursery transplants outside in a shaded, protected spot for a few hours a day, gradually adding sun and time over 5 to 7 days. Skipping this step causes sunscald and transplant shock that can set plants back two weeks.
2. Dig the hole and plant at soil level
Unlike tomatoes, peppers should not be buried deeper than they were growing in the pot. Dig a hole just deep enough for the root ball, set the plant so the soil line matches, and firm soil gently around the stem.
3. Space for airflow
Give standard bell and sweet types 18 to 24 inches apart; smaller hot pepper varieties can go as close as 12 to 15 inches. Rows 24 to 36 inches apart. Crowded plants trap humidity and invite fungal disease later.
4. Water in and mulch
Water thoroughly right after planting, then add 2 to 3 inches of mulch, keeping it an inch away from the stem. Mulch keeps soil temperature steady, which peppers care about more than most vegetables.
Once they’re in the ground, the plant’s needs shift fast, and watering is where the next mistake usually shows up.
Watering and Feeding Through the Season
Peppers want consistent moisture, not soggy soil and not drought stress. Aim for about 1 to 1.5 inches of water a weekadjusted upward in hot, dry stretches. Check by feeling the soil 2 inches down; if it’s dry there, water.
Inconsistent watering, wet then bone-dry then wet again, is what causes blossom end rot far more often than a calcium deficiency does.
Feed lightly. A balanced fertilizer at planting, then a lower-nitrogen, higher-phosphorus and potassium feed once flowering starts, works better than heavy regular feeding. Too much nitrogen after flowering begins is the same lush-leaves, few-fruit trap mentioned earlier.
Once plants are 12 to 15 inches tall and loaded with side branches, a stake or small cage keeps heavy-fruited varieties from snapping in wind or under their own weight.
Even with good watering and feeding, peppers still have a short list of problems that show up almost every season.
Problems That Actually Show Up
- Blossom drop: flowers fall without setting fruit, usually from temperatures above 90°F or below 60°F, or from inconsistent watering. Fixable once conditions moderate, not a disease.
- Blossom end rot: a dark, sunken patch on the fruit’s bottom end, caused by uneven watering interrupting calcium uptake, not soil deficiency in most gardens. Even out your watering schedule before you reach for a calcium spray.
- Aphids and pepper weevils: check leaf undersides for clusters. A strong water spray or insecticidal soap handles light infestations, always following the product label.
- Bacterial leaf spot and fungal blights: dark spotting on leaves, worse in humid, crowded plantings. Improve airflow, avoid overhead watering late in the day, and remove badly affected leaves.
Most of these are manageable, not fatal, if you catch them early rather than after they’ve spread through the whole bed.
Handle the plant well and eventually you get to the part everyone’s been waiting for: the actual harvest.
When and How to Harvest Peppers
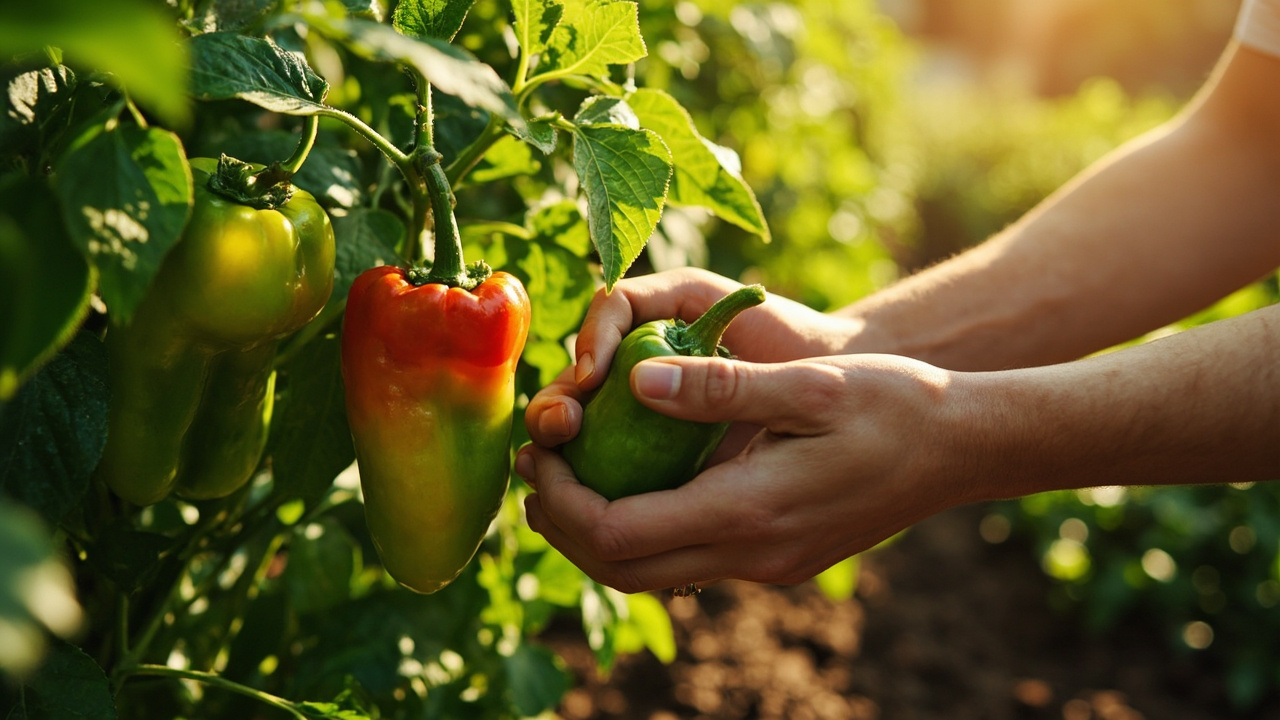
Here’s the answer to the question lurking behind this whole guide: a pepper’s color at “ripe” size isn’t the same as flavor-ripe. Green bell peppers are technically mature and edible, but every pepper, sweet or hot, develops more sugar and complexity the longer it hangs and colors up toward red, yellow, orange, or purple depending on variety.
Harvest with scissors or a clean snip rather than tugging, which can snap brittle branches. Sweet peppers are usable green 60 to 90 days from transplant, or fully colored 2 to 3 weeks later. Hot peppers generally take longer to color fully and often get hotter the longer they ripen.
Regular picking, even of a few green fruits early on, tells the plant to keep producing rather than putting all its energy into the peppers already set.
Now for the part worth screenshotting.
Peppers at a Glance
- When to plant: transplant outdoors 2 to 3 weeks after last frost, once soil hits 65 to 70°F and nights stay above 55°F.
- Sun and spacing: full sun, 6 to 8 hours minimum, plants spaced 12 to 24 inches apart depending on variety.
- Soil: loose, well-drained, pH 6.0 to 6.8, amended with compost, moderate nitrogen only.
- Watering: about 1 to 1.5 inches per week, kept consistent rather than heavy-then-dry.
- Common problems: blossom drop from heat stress, blossom end rot from uneven watering, aphids, fungal leaf spot.
- Harvest window: green and usable at 60 to 90 days from transplant, fully colored and sweetest 2 to 3 weeks after that.
- Harvest method: snip, don’t pull, and pick regularly to keep the plant producing.
If you remember nothing else, remember this: even watering wins more pepper seasons than any fertilizer does.
Plant into warm soil, give it room and sun, and let the fruit hang a little longer than feels necessary.