Garlic moves through six distinct stages between planting and harvest, and knowing what each one looks like is how you know whether your crop is on track or in trouble. It starts with root establishment in fall, pushes green shoots through winter or early spring, bulks up leaves through spring, then triggers bulbing in response to lengthening days and warming soil. Understanding these garlic growing stages tells you exactly when to feed, when to water, and when to walk away and let it finish.
Most failed garlic crops go wrong at one specific stage, and it is not the one people worry about. There is also a sign in early summer that looks like disaster but is actually the plant doing exactly what it should.
Stick around for the honest answer on how long this whole process actually takes, because it is longer than most first-timers expect. There is a save-able Garlic at a Glance card at the bottom with every stage, timeframe, and job condensed onto one card you can pull up from your phone in the garden.
Stage One: Planting and Root Establishment (Fall, 2 to 4 Weeks Before Ground Freezes)
You plant individual cloves, pointed end up, 2 inches deep and 4 to 6 inches apart, about 2 to 4 weeks before your ground freezes solid. In most zones that is October or early November. The clove itself does the work heresending down roots without pushing much top growth before winter.
You will not see much above soil unless you planted early and got a mild fall, in which case a little green tip poking through is normal and not a problem. What garlic needs now is moisture to trigger rooting and a 3 to 4 inch layer of mulch, straw works well, to buffer freeze-thaw cycles that heave cloves out of the ground.
Skip this stage’s timing and you are already fighting the calendar.
Stage Two: Winter Dormancy
Once the ground freezes, the clove stops growing above ground but keeps building roots below, especially during any winter thaw. This is dormancy, not death, even though the bed looks completely empty for months.
This is also where most people panic for no reason. A bare bed in January feels like failure, but garlic is built for cold and needs a stretch of temperatures below about 40 F to properly form a bulb later. This chilling requirement is why fall planting beats spring planting almost every time, garlic planted in spring often skips proper bulbing and forms a rubbery, undivided round instead of cloves.
The real test of whether winter went fine comes the moment things start growing again.
Stage Three: Spring Green-Up
As soil temperatures climb past roughly 40 F, green shoots emerge and grow fast. In most climates this is late winter to early spring, sometimes earlier if you had a mild season.
This is the stage where most things actually go wrongnot planting. Spring green-up is when weeds and garlic emerge together, and weeds win if you let them; garlic hates competition for the first several weeks far more than most vegetables do. It is also when a first application of nitrogen, blood meal or a balanced organic fertilizer, makes the biggest difference in final bulb size.
Pull weeds by hand near the shoots rather than hoeing, garlic roots sit shallow and hoeing slices right through them. Feed again lightly three to four weeks later while leaves are still actively growing.
Get this stage right and the rest of the season mostly takes care of itself.
Stage Four: Leaf and Stalk Development
Through mid to late spring, the plant is all about leaves, typically building 6 to 10 of them, plus a thickening central stalk. Each healthy green leaf corresponds to a wrapper layer on the eventual bulb, so this stage determines how well your garlic stores later, not just how big it gets.
If you assumed more leaves always means a better bulbthat is only half true. What matters more is that the leaves stay green and upright rather than yellowing or flopping early, since yellowing now, weeks before it is supposed to happen, usually signals water stress or nitrogen running out, not natural progress.
Garlic wants consistent moisture here, about 1 inch a week from rain or irrigation, and this is the last realistic window to fertilize.
Then something happens on hardneck varieties that throws a lot of new growers off completely.
Stage Five: Scapes and Bulbing (the Stage Everyone Misreads)
If you grow hardneck garlic, a curling flower stalk called a scape shoots up from the center in late spring to early summer. It looks alarming, like the plant is bolting and ruining itself, and that guess is understandable but wrong.
The scape is not a failure sign, it is a scheduling cue. Cut it off at the base once it curls one full loop, and the plant redirects energy straight into the bulb instead of a flower. Skip this step and you will still get garlic, just noticeably smaller.
Bulbing itself is triggered by day length and warming soil, roughly the same window as scape formation, and this is when the bulb actually splits into cloves underground where you cannot see it happening. Softneck varieties skip the scape entirely and bulb on the same rough timeline, so the absence of a scape is not a problem, it just means you are growing softneck.
What happens above ground next is your real signal that harvest is getting close.
Stage Six: Maturation and the Harvest Window
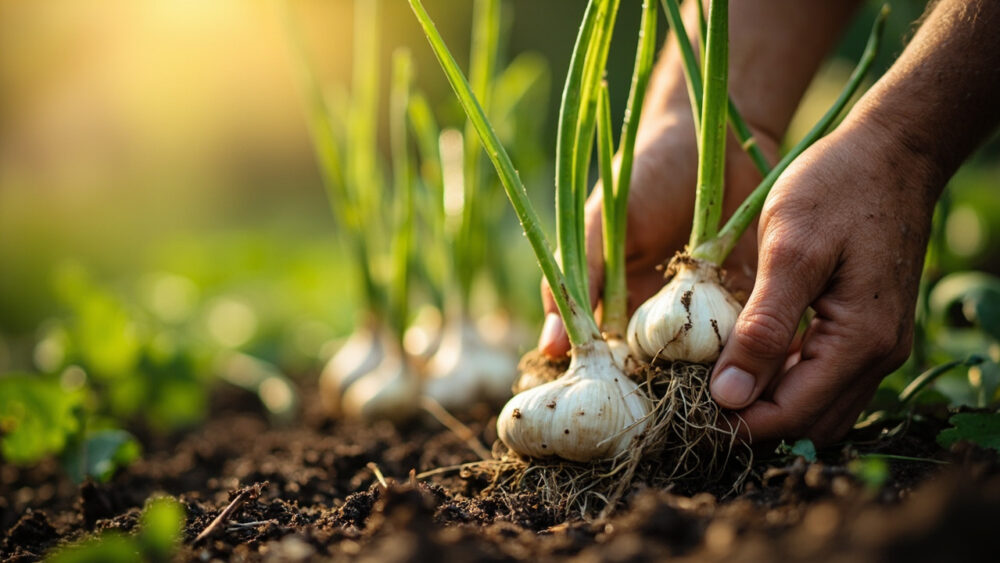
Roughly 7 to 9 months after planting, lower leaves start browning while upper leaves stay green. The correct harvest moment is when about 5 or 6 green leaves remain and the rest have browned, usually early to mid summer depending on climate.
Pull too early and cloves are undersized with loose wrappers that will not store. Wait until all leaves brown and bulbs often split their skins underground, exposing cloves to soil and rot, which wrecks storage life fast.
Stop watering about 1 to 2 weeks before you expect to harvest; wet soil at digging time invites staining and shortens storage. Dig, do not pull, using a fork to loosen soil first so you do not snap stalks off bulbs.
Healthy progress versus a stall comes down to one comparison worth checking now.
How to Tell Healthy Progress From a Stalled Crop
Healthy garlic has leaves that are noticeably bigger and greener each time you check, week over week, especially through spring. A stall looks like leaves staying the same size for two or more weeks, thin yellowish growth, or stalks that feel soft rather than firm at the base.
The most common cause of a real stall is waterlogged soil, garlic rots quickly in standing water, followed closely by nitrogen deficiency in poor soil that never got fed at green-up. Both are fixable if caught in spring. Neither is fixable once you are two weeks from harvest.
If growth has genuinely stopped and stalks are soft or discolored at soil level, dig one plant up and check the bulb before deciding whether the whole bed is worth saving.
Here is everything from every stage condensed onto one card.
Garlic at a Glance
- When to plant: 2 to 4 weeks before your ground freezes in fall, individual cloves pointed end up, 2 inches deep, 4 to 6 inches apart.
- Winter: dormant above ground, roots still developing below, needs a stretch of temperatures under about 40 F to bulb properly later.
- Spring green-up: shoots emerge as soil passes roughly 40 F, weed by hand and apply first light nitrogen feeding.
- Scapes (hardneck only): cut at the base once curled one loop, this redirects energy into the bulb.
- Watering: about 1 inch per week through leaf and bulb development, stop 1 to 2 weeks before harvest.
- Harvest sign: 5 to 6 green leaves remaining, the rest browned, typically 7 to 9 months after planting.
- Curing: hang or lay bulbs in a dry, shaded, airy spot for 2 to 4 weeks before trimming and storing.
Get the fall planting depth and the spring weeding right, and garlic mostly grows itself from there.
Everything else is just watching leaves and trusting the calendar you already set in October.