Growing peanuts at home means planting shelled raw peanuts (not roasted ones from the pantry) about 1.5 to 2 inches deep in loose, sandy soil once the soil hits 65°F, then waiting a full 120 to 150 days for the underground pods to mature. They need a long, warm, frost-free stretch and soil they can actually push through, which is exactly where most first-time growers go wrong.
The mistake that sinks more home peanut patches than anything else has nothing to do with watering or fertilizer. It happens underground, after the flowers show up, in a step nobody warns you about until it’s too late.
There’s also a sign a lot of gardeners misread completely, mistaking a plant that’s doing exactly what it should for one that’s failing. Stick with me, because the save-it-to-your-phone Peanuts at a Glance card is waiting at the bottom once you’ve got the full picture.
When to Plant Peanuts
Wait until the soil is genuinely warm, not just until frost danger has passed. Peanuts want soil temperature at 65°F or higher at planting depth, which usually lands two to three weeks after your last spring frost date.
Cold, wet soil rots the seed before it ever sprouts. If you’re in zone 7 or colder, you’re working with a tight window, since peanuts need 120 to 150 frost-free days depending on variety, so start as early as the soil allows and consider a shorter-season type.
Zones 8 through 10 have plenty of runway and can plant well into early summer.
Get the timing right and the rest of the season gets a lot more forgiving.
Choosing the Spot and Prepping the Soil
Peanuts need full sun, at least 6 to 8 hours a day, and soil that’s loose enough for developing pods to push into with almost no resistance. Heavy clay is the enemy here, not because the plant won’t grow, but because the pods struggle to form and are miserable to dig out later.
Sandy loam is ideal. If your soil is heavy, work in a couple inches of compost and coarse sand across the bed, and till it 8 to 10 inches deep so it’s genuinely loose, not just loose on top.
Aim for soil pH between 5.8 and 6.5. Peanuts also want calcium in the root zone specifically where the pods form, so if a soil test shows low calcium, work in gypsum at planting time rather than waiting until midseason.
Skip heavy nitrogen fertilizer here, peanuts fix their own nitrogen through root bacteria and too much extra nitrogen just grows leaves at the expense of pods.
Once the ground is right, planting itself is the easy part.
Step by Step: Planting Peanuts
- Shell your seed: crack raw, unroasted peanuts out of the shell right before planting, keeping the thin papery skin on the nut intact.
- Plant 1.5 to 2 inches deep in light soil, or closer to 1 inch deep if your soil runs a bit heavier.
- Space seeds 4 to 6 inches apart within the row, with rows 24 to 36 inches apart.
- Water in well right after planting to settle soil around the seed.
- Expect sprouts in 10 to 14 days in warm soil, slower in cooler conditions.
Once they’re up, the plant does something most vegetable gardeners have never watched happen before.
Watering and Feeding Through the Season
Keep soil evenly moist, not soggy, through germination and the first several weeks of growth. Peanuts handle brief dry spells fine once established, but they need consistent moisture during flowering and pod development, roughly 1 inch of water a week, more in sandy soil that drains fast.
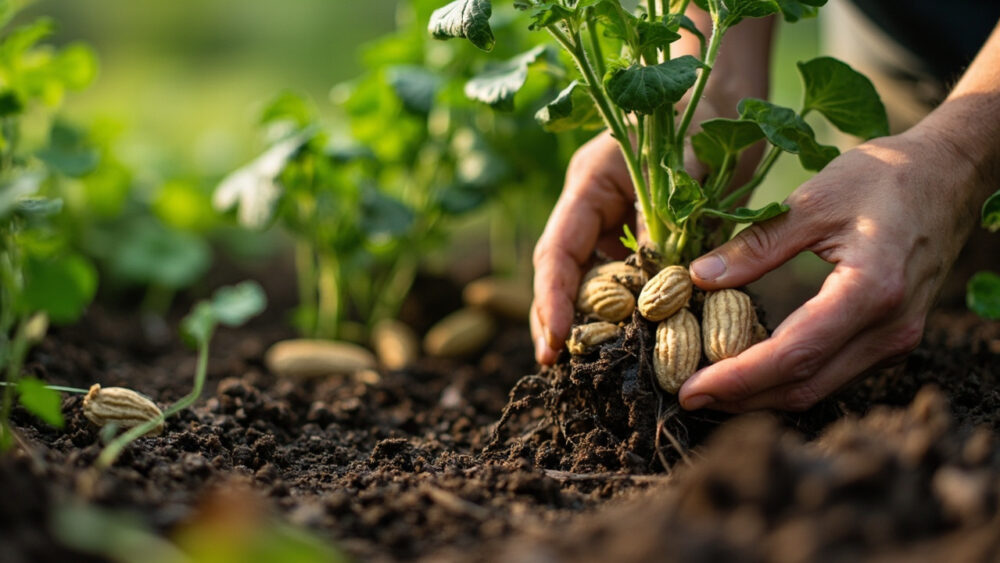
Here’s the sign people misread: about six to eight weeks in, the plant sends out small yellow pea-like flowers, and shortly after, thread-like stems called pegs grow downward from the base of the spent flowers toward the soil.
If you assumed those droopy stems flopping onto the dirt meant the plant was stressed or dying, that guess costs people their whole crop, because those pegs are exactly how peanuts form. Each peg has to bury its tip in the soil, and that buried tip is where the actual peanut develops.
This is the step nobody warns you about: once pegging starts, mound loose soil up around the base of the plant, almost like hilling potatoes, so the pegs have soft ground to reach and burrow into. Skip this and pegs that can’t reach loose soil simply fail to form pods.
Feed lightly with a low-nitrogen, phosphorus-and-potassium-leaning fertilizer at flowering, and that’s typically all they need.
Get the hilling right and you’ve cleared the hardest part of growing peanuts.
Problems Likely to Show Up
Peanuts are relatively trouble-free compared to most garden vegetables, but a few issues are common enough to plan for.
- Leaf spot fungus: small brown or dark spots on leaves in humid weather. Improve airflow between plants and remove badly affected foliage; a labeled fungicide can help in bad years, applied exactly per the label.
- Southern blight or root rot: wilting plants in hot, humid conditions, often from soil that stays too wet. Improve drainage and avoid planting peanuts in the same spot two years running.
- Squirrels, voles, and birds: the biggest real threat to home peanut patches, since these critters can smell ripening pods underground and dig them up before you do. Hardware cloth buried a few inches around the bed edge helps more than any spray.
- Weeds: shallow-rooted and easy to pull, but pull by hand near the plant base once pegging starts so you don’t disturb the buried pods.
None of this is usually fatal to the crop, and the bigger question on your mind now is probably just when to actually dig.
When and How to Harvest Peanuts
Peanuts mature in 120 to 150 days from planting, and the calendar alone won’t tell you when. The real signal is the plant itself starting to look tired, with lower leaves yellowing and the whole plant taking on a slightly ragged, worn-down look.
Dig a test plant before committing to the whole bed. Pull one up and check the pods, if the inside shells show a darkened, netted pattern and the kernels have filled out and taste sweet rather than watery, you’re close to ready.
Choose a dry day and loosen soil deeply with a garden fork before pulling, since ripe pods snap off easily if you just yank the plant.
After digging, don’t rush straight to eating them. Peanuts need to cure, hang whole plants upside down or lay pods out in a warm, dry, airy spot for 1 to 2 weeks, then cure the pulled pods further for another 2 to 3 weeks until shells are fully dry and rattle when shaken.
Skip curing and you’ll get soft, moldy peanuts within days, no matter how good the harvest looked coming out of the ground.
That waiting period is annoying, but it’s the difference between peanuts that store all winter and peanuts that rot in a bowl on your counter.
Peanuts at a Glance
- When to plant: two to three weeks after last frost, once soil hits 65°F or warmer.
- Depth and spacing: 1.5 to 2 inches deep, seeds 4 to 6 inches apart, rows 24 to 36 inches apart.
- Soil needs: loose sandy loam, pH 5.8 to 6.5, low nitrogen, added calcium at planting.
- Water: about 1 inch a week, most critical during flowering and pod fill.
- Key step: hill loose soil around the base once pegs appear, six to eight weeks in.
- Days to maturity: 120 to 150 days, confirmed by digging a test plant.
- After digging: cure 3 to 5 weeks total before eating or storing.
Get the soil loose and the hilling timed right, and peanuts basically grow themselves from there.
The wait for curing feels long, but rushed peanuts are the only ones that ever disappoint.