Learning how to grow mulberries starts with picking the right tree and giving it room, because mulberries grow fast, get big, and once established are nearly impossible to kill. Plant a bare-root or container tree in early spring after the ground thaws, in full sun, spaced 25 to 30 feet from structures and other trees. Skip the fussing over soil pH and drainage that fruit trees usually demand; mulberries are far more forgiving than that.
Here is where most people go wrong, though: they plant a mulberry too close to a patio, driveway, or pool, thinking it’s just a nice shade tree. Ripe mulberries drop constantly for weeks and stain everything they touch, and by the time anyone remembers that, the tree is 20 feet tall and moving it is not an option.
There is also a timing question almost nobody asks until it is too late: how do you know when the berries are actually ready, since they don’t all ripen at once and the unripe ones look deceptively close to ready. And there is the sign most people misread as disease when it is actually completely normal. Stick around, because the save-able Mulberries at a Glance card at the bottom covers spacing, timing, and harvest cues in one place for exactly this reason.
When to Plant Mulberries
Plant in early springonce the soil is workable and no longer frozen solid, roughly the same window you’d plant apple or pear trees. Bare-root trees go in while still dormant, before leaves emerge. Container trees are more flexible and can go in through late spring or even fall in mild climates.
Mulberries are hardy across a wide range, generally USDA zones 4 through 9 depending on the variety, so frost timing matters less here than it does for tender fruits. The real trigger is soil you can dig without it clumping into mud.
In hot-summer regions, fall planting lets roots establish before summer stress hits.
Choosing the Spot and Prepping the Soil
Full sun is non-negotiable if you want real fruit production, at least 6 to 8 hours a day. Mulberries tolerate partial shade but sulk on fruiting when they don’t get enough light.
They’ll grow in poor, sandy, clay, even compacted soil that would sulk most fruit trees. What they won’t tolerate is standing water, so avoid low spots where water pools after rain.
Work a few inches of compost into the planting area, but don’t overdo amendments. A mulberry planted in mediocre native soil often outgrows one babied with rich fertilized soil, because the roots get lazy when everything is handed to them.
Once you’ve picked the spot, the actual planting is where precision starts to matter.
Planting Mulberries Step by Step
1. Dig the hole wide, not deep
Dig a hole twice the width of the root ball but no deeper than it. Planting too deep is the single most common mistake and it slowly suffocates the roots over a year or two.
2. Set the tree at grade
The point where the trunk flares out to roots should sit right at, or very slightly above, the surrounding soil line. Backfill and tamp gently to remove air pockets.
3. Space for the mature size
Standard mulberries reach 30 to 50 feet tall and just as wide, so give them 25 to 30 feet from buildings, fences, and each other. Dwarf or weeping varieties can go as close as 10 to 15 feet.
4. Water in immediately
Give the new tree a slow, deep soak right after planting, enough to settle the soil around every root, not just a surface splash.
5. Mulch, but keep it off the trunk
Lay 2 to 3 inches of mulch in a ring extending 2 feet out, leaving a bare gap right at the trunk to prevent rot.
Get the depth and spacing right at planting and almost everything after this gets easier.
Watering and Feeding Through the Season
Water new trees deeply once or twice a week through their first summer, whenever the top 2 to 3 inches of soil feel dry. Established mulberries, meaning anything past its second full season, handle drought remarkably well and often need no supplemental water at all once roots are deep.
Feed lightly in early spring with a balanced fruit tree fertilizer or a layer of compost. Skip heavy nitrogen feeding on a tree that’s already fruiting, since it pushes leafy growth at the expense of berries.
If you’re growing for fruit rather than shade, resist the urge to overfeed. A mulberry that’s fed too well gets vigorous and green but stingy with berries.
Feeding is simple, but pests and problems deserve their own honest rundown.
Problems That Actually Strike Mulberries
Mulberries are genuinely low-drama trees, but a few things do show up.
- Popcorn disease: a fungal issue that swells berries into popcorn-like galls. Remove and destroy affected fruit and fallen debris; there’s no fungicide fix, only sanitation.
- Bacterial blight: causes blackened, wilted leaf tips in wet spring weather. Prune out affected shoots and improve airflow. It rarely kills an established tree.
- Root suckering: mulberries throw up shoots from the base or nearby roots. Cut them at ground level as they appear rather than letting a thicket form.
- Birds: the biggest real threat to your harvest, not disease. Netting is the only reliable defense if you’re competing for the crop.
One thing that alarms new growers but isn’t a problem at all: heavy leaf drop or a sudden flush of small, unripe green fruit falling in early summer. If your instinct says the tree is stressed or diseased, that guess is usually wrong. Mulberries naturally shed excess fruit set and some foliage in a hot dry stretch, and it’s a self-thinning response, not decline.
Once you know what’s normal, harvest timing is the last real skill to nail down.
When and How to Harvest Mulberries
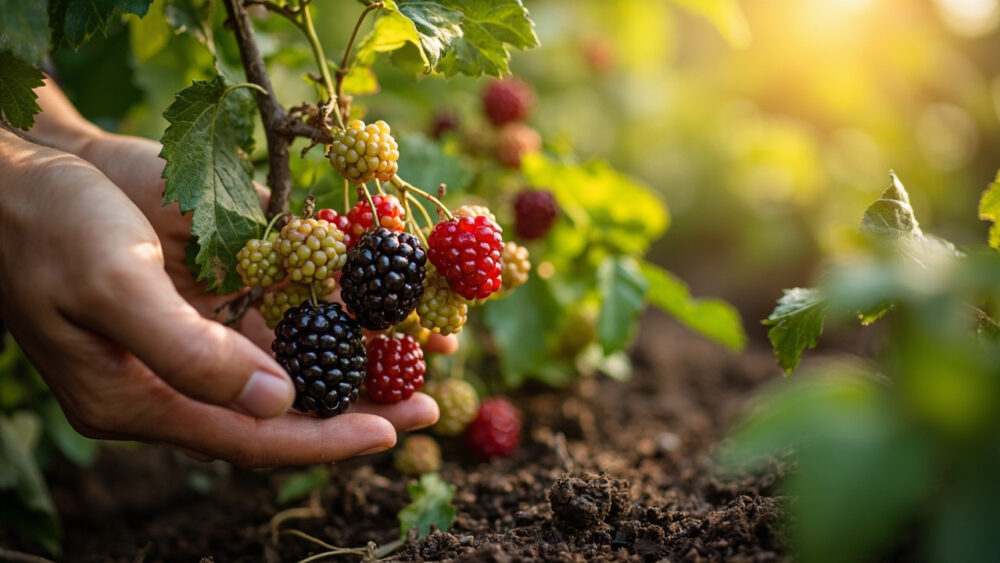
Mulberries ripen over several weeksnot all at once, typically starting in late spring to midsummer depending on your climate and variety. A ripe berry has gone fully black (or deep red, or white, depending on the variety) and comes off the branch with almost no resistance.
Here’s the part that trips people up: color alone lies. Berries can look dark red or purple-black and still taste sharp and underripe.
The real test is the tug. A ripe mulberry drops into your hand at the lightest touch. If you have to pull or twist it, leave it another day or two.
The easiest harvest method for a mature tree is the sheet trick: lay a tarp or old sheet under the canopy and shake the branches gently. Ripe berries rain down. Unripe ones stay put.
Mulberries don’t ripen further once picked, and they’re fragile, so plan to use or refrigerate them within a couple of days. This is also the moment worth knowing plainly: mulberry leaves and unripe green berries can cause stomach upset in people and pets, so keep an eye on curious dogs grazing fallen fruit, and call a veterinarian if a pet eats a large quantity of unripe fruit or shows distress.
Everything above is the full season in order, but here’s the condensed version for your phone.
Mulberries at a Glance
- When to plant: early spring once soil is workable, or fall in mild-winter climates for container trees.
- Sun and soil: full sun, 6 to 8 hours minimum, tolerant of poor soil but not standing water.
- Spacing: 25 to 30 feet from structures and other trees for standard varieties, 10 to 15 feet for dwarf types.
- Planting depth: root flare level with or just above the soil surface, never buried deep.
- Water: deep soak weekly for the first year, minimal once established.
- Watch for: popcorn disease and bacterial blight, both minor with sanitation and pruning. Birds are the bigger threat to your crop.
- Harvest cue: berries drop at the lightest touch, not by color alone, over several weeks in late spring to midsummer.
Get the spacing right at planting and the harvest right by touch, not color, and everything else about this tree takes care of itself.
Mulberries reward patience more than fuss, which is rare in the fruit tree world and worth appreciating.