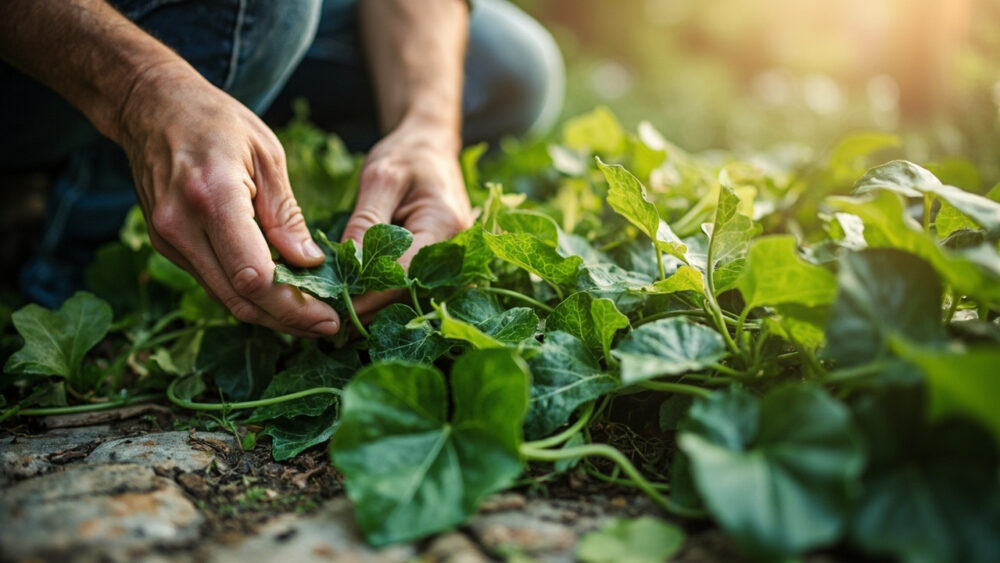
Learning how to grow English ivy comes down to three things: give it soil that drains but doesn’t dry out, keep it somewhere with at least a few hours of light, and stay ahead of pruning before it decides your fence, siding, or living room shelf is fair game. Plant divisions or rooted cuttings in spring or early fall, space them 12 to 18 inches apart if you’re covering ground, and expect real coverage within one to two growing seasons. It’s one of the easiest plants you’ll ever grow, which is exactly why it gets away from so many people.
There’s a mistake that ruins more ivy plantings than any pest or disease ever will, and it isn’t neglect. It’s the opposite. There’s also a sign on the leaves that panics new growers for no reason, and a real answer to the question you’re probably already forming: how do you stop this thing once it’s happy?
Stick around for the English Ivy at a Glance card at the bottom. It’s the version you’ll want saved to your phone before you’re standing in the nursery aisle or the potting soil bag next weekend.
When to Plant English Ivy
Plant in spring after the soil has warmed past 50°F, or in early fall while soil is still warm but air has cooled. Both windows give roots time to establish before summer heat or winter cold stresses a new planting. English ivy is hardy in USDA zones 4 through 9, and in the warmer end of that range it barely slows down, which is worth knowing before you commit it to a spot you can’t easily reach.
Indoors, timing barely matters. A potted ivy can go into fresh soil any month of the year as long as you’re not asking it to root in freezing temperatures near a drafty window.
Outdoors, fall planting in mild climates often outperforms spring, since roots get a full cool season to spread before top growth explodes.
Get the timing right and the next decision, where exactly to put it, matters even more.
Choosing the Spot and Prepping the Soil
English ivy tolerates deep shade better than almost anything you’ll plant, but it grows fastest in partial shade with a few hours of morning sun. Full, hot afternoon sun in southern climates can scorch the leaves, especially on variegated varieties.
Soil needs to drain but hold enough moisture that it doesn’t turn to dust between waterings. Loamy or slightly sandy soil works better than heavy clay, which stays soggy and invites root rot. If your soil is thick clay, work in some compost before planting rather than fighting it later.
Here’s the part people misjudge: this is not a plant that needs rich, heavily fertilized soil to thrive. Average garden soil, even mediocre soil, is usually enough. Overpreparing the bed with heavy feeding at this stage sets up problems you’ll read about two sections from now.
Once the spot is picked, the planting itself takes ten minutes.
Planting English Ivy Step by Step
1. Dig the hole
Dig a hole roughly twice as wide as the root ball and just as deep, so the crown sits level with the surrounding soil, not buried and not sitting high.
2. Space for the long game
Space plants 12 to 18 inches apart for ground cover that fills in within a season or two. For a wall or trellis, one plant every 24 inches is plenty, since a single vine can eventually cover far more territory than that.
3. Set and backfill
Loosen the root ball gently with your fingers if it’s pot-bound, set it in the hole, and backfill with the native soil you dug out. Firm it down but don’t compact it hard.
4. Water it in
Give it a slow, deep soak right after planting, enough that water reaches a few inches down, not just wets the surface.
The planting is the easy part; keeping it fed and watered without overdoing it is where habits start to matter.
Watering and Feeding Through the Season
Water new plantings often enough that the top inch or two of soil never fully dries out for the first month. Once established, outdoor ivy is genuinely drought-tolerant and often survives on rainfall alone in most climates, needing supplemental water only during extended dry stretches.
Potted indoor ivy is a different animal. Let the top inch of soil dry between waterings, then water thoroughly until it drains from the bottom. Soggy, constantly wet potting soil is the single fastest way to kill an indoor ivy.
Feed lightly, if at all. A diluted balanced fertilizer once in spring is enough for outdoor plantings. Indoors, feed monthly during active growth in spring and summer and skip it entirely in fall and winter.
If you assumed a struggling ivy needs more fertilizerthat’s usually backwards. Overfeeding pushes soft, fast growth that’s more prone to pests and less winter-hardy, which brings us to what actually goes wrong.
Problems That Actually Strike, and the Sign Everyone Misreads
The sign that alarms new growers most is small brown, crispy leaf edges or tips. Nine times out of ten that’s low humidity or underwatering indoors, or scorch from too much direct sun outdoors, not disease.
Spider mites and scale are the two pests actually worth watching for, especially on indoor plants. Fine webbing between leaves or tiny bumps along stems are the tells. Wipe leaves down periodically and treat with insecticidal soap or a labeled horticultural oil, following the product label exactly.
Bacterial leaf spot shows up as dark, water-soaked blotches, usually after prolonged wet conditions. Improve air circulation and avoid overhead watering, and remove badly affected leaves.
The real threat isn’t a disease at all. It’s ivy’s own ambition. Left unchecked outdoors, it climbs trees, smothers other plantings, and roots wherever a trailing stem touches soil.
English ivy is also mildly toxic if ingested, to both people and pets, and the sap can irritate skin on contact for sensitive people. If a pet eats a meaningful amount, symptoms can include drooling, vomiting, or mouth irritation; call your veterinarian rather than waiting to see how it plays out.
Controlling that ambition is where harvesting and maintenance actually earn their keep.
When and How to Harvest or Trim English Ivy
English ivy doesn’t have a harvest window in the fruit-and-vegetable sense. There’s no ripening moment you’re waiting for. Maturity here means the plant has enough established growth to trim, propagate, or use for cuttings, which usually happens within the first six months to a year.
The honest answer to stopping it is that you don’t stop it once, you manage it continuously. Cut back trailing stems any time during the growing season to control spread. Ivy tolerates hard pruning far better than most vines.
For indoor plants, trim leggy stems back to just above a leaf node whenever growth looks sparse or overly long, which also encourages fuller, bushier growth.
If you want new plants, cut 4 to 6 inch sections with at least two leaf nodes, strip the bottom leaves, and root them in water or moist soil. Roots typically show within two to four weeks.
Outdoors on the ground or a wall, plan on trimming back at least once or twice a year, more often in mild climates where it never really stops growing.
That single habit, regular cutting back, is the difference between ivy that behaves and ivy that becomes a genuine outdoor problem.
English Ivy at a Glance
- When to plant: spring after soil hits 50°F or early fall while soil is still warm, hardy in zones 4 through 9.
- Spacing: 12 to 18 inches apart for ground cover, 24 inches apart for climbing on a wall or trellis.
- Light and soil: partial shade to full shade, well-draining soil that isn’t allowed to fully dry out.
- Watering: keep new plantings consistently moist for the first month, then water established outdoor ivy only during dry spells, let potted ivy dry an inch down between waterings.
- Feeding: light, once in spring outdoors, monthly during spring and summer indoors, none in fall or winter.
- Watch for: spider mites, scale, and bacterial leaf spot, plus its own tendency to spread past its boundaries.
- Maintenance: trim back at least once or twice a year outdoors, more in mild climates, to keep growth in bounds.
The whole secret to English ivy is that it will grow almost anywhere you let it.
Your only real job is deciding, ahead of time, exactly where you won’t.