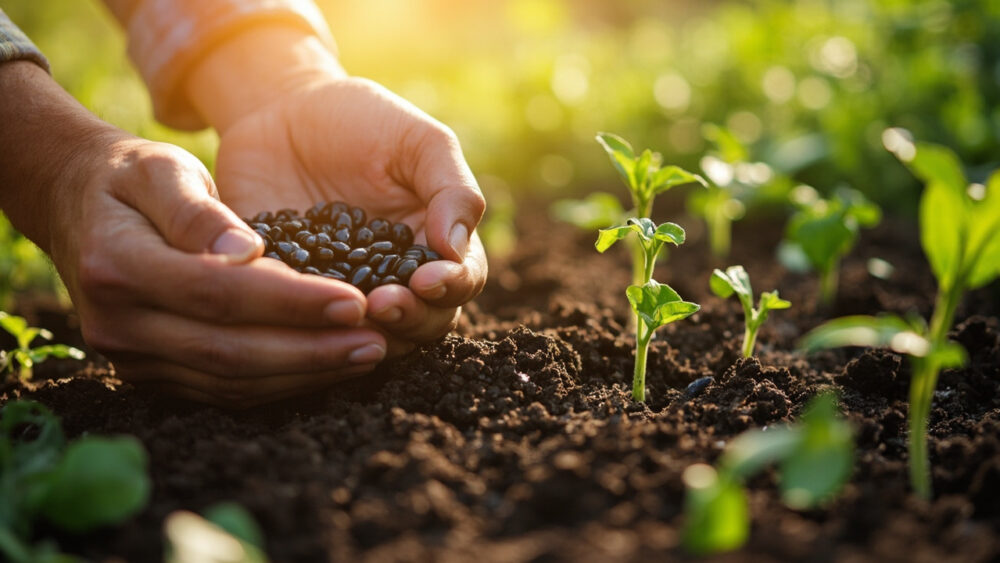
Black beans go in the ground after your last frost, once soil hits at least 60°F, direct-sown 1 inch deep and 3 to 4 inches apart in rows spaced 18 to 24 inches apart. They need a full 90 to 120 warm days to mature dry pods, so if you’re growing to actually harvest and store beans rather than eat them fresh, timing your planting to give the whole season is the real answer to how to grow black beans successfully.
Most first attempts fail for one of two reasons that have nothing to do with soil or watering. One is planting too early into cold soil, where the seed just rots instead of sprouting. The other is pulling the plants at the wrong moment, either too soon for full flavor and storage life, or too late after a rain has already cracked the pods open in the field.
There’s also a question almost nobody asks until it’s too late: how do you actually know a bean is “dry bean ready” versus just “green bean ready,” since they come from the same plant. That distinction is where most beginners lose half their crop. Stick with me through planting, feeding, and the pest that will absolutely find your beans, and I’ll give you a save-able Black Beans at a Glance card at the bottom with every number in one place.
When to Plant Black Beans
Black beans are warm-season plants with zero frost tolerance. A late frost after planting will kill young seedlings outright, and cold, wet soil rots the seed before it ever sprouts. Wait until soil temperature is reliably at 60°F or warmer, which usually lands 1 to 2 weeks after your last spring frost date.
If you’re not sure of your soil temperature, feel is a decent proxy: soil that’s still cold and damp to the touch 4 inches down isn’t ready, even if the calendar says it should be. In cooler zones (5 and below), you may need to wait into late May or early June. In zones 7 and warmer, you can often get a second planting in for a fall crop if you count back 100 to 120 days from your first fall frost.
Beans planted too early just sit and sulk, or rot.
Choosing the Spot and Prepping the Soil
Black beans want full sun, at least 6 to 8 hours a day, and soil that drains well. They’re not heavy feeders and actually perform worse in rich, high-nitrogen soil because it pushes leafy growth over pod production.
Work the bed to a loose texture down about 8 inches, and mix in an inch or two of compost if your soil is heavy clay or very sandy. Skip the high-nitrogen fertilizer at planting time. Beans are legumes and fix their own nitrogen through a relationship with soil bacteria, so overfeeding nitrogen is one of the few true mistakes that actively works against you here.
Aim for soil pH between 6.0 and 7.0. Get that right and most of your feeding work is already done before you plant.
Planting Black Beans Step by Step
Black beans don’t transplant well, their roots resent disturbance, so direct-sow rather than starting indoors.
Step by step
- Depth: sow seeds 1 inch deep, slightly deeper (up to 1.5 inches) in sandy soil that dries fast.
- Spacing: space seeds 3 to 4 inches apart within the row.
- Row spacing: leave 18 to 24 inches between rows for airflow and easy weeding.
- Water in: water gently right after planting to settle soil around the seed, then hold off until you see germination.
- Germination: expect seedlings up in 7 to 10 days in warm soil.
- Thinning: once seedlings are up, thin to one plant every 4 inches if you seeded heavier as insurance.
Resist the urge to soak seeds overnight before planting. It can crack the seed coat and cause uneven, mushy germination in beans specifically, unlike peas which tolerate a soak fine.
Once they’re up and growing, the season becomes about water, not fuss.
Watering and Feeding Through the Season
Black beans want consistent moisture while flowering and setting pods, roughly 1 inch of water a week from rain or irrigation. Uneven watering during flowering is the single biggest cause of poor pod set, more so than any pest.
Once pods are filling out and beginning to dry, ease off watering. Beans destined to dry down for storage actually want a drier finish, and too much late moisture invites mold in the pods.
Skip nitrogen fertilizer entirely once plants are established, for the reason covered above. If you want to feed at all, a light dose of compost or a low-nitrogen, phosphorus-and-potassium-leaning feed at flowering is plenty.
Mulch around the base once plants are a few inches tall. It holds moisture and keeps weed competition down without you having to hover over the bed.
Water right and feed light, and the plants mostly manage themselves from here.
Problems That Actually Show Up
Mexican bean beetles and aphids are the most common visitors, both recognizable by stippled or skeletonized leaves and, for aphids, a sticky residue and curled new growth. Handpicking beetle larvae and blasting aphids off with a strong jet of water handles light infestations. For anything heavier, an insecticidal soap applied per the product label is the standard cultural response.
Fungal issues like rust or bacterial blight show up as spotted, yellowing, or water-soaked-looking leaves, usually after a stretch of humid weather or overhead watering that keeps foliage wet. Water at the soil line instead of overhead, and give plants the full 18 to 24 inches of row spacing so air actually moves between them.
Root rot from soggy soil is the other real threat, especially if you planted in poorly drained ground. There’s no fixing rotted roots once it’s advanced, so prevention through good drainage is the only real cure.
Handle these early and they rarely cost you the season, but ignore them and they will.
When and How to Harvest Black Beans
Here’s the distinction that trips up almost every first-time grower: black beans for drying are not harvested green like snap beans. You let them go all the way to the end.
The honest sign to watch for is the whole plant, not just the pods. Foliage yellows and drops, and pods turn from green to tan, then to a dry, papery brown, usually 90 to 120 days after planting depending on your variety and season length. Inside, the beans themselves should be hard and fully black, not soft or greenish.
If you’ve grown snap beans before, your instinct will be to pick early. Resist it here. Pulling pods while they’re still green or leathery gets you underdeveloped beans that won’t store or cook properly, no matter how long you dry them afterward.
Once most pods on a plant are dry and brittle, pull the entire plant and finish drying it indoors, hung upside down or laid on a screen in a dry, airy spot out of direct sun, for 1 to 2 weeks. Then shell the pods by hand or by rubbing them between your palms, and let the shelled beans cure a few more days on a tray before storing.
Store fully dried beans in an airtight container in a cool, dark spot, where they’ll keep well for a year or more.
If a rain is coming and pods are close to dry, pull the plants and finish them indoors rather than risk splitting or mold in the field.
Black Beans at a Glance
- When to plant: after your last frost, once soil is at least 60°F, usually 1 to 2 weeks past frost date.
- Depth and spacing: sow 1 inch deep, 3 to 4 inches apart, in rows 18 to 24 inches apart.
- Sun and soil: full sun, 6 to 8 hours minimum, well-drained soil with pH 6.0 to 7.0.
- Watering: about 1 inch a week during flowering and pod set, tapering off as pods dry down.
- Feeding: skip nitrogen fertilizer, light compost or low-nitrogen feed at flowering is enough.
- Days to maturity: 90 to 120 days from seed to fully dry, harvest-ready pods.
- Harvest signal: pods tan and papery, beans inside hard and fully black, plant foliage yellowing and dropping.
Get the soil warm before you plant and let the pods go fully dry before you pick, and black beans mostly grow themselves.
Everything else is just weather, patience, and staying ahead of the bugs.