Learning how to grow apples starts with one decision most people get wrong before they even buy a tree: picking a variety that actually needs a second tree nearby to produce fruit. Plant a bare-root tree in late winter to early spring while it’s still dormant, give it full sun and a spot with real air movement, and expect your first real harvest in three to five years. That timeline sounds slow, but a healthy apple tree will produce for thirty years or more, so the setup work at the start pays off for decades.
Here’s what nobody tells you at the garden center. Most apple varieties are not self-pollinating, so a single lonely tree in your yard may bloom beautifully every spring and never set fruit. There’s also a pruning mistake that costs people an entire season of growth, and a watering habit that seems careful but actually starves young roots of oxygen.
I’ll walk through all of it here, in order, from planting day through the afternoon you finally twist a ripe apple off the branch. Stick around to the end and you’ll find a save-able “Apples at a Glance” card with the exact numbers you’ll want pulled up on your phone at the nursery.
When to Plant Apple Trees
Bare-root trees go in the ground while dormant, which in most regions means late winter through early spring, roughly four to six weeks before your last expected frost. Soil should be workable, not frozen or waterlogged, and cool soil is actually fine since the tree isn’t pushing leaves yet.
Container-grown trees are more forgiving. You can plant those in spring or fall as long as the ground isn’t frozen, though fall planting in zones 5 and colder risks winter damage to unestablished roots.
In warmer zones, 7 and up, fall planting often works better since it lets roots settle before summer heat arrives.
Getting the timing right matters less than getting the spot right, and that’s where most new orchards go wrong.
Choosing the Spot and Prepping the Soil
Apples want full sun, at least six to eight hours a day, and they want it consistently, not dappled shade under a bigger tree. Poor sun exposure is a slow, quiet killer: the tree survives but never fruits well.
Air movement matters more than people expect. A low spot where cold air pools and stays still all night is an invitation for frost damage on spring blossoms and fungal disease all summer. Slightly elevated ground with open air around it beats a sheltered corner against a fence.
Soil should be well-draining and slightly acidic, in the 6.0 to 6.8 pH range. If water sits on the surface an hour after a heavy rain, that spot will drown apple roots eventually. Work compost into the top 12 inches of a planting area roughly 3 feet across, but skip fresh manure or heavy fertilizer at this stage. It’s not needed yet, and it can burn young roots.
Now for the decision that determines whether any of this soil prep even matters.
The Pollination Problem Everyone Misses
If you assumed one tree is enough because it flowers every spring, that assumption is exactly what leaves people with a beautiful, fruitless tree for years. Most apple varieties need a different variety blooming nearby, within about 50 to 100 feet, at the same time, so their flowers can cross-pollinate.
A few varieties are self-fertile enough to produce alone, but even those bear more heavily with a partner nearby. Crabapples work as pollinators too, and they’re often already growing in a neighbor’s yard, which is why some solo trees do surprisingly fine.
Check bloom times before you buy. An early-blooming variety and a late-blooming variety often miss each other entirely and won’t pollinate one another even if planted side by side.
Once pollination is sorted, the actual planting is the easy part.
Planting Step by Step
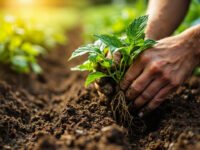
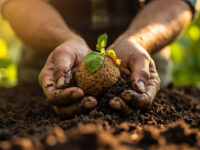
- Dig the hole: twice as wide as the root system and just deep enough that the graft union, the noticeable bump near the base of the trunk, sits 2 to 3 inches above final soil level.
- Spread the roots: tease bare roots outward in the hole rather than letting them coil or bend upward against the sides.
- Backfill gradually: add soil in stages, watering partway through to settle it and remove air pockets, rather than dumping it all in at once.
- Firm gently, don’t pack: compacted soil around new roots blocks the oxygen they need to establish.
- Water deeply: give it a slow soak right after planting, enough to settle the soil fully around the roots.
- Stake if needed: young trees in windy spots benefit from a single stake for the first year, removed once the trunk thickens.
Spacing depends on rootstock. Dwarf trees need about 8 to 10 feet between them, semi-dwarf need 12 to 15 feet, and full-size standard trees need 18 to 30 feet. Crowded trees compete for light and airflow, and poor airflow is a direct invitation to fungal disease later.
Get the tree in the ground correctly and the next test is what you do with a hose over the following weeks.
Watering and Feeding Through the Season
New trees need consistent moisture for their first two growing seasons, roughly 1 to 2 inches of water a week between rain and irrigation, delivered slowly and deeply rather than as a quick daily sprinkle.
Here’s the watering mistake that looks responsible but isn’t. Frequent shallow watering trains roots to stay near the surface, where they’re vulnerable to drought and cold. A deep soak once or twice a week beats a light sprinkle every day, because it pushes roots down where conditions stay stable.
Check soil moisture by feeling it 3 to 4 inches down. If it’s dry there, water. If it’s still damp, wait.
Skip fertilizer at planting time. Starting the following spring, a balanced fertilizer applied once as new growth begins is usually enough for young trees; mature, fruiting trees benefit from an early spring feeding as well, following the product label rate for tree size. Too much nitrogen pushes soft leafy growth at the expense of fruit and makes trees more attractive to pests.
Feed and water right, and most of your remaining problems come from the sky and the bugs, not from your hose.
Problems That Actually Show Up
Apple scab is the most common headache in humid climates, showing up as dark, scabby blotches on leaves and fruit. It thrives in wet, still conditions, which is exactly why airflow and spacing matter so much earlier in this guide.
Fire blight causes blackened, wilted shoot tips that look scorched. It spreads fast in warm, wet spring weather and infected branches need to be pruned out well below the visible damage.
Codling moth larvae are the classic worm-in-the-apple problem. Traps and properly timed treatments help, but the real defense is cleaning up fallen fruit all season so larvae can’t complete their life cycle in the soil beneath the tree.
For any of these, a fungicide or pesticide labeled for the specific problem, applied exactly per its label instructions and timing, is the reliable fix; skip homemade guesswork on timing since these products work in narrow windows.
Pruning is the other place people lose a season without realizing it. Prune in late winter while the tree is still dormant, removing crossing branches, dead wood, and anything growing straight up through the center. Prune in summer or fall instead, and you risk removing the very buds that were about to become next year’s fruit.
Handle disease pressure and pruning timing correctly, and the tree mostly takes care of the rest, right up until harvest day raises its own question.
When and How to Harvest
Apples are ready when the background color behind any blush has shifted from green to yellow or cream, and the fruit twists off the branch with a gentle turn rather than needing to be yanked or cut.
The honest answer is that taste is the real test. Color can be misleading depending on variety, so pick one, bite it, and judge the crispness and sweetness against what that variety is supposed to taste like ripe. Depending on variety and climate, harvest typically runs from mid to late summer for early varieties through mid-fall for late-keeping ones.
Fruit that drops on its own before you’ve started picking is usually a sign you’re already a bit late, not a sign to wait longer.
Store harvested apples cool, around 30 to 40°F with high humidity, and they’ll keep for weeks to months depending on variety, far longer than anything sitting on a warm kitchen counter.
That first satisfying twist off the branch is the payoff for everything above it, and here’s the whole guide condensed for your phone.
Apples at a Glance
- When to plant: bare-root trees while dormant, four to six weeks before last frost, or container trees in spring or fall depending on your zone.
- Sun and site: six to eight hours of direct sun daily, with open air movement and no low, frost-pooling spots.
- Spacing: 8 to 10 feet for dwarf rootstock, 12 to 15 feet for semi-dwarf, 18 to 30 feet for standard.
- Planting depth: graft union sits 2 to 3 inches above final soil level, roots spread wide, not coiled.
- Pollination: plant two different varieties with overlapping bloom times within 50 to 100 feet, since most apples aren’t self-fertile.
- Water: 1 to 2 inches per week for young trees, delivered as a deep soak, not daily light sprinkles.
- Harvest sign: background skin color shifts from green to yellow or cream, fruit twists free easily, taste confirms ripeness.
Get the pollination partner and the planting depth right, and apples forgive almost everything else.
The rest is patience, a few seasons of it, until that first real harvest arrives.