You grow turmeric by planting a piece of rhizome (a knuckle-sized “finger” with at least one visible growth bud) about 2 inches deep in warm, loose soil once nighttime temperatures stay above 55°F, then giving it 8 to 10 months of heat, humidity, and steady moisture before digging up the whole clump in fall. That is the entire arc of how to grow turmericbut the timing is where almost everyone gets tripped up.
Most failed attempts do not fail from bad soil or poor watering. They fail because the grower planted too early in cold ground and the rhizome just sat there and rotted, or because they expected a harvest after three months and gave up right when the plant was finally getting started.
There is also a sign most people misread completely: when the leaves start yellowing and flopping over in early fall, the instinct is to panic and think you killed it. That is actually turmeric telling you it is ready.
Stick around and I will cover the mistake that costs people their whole season, the honest timeline nobody wants to admit, and the exact harvest signs to watch for. There is also a save-able “Turmeric at a Glance” card at the bottom with every number in one place.
When to Plant Turmeric
Turmeric is a tropical rhizome and it has zero tolerance for cold soil. Wait until soil temperature is reliably above 60°Fwhich usually lines up with two to three weeks after your last spring frost date, not the date itself.
In cooler climates (roughly zone 7 and north), start rhizomes indoors in pots 6 to 8 weeks before your last frost, then transplant out once nights stay above 55°F. Zones 8 and warmer can plant directly in the ground.
Turmeric needs a long warm season, 8 to 10 months of frost-free growth, so gardeners north of zone 9 are almost always growing it as an annual dug up before first fall frost, or growing it in containers that can come indoors.
Get the timing wrong here and nothing else you do matters.
Choosing the Spot and Prepping the Soil
Turmeric wants partial shade to filtered sun, especially in hot climates. Full blazing sun all day in the desert Southwest will scorch the leaves; further north, more sun is fine and actually helps.
Soil needs to be loose, rich, and well draining. Turmeric rhizomes rot fast in heavy clay or soil that stays soggy. Work in a few inches of compost or aged manure before planting, and if your soil is dense clay, consider raised beds or large containers instead of fighting it.
Aim for a slightly acidic to neutral pH, around 6.0 to 6.5. This is a hungry, moisture-loving plant, but hungry and moisture-loving is not the same as swampy.
Once the bed is ready, the actual planting takes ten minutes.
Planting Turmeric Step by Step
1. Select and prep your rhizome
Choose a firm, plump piece with at least one, ideally two or three, visible eye buds (small pointed nubs, like on a ginger root). Break or cut larger rhizomes into 1.5 to 2 inch pieces, each with a bud.
2. Let cut pieces callus (optional but smart)
If you cut a fresh piece, let it sit out of direct sun for a day so the cut end dries slightly. This cuts down on rot risk once it goes in damp soil.
3. Plant at the right depth and spacing
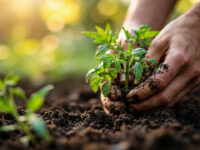
Plant each piece 2 to 3 inches deep, bud facing up, spaced 8 to 12 inches apart. In containers, use one rhizome per 12-inch pot, or several spaced out in something larger and at least 12 inches deep.
4. Water in, then be patient
Water thoroughly after planting, then keep soil moist but not saturated. Sprouting is slow: expect 2 to 4 weeks before you see any green shoots, sometimes longer in cooler soil.
That long silent stretch before sprouting is exactly where the next mistake happens.
Watering and Feeding Through the Season
If you assumed no visible growth means you should water more, that guess is what drowns most rhizomes in the first month. The fix is patience, not more water. Keep soil evenly moist, like a wrung-out sponge, and let the top inch dry slightly between waterings until shoots appear.
Once leaves are up and growing, turmeric turns into a heavy feeder. Water consistently, aiming for soil that never fully dries out, especially through peak summer heat.
Feed every 3 to 4 weeks with a balanced fertilizer, or work compost into the soil surface mid-season. High humidity and warm temperatures push faster growth, so a plant in a hot, humid climate will drink and eat more than the same plant in a drier one.
Mulch around the base to hold moisture and moderate soil temperature.
Feed it right through summer and the plant will reward you with a surprisingly tall, lush stand of leaves.
Problems That Actually Show Up
Rhizome rot is the number one killer, almost always from soil that stays too wet, especially early in the season before roots are established. Improve drainage and ease off watering rather than reaching for a fungicide first.
Leaf spot and general fungal issues can appear in humid, still air. Space plants for airflow and avoid overhead watering late in the day. If a fungal problem persists, use a fungicide labeled for the issue and follow the product label exactly.
Slugs and snails will chew young leaves in damp mulch; handpicking or a labeled bait product handles most infestations.
Aphids sometimes cluster on new growth. A strong water spray or insecticidal soap, applied per the label, usually clears them.
None of these are usually fatal if you catch them early, and none of them tell you as much as what the leaves do at the end of the season.
When and How to Harvest Turmeric
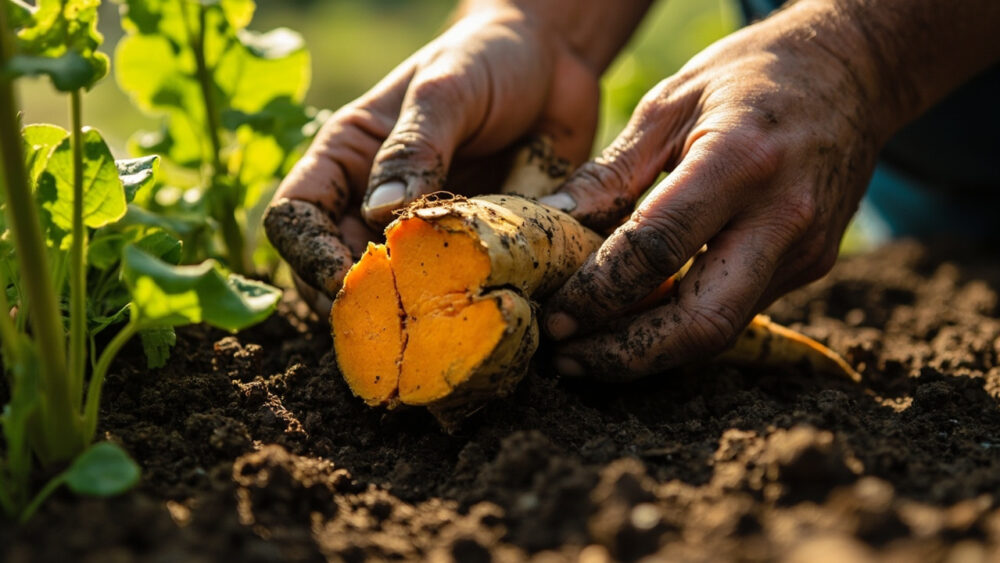
Turmeric is ready 8 to 10 months after planting, when the leaves and stems yellow, dry out, and flop over. This happens naturally as the plant goes dormant heading into fall, and it is the plant finishing its job, not dying from neglect.
In most climates this lands anywhere from early fall to just before your first frost. If frost is coming and the plant has not yellowed yet, harvest anyway. Frost damages rhizomes fast.
How to dig it up
- Loosen soil generously around the base with a fork, staying 6 to 8 inches out from the stem to avoid slicing rhizomes.
- Lift the entire clump by hand rather than yanking the stem.
- Shake or brush off loose soil, then rinse gently.
- Set aside a few plump, healthy rhizomes with good buds to replant next season.
- Cure the rest by letting them dry in a warm, airy spot for a few days before storing or processing.
Fresh turmeric can be used right away, sliced or grated, and stores in the refrigerator for a couple of weeks, or in the freezer much longer.
Everything above works, but here is the whole thing condensed to what actually needs saving.
Turmeric at a Glance
- When to plant: two to three weeks after last frost, once soil is consistently above 60°F, or start indoors 6 to 8 weeks early in cooler zones.
- Where it grows well: zones 8 to 11 outdoors as a perennial, elsewhere as an annual or container plant brought in before frost.
- Planting depth and spacing: 2 to 3 inches deep, buds facing up, 8 to 12 inches apart.
- Light and soil: partial shade to filtered sun, loose rich soil, pH 6.0 to 6.5, good drainage is non-negotiable.
- Watering: consistently moist, not soggy, ease off until shoots emerge in 2 to 4 weeks, then water freely through summer.
- Feeding: balanced fertilizer or compost every 3 to 4 weeks during active growth.
- Harvest timing: 8 to 10 months after planting, when leaves yellow and flop over, or before first frost regardless of leaf color.
Get the soil temperature and drainage right at planting, then leave the plant alone to do its slow, quiet work all summer.
The yellow, floppy leaves in fall are not a problem to fix, they are your harvest notice.