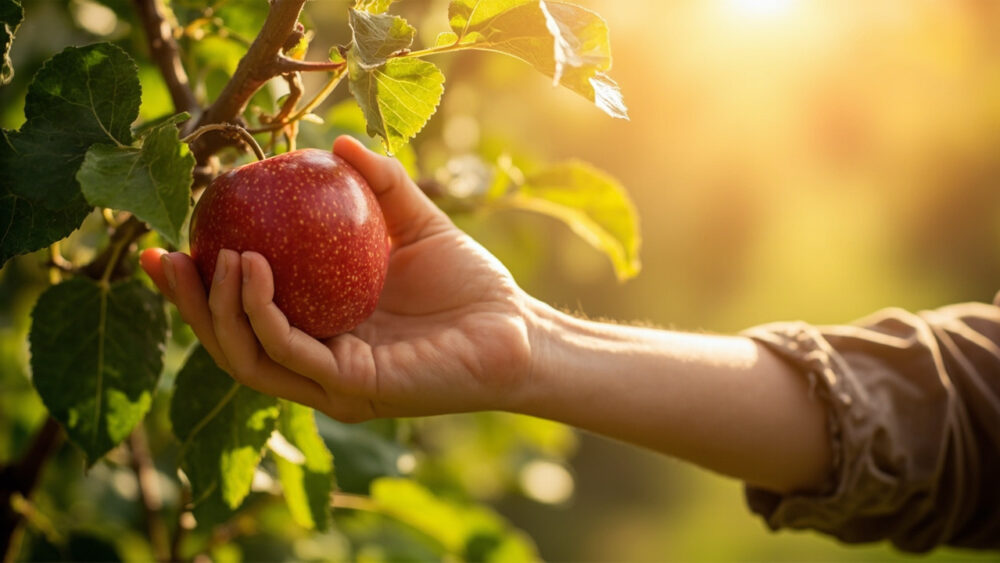
The core test takes five seconds: cup an apple in your palm, lift and twist gently. If it separates from the branch with the stem intact, it is ready. If it clings and you have to yank, give it more time. Most apples hit that point somewhere between late summer and mid fall depending on variety and climate, but the twist test overrides any date on a calendar.
There is a mistake almost every first-time grower makes, and it has nothing to do with color. It is picking by red skin alone, which sends a huge share of apples into storage a week or two before they are actually ready. There is also a sign most people misread as a bad omen when it is actually good news, and a real dilemma waiting right after harvest that nobody warns you about: what to do with a tree that ripens forty pounds of fruit over three confusing weeks instead of all at once.
Stick around for all of it, including the Apples at a Glance card at the bottom of this page. Save it before you head out to the tree, because once your hands are full of fruit you will not want to be scrolling.
The Real Ready Signs, Not Just Red Skin
Color is the least reliable clue you have, because plenty of varieties blush red weeks before the flesh inside is actually sweet and starchy sugars have converted. Golden Delicious and Granny Smith never turn red at all, so color tells you nothing useful on those.
What actually matters is a combination of three things: background color, seed color, and how the fruit releases from the spur.
Background color
Look past the red blush to the base color underneath, usually visible on the shaded side of the apple. It should be shifting from a hard green to a softer yellow or cream. Green-green background means wait.
Seed color
Cut one test apple open. Ripe seeds are dark brown to nearly black. Pale tan or white seeds mean the fruit needs more time on the tree, no matter how good it looks outside.
The stem release
This is the twist test from the intro, and it is the single best field check you have. A ready apple lets go with a clean snap, stem attached, almost no resistance.
None of these signs work alone, which is exactly why the next section on timing matters so much.
Windfall Apples Are a Green Light, Not a Warning
Here is the sign everyone misreads. When a few apples start dropping on their own before you have picked anything, most people panic and assume disease, pests, or a tree in trouble. Usually it just means the tree has started ripening and is naturally thinning itself.
A handful of drops a day is completely normal in the final one to two weeks before a full harvest, especially after wind or a hard rain. Check one of the drops with the seed test above. If the seeds are dark and the flesh tastes right, that tree is telling you it is close, not that something is wrong.
What is not normal is sudden mass dropping of mostly green, immature fruit, which usually points to drought stress, a heavy pest load, or the tree simply overloaded with more apples than it can support. That is a different conversation than ripening.
Normal drop is a countdown clock, not a fire alarm, and the actual timing window is where things get specific.
The Timing Window, and What Early or Late Costs You
Apple varieties ripen across a wide window, and that spread is the whole reason date-based advice fails. Early varieties like Gala and Ginger Gold often come off the tree in later summer. Mid-season types like Honeycrisp and Jonagold usually follow a few weeks after. Late varieties like Fuji, Granny Smith, and most storage apples such as Arkansas Black hang on into mid or even late fall, sometimes needing a light frost to fully sweeten.
Picking early is the mistake that costs the most flavor. Underripe apples are starchy, tart in an unpleasant flat way rather than a bright way, and they do not sweeten further once picked. Apples ripen on the tree, not on the counter, unlike bananas or tomatoes.
Picking late has its own cost. Overripe fruit turns soft, mealy, and drops heavily, and it bruises the instant you touch it, which shortens storage life to almost nothing. A light frost or two is fine and even improves flavor in many late varieties, but a hard freeze while fruit is still on the branch will damage texture for good.
Get the window right and the harvest step itself is simple, but only if you do it correctly.
How to Pick an Apple Without Wrecking Next Year’s Crop
The step people get wrong is the yank. Pulling straight down or ripping an apple off tears the spur, the short woody stub the fruit grows from, and that same spur is what produces apples again next year. Damage enough spurs and you are trading this year’s ease for a lighter harvest down the road.
Do it this way instead:
- Cup the apple in your palm rather than gripping just the fruit.
- Lift up and rotate in one smooth twist, do not pull downward.
- Let it release naturally with the stem attached to the apple, not the tree.
- Set, don’t drop, apples into a padded bucket or lined harvest bag, since bruises show up as brown spots within days.
- Work from the outside in, picking the lowest, most accessible fruit first and working up with a ladder for the rest.
A bruised apple is not ruined, but it is now a today apple, not a storage apple.
What to Do in the First Few Hours
Sort immediately, before anything goes in a box for the long haul. Separate anything bruised, split, or insect-damaged from the clean, perfect fruit, because one bad apple genuinely does accelerate rot in the ones around it through the ethylene it releases.
Cool them down fast. Apples fresh off the tree hold field heat, and that heat speeds ripening and shortens storage life. Get them into shade immediately and into a cool space, ideally near 32 to 40 degrees Fahrenheit, within a few hours if you plan to store rather than eat them soon.
Do not wash apples before storing. Moisture on the skin invites mold in storage, so wipe off visible dirt with a dry cloth instead and save washing for right before you eat or cook with them.
Bruised and imperfect fruit still has a job, and that is the next problem to solve.
Handling the Uneven Ripening Nobody Warns You About
This is the honest follow-up problem from the intro. A single tree does not ripen all at once, even within one variety, because fruit on the sunnier south and west side ripens before fruit tucked in shade. Expect to make two or three passes through the same tree over one to three weeks rather than one big harvest day.
Use the bruised and imperfect fruit fast, within a few days, for sauce, cider, or baking, since those apples were never candidates for long storage anyway. Save only unblemished, properly ripe apples for the root cellar or fridge.
For storage, firm, late-season varieties like Fuji, Granny Smith, and Arkansas Black keep for months in cold, humid conditions near 32 to 40 degrees Fahrenheit. Softer, early varieties like Gala hold for weeks, not months, no matter how carefully you store them.
Check stored apples every couple of weeks and pull any that are softening, because that single soft apple is the one that takes down its neighbors.
Apples at a Glance
- Ready test: cup and gently twist the apple, it should separate cleanly with the stem attached, no yanking needed.
- Timing window: early varieties like Gala ripen in later summer, mid-season types like Honeycrisp a few weeks after, late varieties like Fuji and Granny Smith into mid or late fall.
- Confirm with a cut test: ripe seeds are dark brown to black, pale seeds mean wait longer.
- Normal drop: a few apples falling on their own in the final week or two before harvest is a good sign, not a problem.
- How to pick: lift and twist, never pull straight down, to protect the fruiting spur for next year.
- After picking: sort out bruised fruit immediately, cool clean apples fast, skip washing until you are ready to use them.
- Storage: firm late varieties keep for months near 32 to 40 degrees Fahrenheit and high humidity, soft early varieties only for weeks.
When in doubt, trust the twist and the seed, not the color. Get those two right and everything else about apple harvest takes care of itself.