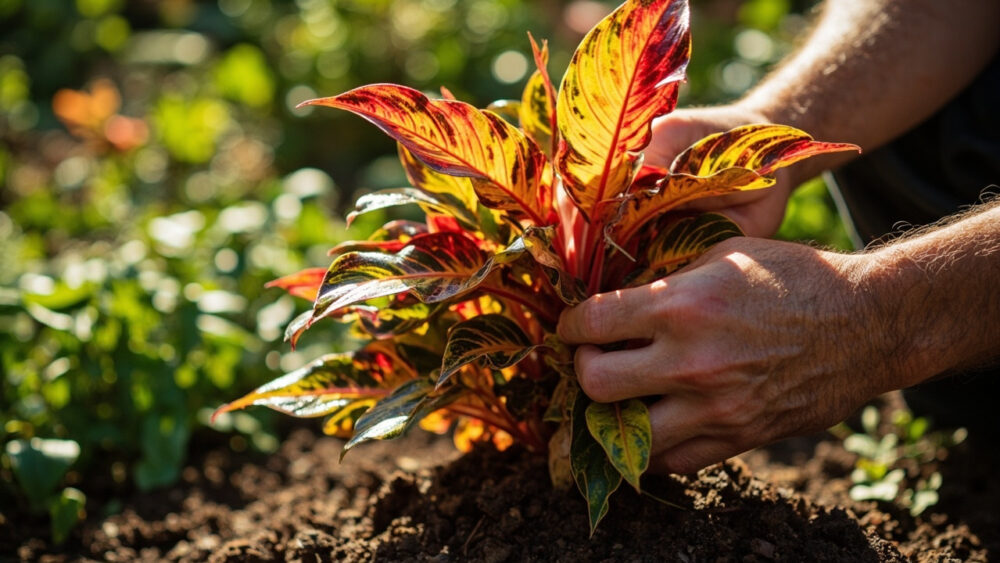
Here’s how to care for croton in one breath: bright light for at least four to six hours a day, water only when the top inch or two of soil dries out, temperatures that never dip below 55°F, and steady humidity above 40 percent. Get those four things right and the plant does the rest, throwing out the red, orange, and yellow leaf color that made you buy it in the first place. Get them wrong and croton drops leaves fast, often with no warning you’d recognize until it’s already happened.
Most people lose their croton in the first six weeks, and almost never to neglect. It’s usually the opposite: a well-meaning move to a “better” spot, a change in water routine, or a draft nobody noticed. The mistake that ruins most attempts isn’t underwatering or forgetting the plant exists. It’s moving it around too much right when it’s trying to settle in.
Before we get to the fixes, there’s also a sign almost everyone misreads as a watering problem when it’s actually about light, and an honest answer to the question you’re probably about to ask about that leaf drop happening right now. Stick around for the Croton at a Glance card at the bottom. It’s the version you’ll want saved to your phone for the next time you’re standing in front of the plant unsure what to do.
Light, Placement, and Temperature
Croton wants bright light, ideally some direct sun in the morning or late afternoon. An east or west-facing window is close to ideal. Without enough light, new leaves come in mostly green, losing the red and orange patterning that’s the entire point of the plant.
If you assumed a dim corner is fine because the plant “tolerates low light,” that assumption is exactly what turns a $30 croton into a plain green shrub within a couple of months. It survives low light. It does not perform in it.
Temperature matters just as much as light. Keep croton between 60°F and 85°F, and never let it sit near a cold window pane, an exterior door, or an AC vent blowing directly on it. Anything below 50°F for more than a short stretch can cause sudden, dramatic leaf drop.
That sudden leaf drop you might be dealing with right now is often a temperature or draft event from days earlier, not something happening today.
Watering: How Much, How Often, and How to Tell
Water croton when the top 1 to 2 inches of soil feel dry to a finger poked in. Depending on light, pot size, and season, that’s usually every 7 to 10 days, less in winter. When you do water, water thoroughly until it runs from the drainage holes, then let the pot drain completely.
Croton is genuinely fussy about consistency, more than most houseplants. It doesn’t want to dry out completely, and it doesn’t want to sit wet, either. Both extremes show up as the same symptom: yellowing lower leaves that drop.
This is the sign almost everyone misreads. Yellow, dropping leaves get blamed on underwatering nearly every time, so the instinctive fix is more water. But if the soil is already damp an inch down, you’ve just made a root rot problem worse. Check the soil before you touch the watering can. Dry soil plus yellow leaves means water now. Damp soil plus yellow leaves means the roots are struggling and the fix is less water and better drainage, not more.
Get the soil itself right and half of your watering problems disappear before they start.
Soil, Pots, and Feeding
Use a well-draining potting mix, a standard indoor potting soil with some perlite or bark mixed in works well. Always use a pot with drainage holes. Croton roots that sit in trapped water rot within days, and that damage often isn’t reversible.
Feed with a balanced liquid houseplant fertilizer diluted to about half strength, every four weeks during spring and summer when the plant is actively growing. Skip feeding in fall and winter when growth slows way down.
Repot every two years or when you see roots circling the drainage holes or pushing up out of the soil surface. Go up just one pot size, 2 inches larger in diameter is plenty. Spring is the best time, right as growth picks back up.
Feeding and repotting are the slow, steady half of croton care, but there’s a set of routine tasks that matter just as much and happen far more often.
Pruning, Cleaning, and the Routine Tasks
Prune croton in spring or early summer to control size and encourage bushier growth. Cut stems back to just above a leaf node, and don’t be afraid to take off up to a third of the plant on an overgrown specimen. New growth branches just below every cut.
Wipe the broad leaves down with a damp cloth every couple of weeks. Dust blocks light from reaching the leaf surface, and a dusty croton photosynthesizes noticeably less than a clean one, which shows up as dimmer color over time.
Rotate the pot a quarter turn every week or two so growth stays even instead of leaning hard toward the light source.
Croton sap can irritate skin, so wear gloves when you prune, and wash any exposed skin afterward if you skip them.
These small habits are what separate a croton that looks styled from one that just looks alive, but they won’t save you from the problems that actually take a plant down.
The Problems Most Likely to Strike
Leaf drop is the big one, and by now you know it traces back to cold drafts, sudden moves, or inconsistent watering rather than one single cause. The fix is stability: same spot, same watering rhythm, no surprises.
Spider mites show up as fine webbing and stippled, dull patches on leaves, especially in dry winter air. Increase humidity, rinse leaves under running water, and treat with an insecticidal soap or horticultural oil if the infestation persists, following the product label exactly.
Scale insects look like small brown bumps stuck to stems and leaf undersides. Wipe them off with a cloth dipped in soapy water, or treat with horticultural oil for a heavier infestation.
Root rot from overwatering shows as a mushy stem base and leaves that yellow and drop despite damp soil. Pull the plant, trim any black or mushy roots, and repot into fresh, dry mix. Some cases are too far gone to save, and that’s an honest outcome, not a failure on your part.
Croton is toxic if ingested, to both pets and people, and can cause mouth and stomach irritation. If a pet or child eats any part of the plant, call a veterinarian or poison control right away rather than waiting to see what happens.
Once you’ve ruled out the problems, the next thing worth learning is what actual thriving looks like on this plant.
How to Tell It’s Actually Thriving
A thriving croton pushes new leaves that come in with strong color almost immediately, not months later. Established leaves stay firm and glossy rather than dulling or curling at the edges.
You’ll also see steady, upright growth rather than leggy stretching toward the window, and very little leaf drop beyond the occasional old lower leaf shedding naturally as the plant matures.
Color intensity is the best gauge you have. A croton getting everything it needs looks more vivid every few weeks, not less.
That’s the whole picture, and here’s the card that puts it all in one place.
Croton at a Glance
- Light needed: bright light with some direct morning or late afternoon sun, at least four to six hours a day.
- Temperature range: 60°F to 85°F, never below 50°F, and away from drafts, vents, and cold windows.
- Watering: when the top 1 to 2 inches of soil are dry, roughly every 7 to 10 days, less in winter, always drain fully.
- Soil and pot: well-draining potting mix with perlite or bark, always in a pot with drainage holes.
- Feeding: balanced liquid fertilizer at half strength every four weeks in spring and summer, none in fall and winter.
- Routine care: prune in spring to shape, wipe leaves every couple of weeks, repot every two years in spring.
- Toxicity: toxic to pets and people if ingested, contact a veterinarian or poison control immediately if that happens.
Stability is the real secret with croton, more than any single fix on this list.
Pick a bright spot, settle it in, and leave it alone longer than you think you should.