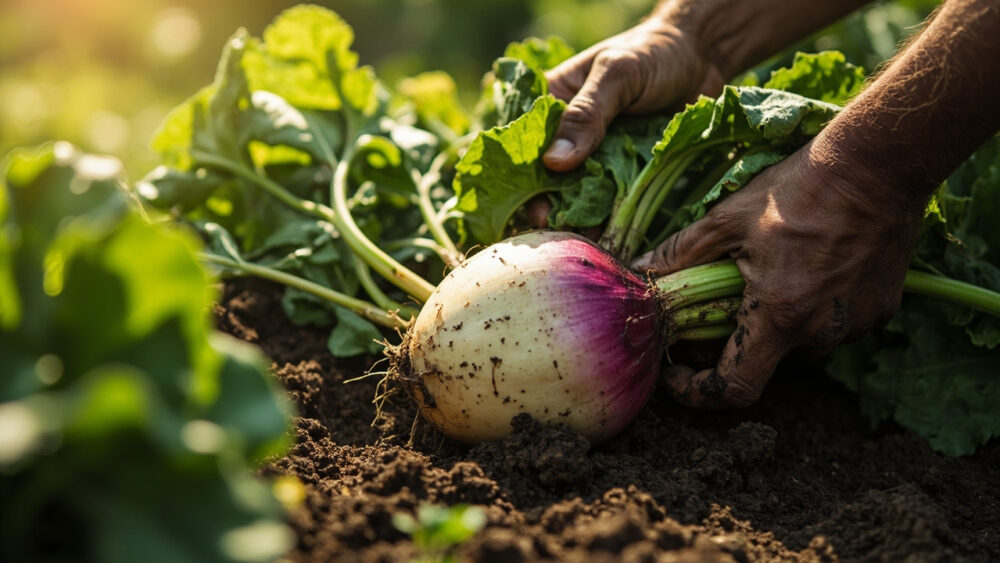
Most turnips are ready 40 to 60 days after planting, when the roots have swelled to somewhere between the size of a golf ball and a tennis ball, roughly 2 to 3 inches across. Push your finger into the soil next to the shoulder of the root and feel for that width before you pull anything. Get the timing wrong in either direction and you either waste the harvest or eat something woody enough to skip.
Here’s what most people get backwards: bigger is not better with turnips. There is a short window where the root is sweet and tender, and it closes fast once the weather warms or the root keeps growing past its prime size.
Below I’ll walk through the exact signs to check, what actually happens if you harvest too early or let them sit too long, and the pulling technique that keeps you from snapping roots off in the ground. Stick around for the Turnips at a Glance card at the bottom, it’s built to save to your phone before you walk back out to the garden bed.
The Real Ready Signs (Not Just “It Looks Big”)
Turnip greens will tell you a story, but the root tells you the truth.
Shoulder width
Brush soil away from the top of the root where it meets the greens. That exposed “shoulder” should be 2 to 3 inches across for most standard varieties like Purple Top White Globe. Smaller salad varieties can be pulled at 1.5 inches for baby turnips.
Root firmness
A ready turnip feels solid and heavy for its size when you press it. If it feels spongy or hollow-sounding when you flick it, it has likely gone past its window or suffered from inconsistent watering.
Leaf clues, used carefully
Healthy, upright greens usually mean the root below is still growing well. But don’t wait for leaves to yellow or die back the way you might with onions or garlic, turnips don’t give that signal, and waiting for one that never comes is how roots get away from you.
Size is the honest measure here, everything else is supporting evidence.
The Timing Window, and What Happens If You Miss It
Turnips are a cool-season crop, and timing is anchored more to soil temperature and weather than to the calendar. Spring-planted turnips sown as soon as soil can be worked, about 2 to 3 weeks before your last frost, are usually ready in early to mid summer before real heat sets in. Fall-planted turnips, started 6 to 8 weeks before your first fall frost, mature in cooler weather and tend to taste better for it.
If you assumed leaving them longer just makes a bigger vegetable, that guess is what turns a good crop into compost. Turnips left in warm soil past their size window get pithy, fibrous, and sharp-tasting, with a texture like a dry sponge instead of crisp flesh. Heat is the enemy here more than time itself.
Pulled too early, at marble size, you get a technically edible root with barely any substance, mostly a waste of a planting slot. The forgiving side of the window is actually the small end, not the large one.
Fall crops are more forgiving of a few extra days in the ground because cold slows the fibrous breakdown that ruins summer turnips.
Once you know your window, the next question is how to actually get the root out of the ground intact.
How to Harvest Without Snapping the Root
Turnip roots break more easily than you’d expect, especially in dry soil, and a snapped root won’t store.
- Water the bed the day before if the soil is dry and hard, moist soil releases roots far more cleanly.
- Loosen the soil around the root with a garden fork or trowel inserted a few inches out from the base, angled to avoid stabbing the root itself.
- Grip low at the base of the greens, close to the soil line, not higher up on the leaf stalks, which can tear away from the root under pressure.
- Pull straight up with steady, even force rather than a yank. A gentle wiggle helps if it resists.
- Brush off loose soil by hand once it’s out, don’t bang it against anything to knock dirt loose.
If a root snaps off mid-pull, dig it out rather than leaving it, a broken root left in the ground will rot and can invite pests to the row.
Getting it out clean is only half the job, what you do in the next hour matters almost as much.
What to Do in the First Hour After Pulling
Turnip greens are edible and nutritious, but they pull moisture hard from the root if left attached.
Cut the greens off within an hour of harvest, leaving about half an inch of stem. This single step is the one most beginners skip, and it’s the difference between a turnip that stores for months and one that turns soft in a week.
Save the greens separately if you want to eat them, they’re good cooked like collards but don’t keep as long as the root itself, usually just a few days refrigerated.
Don’t wash the roots yet if you plan to store them for any length of time. A light brushing of dry soil is fine; a damp root sitting in storage is an invitation for rot.
Once the tops are off, you’re ready to think about whether you’re eating these soon or storing them for the months ahead.
Keeping the Harvest Coming, and Storing What You Pull
Turnips don’t regrow once pulled, but a staggered harvest keeps you in fresh roots for weeks instead of all at once.
Succession planting every 2 to 3 weeks during your cool season, spring or fall, spreads the harvest window out naturally. Turnips mature fast enough that this is easy to manage even in a small bed.
For storage, roots keep 2 to 4 months in a refrigerator crisper drawer, or longer, up to 4 to 5 months, in a cold, humid root cellar setup around 32 to 40°F with high humidity. Layer them in slightly damp sand or sawdust if you have the space for it.
Small, tender baby turnips don’t store as well as full-sized roots and are best eaten within a week or two.
Everything above works better if you can glance at it in thirty seconds, so here’s the whole thing distilled.
Turnips at a Glance
- When to plant: spring, 2 to 3 weeks before last frost, or fall, 6 to 8 weeks before first fall frost.
- Days to maturity: 40 to 60 days for full-size roots, 30 to 40 days for baby turnips.
- Ready size: shoulder width of 2 to 3 inches for standard varieties, 1.5 inches for baby turnips.
- Spacing and depth: seeds sown a quarter to half inch deep, thinned to 3 to 4 inches apart in rows 12 to 18 inches apart.
- Signs to check: firm, solid feel when pressed, exposed shoulder at the right width, no sponginess.
- Harvest method: loosen soil first, grip low at the base of the greens, pull straight up with steady force.
- After harvest: cut greens within an hour, leave roots unwashed and dry, store cold and humid for 2 to 5 months.
Check shoulder width before you trust anything else, that’s the number that doesn’t lie.
Get the roots out of warm soil promptly, and you’ll never wonder why a turnip tastes like a piece of wood.