Repot your monstera when roots start circling the drainage hole or pushing up through the soil surface, moving it into a pot just 2 inches larger in diameter than the current one. Spring through mid-summer is the window, while the plant is actively growing and can recover fast. Do it in a rush, in the wrong pot size, or at the wrong time of year, and you can stall a monstera for months.
There are a few things about this job that trip up almost everyone, even people who have repotted a dozen other houseplants without trouble. The size of the new pot is the first one, and it is not intuitive. There is also a moment mid-repot when the roots look damaged and people panic and cut things they should not touch, and a specific watering mistake right after repotting that undoes the whole point of doing it.
I will walk through all of that, plus the light, water, and feeding routine that keeps a newly repotted monstera pushing out big split leaves instead of sulking. Save the Monstera at a Glance card at the bottom of this page to your phone before you start, you will want it open while your hands are covered in potting mix.
When Your Monstera Actually Needs Repotting
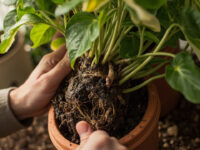
Tip the plant out of its pot, or look at the drainage hole from underneath. If you see a dense wall of roots with barely any soil visible, or roots poking out the bottom, it is time. Water running straight through and out the bottom within seconds, even right after you watered, is another reliable sign, it means there is more root than soil to hold moisture.
The guessable version of this rule is “repot every year.” Skip that idea. A monstera in a pot that still has room can sit two, even three years before it needs to move, and repotting a plant that does not need it yet just wastes the plant’s energy on root recovery instead of growth.
Spring into early summer is the right season, when day length and warmth are increasing and the plant can regrow disturbed roots quickly.
The Pot Size Mistake That Stalls Growth
Here is the one that costs people a season. Jumping from, say, a 6 inch pot to a 12 inch pot feels generous, but it is the most common repotting mistake there is. All that extra soil holds water the roots cannot reach or use yet, and it stays wet for days longer than it should.
Wet, unused soil around a small root ball is exactly the setup for root rot. The plant does not grow faster in a bigger pot, it just sits in soggy soil until the roots start dying back.
The fix is boring but it works: go up only 2 inches in diameter, occasionally 3 for a plant that was seriously rootbound. That is it. You will repot more often over the plant’s life, and that is fine, it is far better than losing roots to a pot that was too big.
Get the size right and the rest of the job is straightforward, starting with what actually goes in that pot.
Soil Mix and the Repotting Steps
Monstera wants a mix that drains fast but still holds some moisture, something like standard potting soil cut with perlite, orchid bark, or coarse coco chips, roughly one part chunky material to two or three parts soil. Straight bagged potting soil alone compacts and holds too much water around monstera’s thick roots over time.
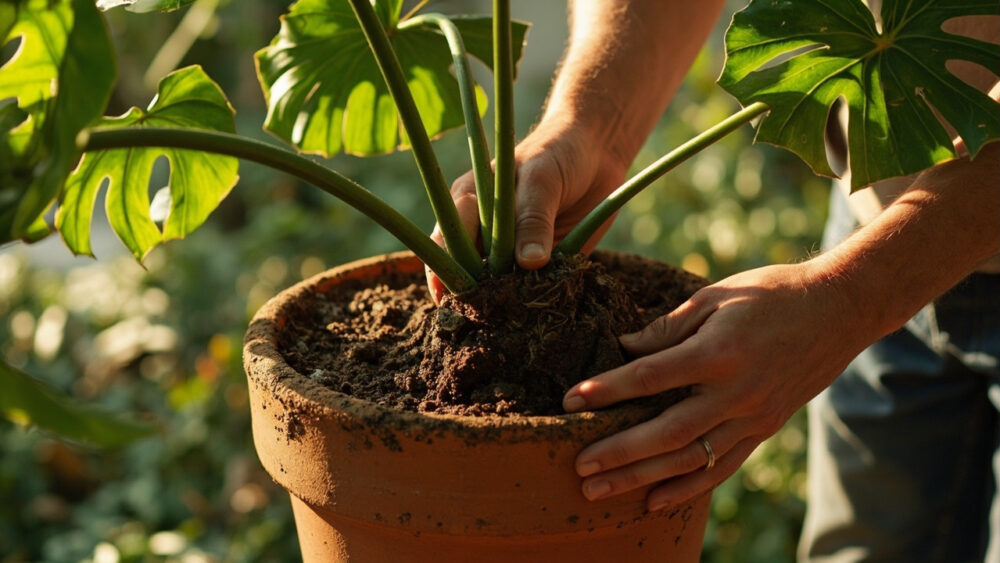
To repot, water the plant a day ahead so the root ball slides out cleanly. Turn the pot on its side, ease the plant out by the base, do not yank by the stem.
Loosen the outer roots gently with your fingers. If you see soft, brown, mushy roots, trim those off with clean scissors, but leave firm white or tan roots alone even if a few break off in the process, that is normal and not a sign you have ruined the plant.
Set it in the new pot at the same depth it was growing before, backfill, water thoroughly, and let it drain completely.
What you do in the days right after this matters just as much as the repot itself.
The Watering Mistake Right After Repotting
Most people water a freshly repotted monstera on the same schedule as before, or even more, thinking the plant needs extra help settling in. That is backwards. Fresh soil around disturbed roots stays wet much longer than the old, root-filled soil did, so watering on the old schedule buries stressed roots in moisture they cannot process.
Let the top 2 inches of the new mix dry out before you water again, checking with a finger rather than the calendar. This can mean waiting 7 to 10 days longer than your old routine, sometimes more depending on pot size and your home’s humidity.
Skip fertilizer for about four to six weeks. Disturbed roots cannot use it well yet, and it is one more thing that can burn a root system that is already recovering.
Once that settling-in period passes, normal watering and feeding rules take over, and those are worth getting right too.
Light, Water, and Feeding the Rest of the Year
Monstera wants bright, indirect light, a spot near an east or south-facing window but out of hours of direct scorching sun, which can bleach or crisp the leaves. Too little light gets you small leaves with few or no splits, which is the plant’s honest way of telling you it is underpowered, not thriving in low light like some care tags claim.
Normal room temperatures of 65 to 85°F suit it fine, but keep it away from cold drafts and heating vents.
Water when the top 1 to 2 inches of soil are dry to the touch, usually every 7 to 10 days indoors, less in winter. Feed monthly during spring and summer with a balanced houseplant fertilizer at the label rate, and skip feeding entirely from late fall through winter when growth slows.
Get the light wrong and no amount of careful watering will fix it, so that is where to look first if growth stalls.
Pruning, Cleaning, and Staking on a Schedule
Monstera benefits from a light trim any time growth gets leggy or a lower leaf yellows and dies back, snip it near the base with clean shears. This is also when you decide whether to give it a moss pole or trellis, ideally set in place at repotting time so you are not fighting established roots later.
Wipe the big leaves down every few weeks with a damp cloth. This is not cosmetic, dust buildup blocks light and is where spider mites like to set up first.
Aerial roots are normal, not a problem to solve. You can tuck them into the soil, guide them onto a pole, or just leave them alone.
Regular cleaning also means you will spot trouble early, which brings up the problems that actually go wrong.
The Problems Most Likely to Show Up
Yellowing lower leaves in small numbers is normal aging. Yellowing across the plant, especially paired with soft brown stems, usually means overwatering and possible root rot, check the roots and cut back watering immediately.
Brown, crispy leaf edges usually get blamed on underwatering, and sometimes that is right, but low humidity or a buildup of fertilizer salts in the soil cause the same symptom. If the soil is consistently moist when this happens, look at humidity and feeding history before you add more water.
Watch for small webs or stippled, dusty-looking leaves, that is spider mites. Fine speckled bugs clustered on stems are likely mealybugs. Treat either with insecticidal soap or a labeled houseplant insecticide, following the product label exactly, and isolate the plant from other houseplants while you treat it.
Monstera is toxic to cats, dogs, and people if chewed or eaten, due to calcium oxalate crystals that cause mouth and throat irritation. If a pet or child ingests it, contact a veterinarian or physician rather than waiting to see what happens.
Knowing what can go wrong makes it easier to recognize when everything is actually going right.
Signs Your Monstera Is Genuinely Thriving
New leaves emerging bigger than the last, and showing more splits and holes as the plant matures, is the clearest sign of health. Young monstera leaves are often solid and heart-shaped, split leaves come with maturity and adequate light, not a different care routine entirely.
A thriving plant also pushes new growth every few weeks during spring and summer, has firm upright stems, and roots that fill but do not choke the pot.
If growth has stopped entirely for more than two months during the growing season, something in light, water, or root space needs adjusting, it will not just start again on its own.
Everything above comes together in one place, so here is the version you can actually save.
Monstera at a Glance
- When to repot: spring through mid-summer, when roots circle the pot or emerge from the drainage hole, roughly every 2 to 3 years.
- Pot size: go up only 2 inches in diameter at a time, never more than 3 even for a badly rootbound plant.
- Soil mix: potting soil cut with perlite, bark, or coco chips, about two to three parts soil to one part chunky material.
- Watering: when the top 1 to 2 inches of soil are dry, roughly every 7 to 10 days indoors, wait longer right after repotting.
- Light: bright, indirect light, an east or south-facing window without hours of direct sun.
- Feeding: balanced fertilizer monthly in spring and summer, none for four to six weeks after repotting, none in winter.
- Toxicity: toxic to pets and people if chewed, causes mouth and throat irritation, contact a veterinarian or doctor for any suspected ingestion.
Get the pot size and the post-repot watering right and almost everything else falls into place on its own.
Everything else is just patience while the roots catch up.