The short answer: prune gardenias right after they finish their main flush of blooms, usually mid to late summer, and never later than about eight weeks before your first fall frost. Take off no more than a third of the plant, cutting just above a leaf node, and stop the moment you start hacking into bare wood with no leaves on it. That timing matters more than the cuts themselves, because gardenias set next year’s flower buds on the growth that follows this pruning.
Get the season wrong and you will not kill the shrub, but you will spend an entire year staring at a glossy green bush with no flowers on it, wondering what you did. That is the single mistake that ruins most attempts, and it happens to careful gardeners just as often as careless ones.
There is also a sign almost everyone misreads on a gardenia, a scale insect problem that looks like a pruning issue, and an honest answer about how hard you can really cut back an overgrown, leggy plant without losing a season of bloom entirely. All of that is ahead, and the quick-reference card at the very bottom has the exact numbers saved in one place so you do not have to hunt for them again.
When to Prune a Gardenia, and When to Leave It Alone
Gardenias bloom on the current season’s new growth that develops shortly after flowering ends. That means the pruning window is narrow: right after the last blooms fade, typically early to mid summer in most climates, and finished up within about four to six weeks after that.
Prune any later than roughly eight weeks before your average first fall frost and you risk cutting off the very buds that would have opened next spring or summer. Prune in late winter or early spring instead, before flowering, and you will cut off flower buds that are already formed and waiting.
Do not prune a gardenia that is actively setting buds, flowering, or stressed from heat, drought, or a recent transplant. If soil is bone dry, water first and wait a few days.
Get this window right and every other decision gets easier.
Tools and the One Prep Step That Actually Matters
You need clean bypass pruners for anything pencil-thick or thinner, and loppers for older woody stems on a mature, overgrown plant. A small pruning saw earns its place if you are renovating a shrub that has gone untouched for years.
Sanitize the blades before you start, and again between plants if you are working on more than one gardenia. Gardenias are prone to fungal issues like botrytis and to bacterial problems that spread easily on dirty blades, and a wipe with rubbing alcohol takes ten seconds.
The prep step nearly everyone skips is simply standing back and looking at the whole shrub for a minute before the first cut. Identify dead wood, crossing branches, and the natural shape of the plant so you are pruning with a plan instead of just snipping whatever is in front of you.
Once you know what needs to go, the actual cutting is fast.
How to Prune a Gardenia, Step by Step
Step 1: Remove the dead and damaged wood first
Cut out any stems that are brown, brittle, or clearly dead all the way back to healthy wood or to the base. This alone often opens up a surprising amount of light and air inside the plant.
Step 2: Take out crossing and rubbing branches
Where two branches cross and rub against each other, remove the weaker or more awkwardly placed one. Rubbing bark is an open door for disease.
Step 3: Cut spent flower stems back to a leaf node
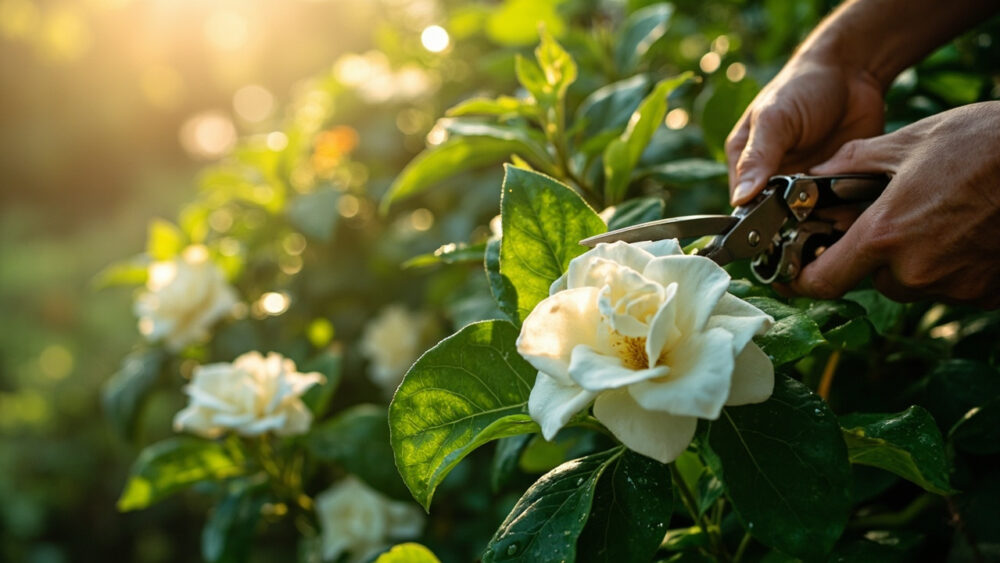
Cut just above a set of leaves, about a quarter inch above the node, angled slightly so water runs off. This is where the next flush of growth, and next year’s flower buds, will originate.
Step 4: Shape lightly, don’t shear
Gardenias look best with a slightly irregular, natural outline. Shearing them into a tight ball like a boxwood removes far more wood than you intend and cuts off buds unevenly.
Step 5: Hold the line at one third
As a general rule, remove no more than about a third of the plant’s total volume in one season. Take more than that and you push the shrub into recovery mode instead of bloom mode.
Those five steps cover a normal, healthy gardenia, but overgrown plants need a different conversation.
What an Overgrown Gardenia Actually Needs
If your gardenia is leggy, hollow in the middle, or has grown four feet taller than you wanted, the honest fix is a hard renovation, and it costs you flowers for a season. Cut it back by up to half its height right after summer bloom, focusing on the oldest, thickest stems, and let it regrow through the following year.
You can spread this over two seasons instead, taking a third off each year, which sacrifices fewer total blooms but takes longer to reach the shape you want. Neither approach gives you a full flush the following spring, and that is worth knowing before you start rather than after.
If you assumed a hard cutback kills the plant, it almost never does, gardenias are tougher than their delicate reputation suggests. What it does kill, temporarily, is next season’s flower count.
Know that trade-off going in and the recovery period will not feel like a failure.
What to Expect After You Prune
Within two to four weeks you should see new leaf growth emerging at or near your cuts, a good sign the plant is responding well. That new growth is what will eventually carry next season’s flower buds.
Yellowing of a few older, interior leaves right after pruning is normal and not a sign of trouble. The plant is reallocating energy and shedding leaves it no longer needs to support.
Feed lightly with a fertilizer formulated for acid-loving shrubs a couple of weeks after pruning, once new growth appears, and keep the soil evenly moist but never soggy. Gardenias sulk visibly under both drought stress and waterlogged roots.
What looks like a pruning mistake at this stage is very often something else entirely.
The Scale Insects Everyone Blames on Bad Pruning
Here is the sign almost everyone misreads: sticky leaves, a black sooty coating, and small bumps along the stems after pruning. Most gardeners assume they cut wrong or damaged the plant.
What they are actually seeing is scale insects, which secrete a sticky residue that grows sooty mold on top of it, and pruning simply exposed an infestation that was already there. This is a pest problem, not a cutting technique problem, and it is common on gardenias in warm, humid climates.
Treat it at the cultural level first: prune out heavily infested stems, improve airflow through the plant, and if it persists, use a horticultural oil or insecticidal soap labeled for scale, following the product label exactly for timing and application. Do not confuse this with a pruning injury and start cutting more, which only stresses the plant further.
With pests ruled out or handled, the rest comes down to a short list of avoidable errors.
The Mistakes That Cost You a Season of Flowers
- Pruning in fall or winter: this removes flower buds that are already set and waiting to open.
- Shearing into a tight shape: this strips buds unevenly and gives you a plant with leaves but few blooms.
- Cutting more than a third in one pass on a healthy plant: this forces the shrub into recovery instead of flowering.
- Ignoring dirty blades: this spreads fungal and bacterial problems from one cut to the next.
- Blaming sticky, sooty leaves on pruning: this is almost always scale insects and needs pest treatment, not more cuts.
Avoid these five and a gardenia rewards you with a genuinely reliable bloom the following season.
Gardenias at a Glance
- When to prune: right after the main summer bloom finishes, finished within four to six weeks, and never later than about eight weeks before first fall frost.
- How much to remove: no more than a third of the plant’s volume in a normal season, up to half for a hard renovation of an overgrown shrub.
- Where to cut: about a quarter inch above a leaf node, angled slightly so water sheds off the cut.
- Tools needed: clean bypass pruners for thin stems, loppers for older woody growth, a pruning saw for major renovation.
- After pruning: expect new leaf growth within two to four weeks and a little normal yellowing of older interior leaves.
- Sticky or sooty leaves: usually scale insects, not a pruning mistake, treat with horticultural oil or insecticidal soap per the label.
- Never prune: in late winter or early spring right before bloom, or while the plant is actively flowering or drought stressed.
Time it right and the cuts themselves are simple. Get the season wrong once and you will remember this timing for good.