Here’s how to prune catmint: cut the whole plant back hard, down to 3 to 4 inches from the ground, right after the first big flush of flowers fades in early to mid summer, and again in early spring before new growth takes off. That mid-season chop is the one most people skip, and it’s the difference between a floppy, half-bald plant by August and a tight, reblooming mound that looks good through fall.
Most of the damage happens for one predictable reason: gardeners treat catmint like a perennial you tidy up once a year. It’s not. It behaves more like an herb that needs a haircut every time it gets shaggy, and skipping that haircut is the mistake that costs people their second and third flush of bloom.
There’s also a sign almost everyone misreads, a moment when the plant looks done for the season when it’s actually just asking for a cut. And there’s an honest answer waiting for you further down about how hard you can really cut catmint without killing it. Stick around for the Catmint at a Glance card at the bottom, it’s built to save to your phone before you walk back out to the garden.
When to Prune Catmint (and When to Leave It Alone)
Catmint gets pruned at three points in its yearly cycle, and timing matters more than force. The big one is after the first flowering flush, usually early to mid summer, when the flower spikes have gone brown and the whole plant starts flopping open in the middle. The second is in early spring, once you see new green shoots low on the stems but before they’ve grown more than an inch or two. The third is a light tidy in fall, optional in most zones, skippable if you garden in zone 3 or 4 where winter top growth helps insulate the crown.
Do not hard-prune catmint in late fall in cold climates. Cutting it down to bare crowns right before a hard freeze removes the insulating structure the plant relies on, and in a rough winter that can mean losing the plant outright.
Also skip pruning during a hard summer drought or heat wave, even if it’s flopping. Wait for a cooler stretch or water it first, then cut.
Get the timing right and the next question is just what to cut with.
The Tools and the One Prep Step That Matters
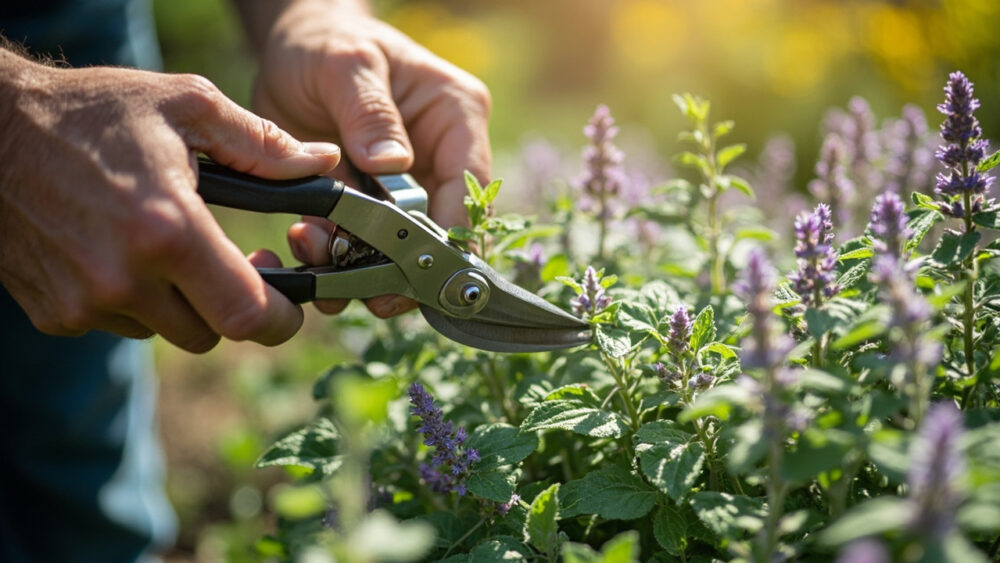
You need clean, sharp bypass pruners or hedge shears, nothing specialized. Hedge shears are actually faster for catmint since you’re cutting the whole clump at once rather than stem by stem.
Wipe the blades with rubbing alcohol before you start, especially if you’ve used them on anything with disease or powdery mildew this season. That’s the one prep step people skip, and catmint is prone enough to mildew in humid climates that a dirty blade can hand it an infection it didn’t have.
Beyond that, wear gloves if you’re sensitive to the smell. Catmint’s crushed foliage smells strong, somewhere between mint and something sharper, and it clings to your hands for the rest of the day.
With clean tools ready, the actual cut is simpler than most people expect.
How to Prune Catmint Step by Step
This is where most guides get vague, and vague pruning advice is exactly what leaves half your plants leggy by midsummer. Here’s the concrete version.
Step 1: Look at the base, not the flowers
Before you cut anything, part the foliage and look at the crown, the woody base where all the stems emerge. That’s your reference point for every cut, not the top of the plant.
Step 2: Cut the whole clump down to 3 to 4 inches
After the first bloom flush fades, take hedge shears and cut the entire mound down to 3 to 4 inches above the crown, all at once, like shearing a hedge. This feels brutal. It is not.
Step 3: In spring, cut to just above new growth
In early spring, instead of a flat shear, cut each woody stem down to about 2 to 3 inches, just above where you see fresh green shoots emerging. Remove any stems that show no green at all, they’re dead and won’t recover.
Step 4: Clear the cut debris
Rake out the trimmings rather than leaving them in the crown. Trapped clippings hold moisture against the base and invite the exact mildew and rot problems catmint otherwise shrugs off.
Cut that hard and the plant looks wrecked for about a week, which is exactly the part that scares people off doing it again next year.
What to Expect After You Cut It Back
If you assumed a hard shearing sets the plant back for the season, that guess is the opposite of what actually happens. Catmint is one of the fastest rebounders in the perennial world.
Within 7 to 10 days you’ll see new gray-green foliage pushing from the crown. By 3 to 4 weeks you’ll have a second flush of flower spikes, often nearly as full as the first, sometimes fuller because the plant is bushier and more branched than before the cut.
This is the sign everyone misreads: a scraggly, brown-tipped, flopped-open catmint in midsummer looks like a dying plant to a lot of gardeners. It isn’t dying. It’s a plant that needs exactly the pruning you just read above, not more water, not fertilizer, not a trip to buy a replacement.
Feed it lightly if at all, catmint blooms best in lean soil, and heavy nitrogen after a cutback gives you soft floppy growth instead of the tight rebloom you want.
Get the rebound right and you can repeat this cycle two or even three times before frost.
The Mistakes That Cost You Flowers
A few specific errors account for almost every disappointing catmint patch.
- Only deadheading, never cutting back: snipping individual spent flower spikes keeps things tidy but doesn’t trigger the vigorous rebloom a full shear does. It’s more work for a weaker result.
- Cutting too high: leaving 8 to 10 inches of old stem behind means you’re just trimming top growth, not renewing it. The plant stays leggy and open in the middle.
- Cutting into bare wood with no green: in spring, shearing below the lowest visible bud can kill that stem outright. Always cut just above green.
- Hard-pruning in late fall in cold zones: covered above, and worth repeating, this is the timing mistake with the highest cost, a dead plant instead of a bare one.
- Skipping the midsummer cut entirely: the single most common mistake, and the reason so many catmint plantings look great in June and rough by August.
Avoid these five and catmint becomes one of the lowest-maintenance, highest-reward plants in a sunny border.
Catmint at a Glance
- When to hard-prune: right after the first flower flush fades, usually early to mid summer, cutting the whole plant to 3 to 4 inches above the crown.
- When to spring-prune: early spring, once new green shoots show low on the stems, cutting each stem to 2 to 3 inches just above the new growth.
- When to avoid pruning: late fall in cold climates, and during active drought or heat stress.
- Tools needed: bypass pruners or hedge shears, wiped with rubbing alcohol before use.
- Recovery time: new foliage in about 7 to 10 days, a second bloom flush in 3 to 4 weeks.
- Feeding after a cut: little to none, catmint blooms best in lean soil and gets floppy with too much nitrogen.
- Biggest mistake to avoid: deadheading only and never doing the full midsummer shear.
Catmint forgives almost everything except neglecting that midsummer cut.
Shear it hard, rake up the mess, and let it come back on its own schedule.