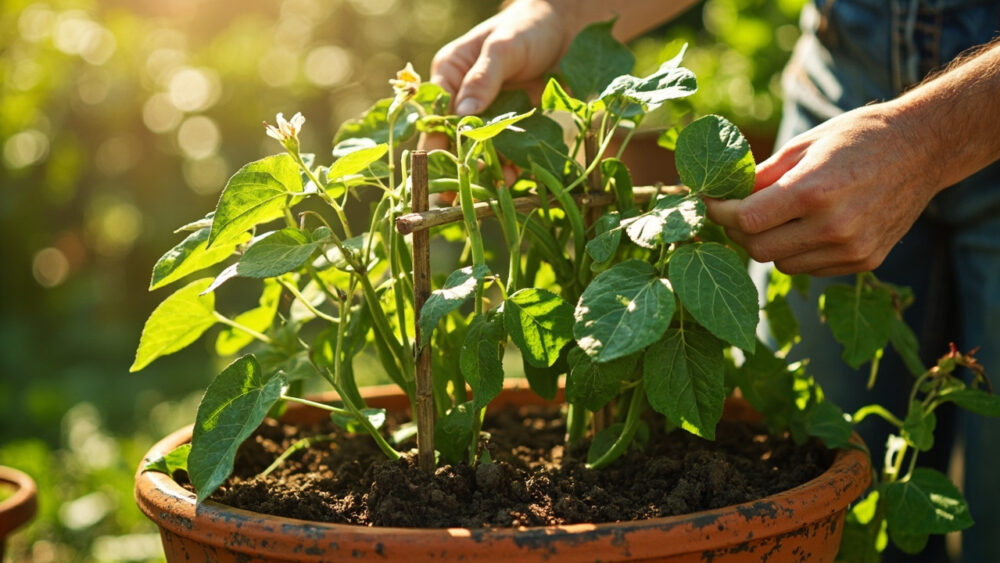
Green beans grow well in containers as long as the pot holds at least 5 gallons per plant, drains fast, and gets 6 or more hours of direct sun. Plant seeds an inch deep and about 3 inches apart once the soil in the pot has warmed past 60°F, usually a week or two after your last frost. Bush varieties are the easier container choice, but pole beans work too if you give them something to climb.
That part is simple. The part that trips people up is everything after germination: the watering rhythm that either builds a productive plant or stalls it out, the one nutrient mistake that gets you a jungle of leaves and almost no beans, and the exact visual cue that tells you a pod is ready today instead of three days from now.
Stick with me through this and you will also get the “Green Beans at a Glance” card at the very bottom, the kind of thing worth screenshotting before you head out to the pot.
When to Plant Green Beans in Containers
Green beans are a warm-season crop, and cold soil is their biggest enemy. Wait until soil temperature is reliably above 60°Fwhich usually lines up with one to two weeks after your last spring frost date. Seeds planted into cold, wet soil will often rot before they sprout instead of just germinating slowly.
Containers actually give you an advantage here. Pot soil warms faster than garden beds, so you can often plant a week earlier than in-ground growers in your area.
In most of the country that means late April through May. In warm zones (8 and up) you can plant as early as March and often get a second round going in late summer for a fall crop.
Succession planting every 2 to 3 weeks through early summer keeps a steady harvest coming instead of one huge flush that overwhelms you for a week and then quits.
Timing solves half the battle, but the container itself decides whether that timing even matters.
Choosing the Right Container and Soil
Size is not negotiable. Use a container at least 12 inches deep and wideholding 5 gallons of soil per plant, with drainage holes in the bottom. Anything smaller dries out too fast and starves the roots of room.
Skip garden soil from the yard. It compacts hard in a pot and drains poorly. Use a quality potting mix, ideally one with compost blended in, and beans will reward you with steady growth.
If you assumed a sunnier spot is always better, that is mostly true but incomplete: beans in very hot climates (regularly above 90°F) actually benefit from a little afternoon shade, since extreme heat causes blossoms to drop before they set pods.
Everywhere else, aim for the sunniest spot you have. Six hours of direct light is the floor, eight is better.
Get the pot and soil right and planting itself takes five minutes.
Planting Green Beans Step by Step
1. Fill the container
Fill with potting mix to about an inch below the rim, water it once to settle air pockets, then let it drain before planting.
2. Sow the seeds
Push seeds 1 inch deep. For bush beans, space them 3 to 4 inches apart in a 12 to 14 inch pot; you can fit 4 to 6 seeds around the edge of a larger container.
3. Set up support if growing pole beans
Pole varieties need a trellis, stake, or tepee of 6 to 8 foot poles installed at planting time, not added later once roots are established.
4. Water in and wait
Keep soil consistently moist, not soggy, until germination. Expect sprouts in 7 to 14 days depending on soil temperature.
Once those seedlings are up, watering habits take over as the thing that makes or breaks the season.
Watering and Feeding Through the Season
Containers dry out faster than garden soil, often needing water every day or two once temperatures climb. Check moisture by pushing a finger 1 to 2 inches down; if it comes out dry, water until it runs from the drainage holes.
Here is the mistake that costs people their harvest: heavy nitrogen fertilizer. Beans fix their own nitrogen from the air through bacteria in their roots, so a nitrogen-rich feed just builds huge leafy plants with few pods.
Use a balanced or low-nitrogen fertilizer, or work compost into the mix at planting and skip heavy feeding altogether. A light feed every 3 to 4 weeks is plenty once flowering starts.
Consistent moisture matters most right when flowers appear, since dry soil at that stage is the single biggest cause of blossoms dropping without setting pods.
Water and nutrients get you a healthy plant, but a few problems show up no matter how well you tend it.
Problems That Actually Show Up in Containers
The most common container issue is not a pest at all, it is blossom drop from heat stress, inconsistent watering, or low light. There is no fix once flowers drop except correcting the underlying cause going forward.
Watch for these actual pests and issues:
- Aphids: clusters on new growth and leaf undersides. A strong water spray or insecticidal soap applied per the label usually knocks them back.
- Mexican bean beetles: yellow-orange lacy skeletonized leaves. Hand-pick adults and check leaf undersides for orange egg clusters.
- Powdery mildew: white, dusty coating on leaves in humid or crowded conditions. Improve airflow and avoid wetting foliage when watering.
- Root rot: yellowing, wilting plants in soggy soil. Almost always a drainage problem, not a disease problem, and the fix is a better-draining pot or mix.
Good airflow between containers and watering the soil instead of the leaves prevents most of this before it starts.
Handle the plant right and the only real problem left is knowing exactly when to pick.
When and How to Harvest
Bush beans mature in 50 to 55 days from seed. Pole beans take a bit longer, 60 to 65 days, but keep producing longer once they start. Pick pods when they are firm, bright, and about the diameter of a pencilsnapping cleanly when bent in half.
Everyone assumes bigger pods mean a better harvest. It is actually the opposite: beans left too long turn tough, stringy, and bulging with seeds that push the plant to stop flowering.
Check plants every 1 to 2 days once pods start showing. Frequent picking is what keeps a bean plant producing for weeks instead of setting one flush and quitting.
Use two hands when harvesting, one to hold the stem and one to pull the pod, so you do not snap the whole branch off the plant.
That habit alone, picking often and picking small, is the difference between a container that gives you a handful of beans and one that keeps feeding you all summer.
Green Beans at a Glance
- When to plant: once soil is above 60°F, roughly one to two weeks after your last frost, with a second sowing possible in late summer in warm zones.
- Container size: at least 12 inches deep and wide, holding 5 gallons of soil per plant, with good drainage holes.
- Planting depth and spacing: 1 inch deep, bush beans 3 to 4 inches apart, pole beans need a trellis installed at planting time.
- Light needs: 6 to 8 hours of direct sun, with light afternoon shade helpful in climates over 90°F.
- Watering: check soil 1 to 2 inches down daily in hot weather, water deeply when dry, keep it consistent through flowering.
- Feeding: skip high-nitrogen fertilizer, use balanced feed or compost, light feeding every 3 to 4 weeks once flowering begins.
- Harvest window: 50 to 65 days from seed depending on variety, pick pencil-thick pods every 1 to 2 days to keep production going.
Get the container size and the nitrogen right, and green beans practically grow themselves. Everything else on this list is just keeping up with a plant that wants to produce.