Here is how to grow gladiolus without the guesswork: plant the corms 4 to 6 inches deep in full sun once the soil has warmed past 55 F, space them 4 to 6 inches apart, keep them evenly watered through summer, and stake or hill the tall varieties before they lean. Do that and you get spikes of bloom 70 to 100 days later, depending on the variety. Miss the depth or the staking and you get gorgeous flowers lying face down in the mulch, which is the single most common heartbreak with this plant.
There are a few other traps waiting for you. Most people plant every corm the same week and end up with two weeks of bloom instead of two months. Almost nobody stakes early enough, because the plant looks sturdy right up until the flower spike puts it off balance. And there is a real question hiding under all of this: what do you do with the corms when the season ends, because gladiolus is not reliably winter-hardy for most of the country and that surprises people every single fall.
Stick with me through planting, feeding, the pest that actually causes the most damage, and harvest timing, and at the bottom you will find a save-able Gladiolus at a Glance card with every number in one place.
When to Plant Gladiolus
Gladiolus corms go in the ground after your last spring frost, once soil temperature has reached at least 55 F a few inches down. In most of the country that lands anywhere from mid-spring to early summer. Cold, wet soil rots corms before they ever sprout, so do not rush this the way you might with peas or spinach.
The real trick most guides skip: stagger your planting. Put a batch in the ground every 10 to 14 days for six weeks and you get continuous blooms from midsummer into fall instead of one big flush that’s gone in ten days.
Gladiolus is winter-hardy roughly in zones 8 through 10. Everywhere colder, treat it as an annual you dig up, or accept you’re replanting fresh corms each spring.
Next comes the part that decides whether those spikes stand up straight or fall over in July.
Choosing the Spot and Prepping the Soil
Gladiolus wants full sun, at least 6 hours of direct light, and soil that drains well. Heavy clay that stays soggy is the fastest way to lose corms to rot before they even sprout.
Work in a couple inches of compost before planting, especially in sandy or clay-heavy soil. Loose, fertile ground also makes it far easier to lift corms cleanly at the end of the season, which matters more than it sounds like it should.
Pick a spot with some wind protection if you can, a fence line or the lee side of a shed. Tall varieties can hit 3 to 4 feet, and open, windy sites are exactly where stems snap.
Soil ready and site chosen, now the planting itself, where depth and orientation actually matter.
Planting Gladiolus Step by Step
1. Check the corm
Look for a firm, plump corm with no soft spots or mold. A corm that feels light or spongy will likely rot instead of sprout, so skip it now rather than blame the weather later.
2. Dig the hole
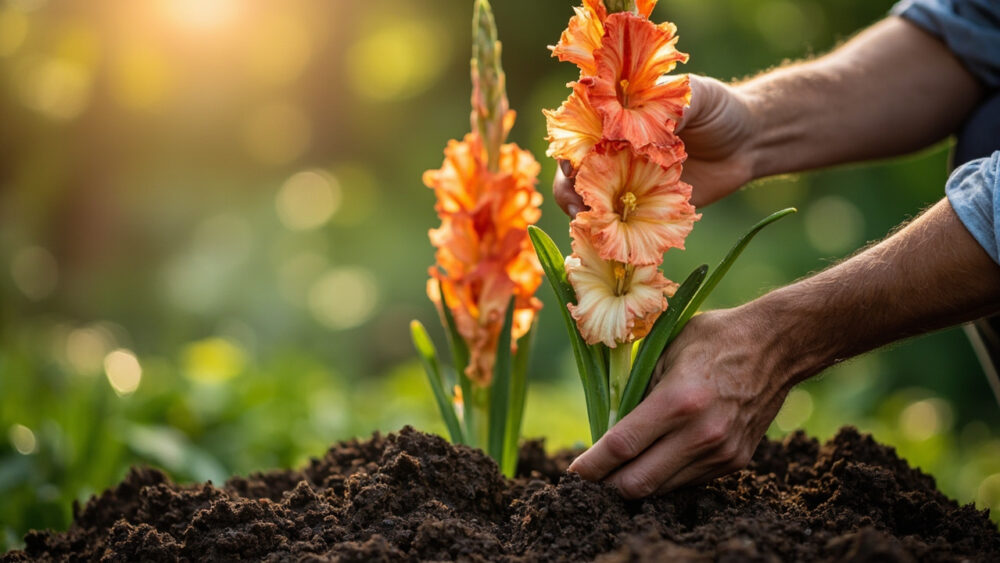
Plant 4 to 6 inches deep, deeper in light sandy soil, shallower in heavy clay. Shallow planting is the number one reason gladiolus flops over later, because the corm never anchors properly.
3. Set it root side down
The flatter, slightly concave side faces down, with the pointed growth tip facing up. If you genuinely can’t tell which end is which, lay it on its side. It will still find its way up, just a bit less efficiently.
4. Space them out
Give each corm 4 to 6 inches of space in every direction. Tight spacing looks lush early on but crowds roots and invites disease later in the season.
5. Water them in
Give the bed a good soak right after planting to settle soil around the corm and trigger root growth.
Get through planting and the next few weeks are mostly about water, fertilizer, and one piece of support most people add too late.
Watering, Feeding, and Staking Through the Season
Gladiolus wants about 1 inch of water a week, more during hot, dry stretches once the flower spike starts forming. Water at the base rather than overhead to keep foliage drier and reduce disease pressure.
Feed lightly with a balanced fertilizer at planting, then again once shoots reach about 6 inches tall. Too much nitrogen pushes soft, floppy growth, which brings us back to that staking problem.
If you assumed a corm planted deep enough never needs staking, that guess is what leaves stems snapped after a summer storm. Depth helps, but tall varieties still need a stake, a piece of twine tied loosely to a cane, or hilling soil up around the base once the flower spike appears, not after it’s already leaning.
Do this before the bud opens, because a top-heavy spike in full bloom is nearly impossible to right once it’s gone sideways.
Water and support handled, now the part where a season can quietly go wrong without you noticing.
Problems That Actually Take Gladiolus Down
The pest to watch for is thrips, tiny slivers of insect that hide inside the leaf sheaths and flower buds. They cause silvery streaking on leaves and blooms that open distorted or flecked brown, and they’re the single biggest reason gladiolus disappoints growers who did everything else right.
Thrips overwinter on stored corms, so inspect any you’re saving before replanting, and keep the bed weeded since thrips also live on nearby grasses and weeds. If an infestation takes hold during the season, an insecticidal soap or a labeled insecticide applied according to the product’s instructions is the standard response.
Rot is the other real threat, usually from soil that’s too wet or corms planted too early into cold ground. Once a corm goes soft and mushy, there’s no saving it. Pull it and improve drainage before you plant there again.
Handle the bugs and the drainage and most of what’s left is simply waiting for bloom, which brings us to harvest.
When and How to Harvest Gladiolus
Gladiolus blooms roughly 70 to 100 days after planting, and the spike opens from the bottom up over about a week to ten days. For cut flowers, harvest when the bottom one or two florets have just started to open and the rest are still tight buds; they’ll continue opening indoors in water.
Cut in the early morning with a sharp, clean blade, angling the cut and leaving at least four to six leaves on the plant. Those remaining leaves are what recharge the corm for next year, so resist stripping the plant bare.
If you’re leaving spikes to bloom in the garden instead of cutting them, let them finish fully and fade naturally, then cut the stem back once flowers are spent but keep the foliage standing.
Once bloom is done, the last real decision of the season is whether those corms survive winter where you garden, and that’s worth getting right.
Digging, Curing, and Storing Corms
In zones colder than about 8, dig corms after the first light frost kills the foliage back, or about 4 to 6 weeks after bloom finishes. Lift gently with a fork, shake off soil, and cut foliage back to about an inch.
Cure them in a dry, well-ventilated spot out of direct sun for 2 to 3 weeks. Then store in mesh bags or open trays in a cool, dry place around 40 to 50 F, never in a sealed plastic bag, which traps moisture and invites rot.
Check stored corms occasionally over winter and toss any that go soft or moldy before they spread to the rest.
That whole cycle, planting to digging, is exactly what’s summarized below so you don’t have to hold all these numbers in your head.
Gladiolus at a Glance
- When to plant: after last frost, once soil hits about 55 F, staggered every 10 to 14 days for continuous bloom.
- Depth and spacing: 4 to 6 inches deep, 4 to 6 inches apart, deeper in sandy soil.
- Light and soil: full sun, at least 6 hours, well-drained soil enriched with compost.
- Water: about 1 inch weekly, more during heat and once flower spikes form.
- Support: stake or hill soil around stems before the flower spike opens, not after.
- Bloom time: 70 to 100 days after planting, opening bottom to top over a week or more.
- Winter care: hardy in zones 8 to 10, elsewhere dig, cure 2 to 3 weeks, and store around 40 to 50 F.
Get the depth right and stake early, and gladiolus takes care of the rest itself.
Everything else is just details on top of that one solid habit.