Green beans move through six distinct stages between the day you drop a seed in the ground and the day you’re picking a full basket: germination, seedling, vegetative growth, flowering, pod formation, and harvest. On bush beans that whole cycle takes about 50 to 60 days. Pole beans run longer, usually 60 to 70 days, but keep producing much further into the season.
Most people can identify the seedling stage and the harvest stage just fine. It’s the middle stretch where things get confusing, and where a plant that looks totally healthy can actually be stalled out and going nowhere.
There’s also one mistake made so often that it’s practically a rite of passage, and it happens right at the flowering stage, for a reason almost nobody expects. Stick around and you’ll also get a full Green Beans at a Glance card at the bottom of this page, worth saving to your phone before you head out to the garden.
Germination: Days 1 to 10
Nothing visible happens above ground for the first several days, and that’s normal. Soil temperature drives this stage more than anything else. Green beans want soil at 60 to 70°F to germinate reliably; below 60°F, seeds often rot before they sprout instead of just sitting slow.
Plant seeds 1 inch deep, 2 to 4 inches apart for bush types, 4 to 6 inches apart for pole types along a trellis. Keep the soil evenly moist but not soaked. A crusted, bone-dry surface is the most common reason a seed never breaks through.
The first sign of life is a curved stem pushing up, sometimes still wearing the split seed casing like a little hat.
Once that happens, you’re only days away from real leaves.
Seedling Stage: Days 7 to 14
The plant unfolds two oval cotyledon leaves first, then its first true leaves, which look distinctly different: rounder and often with a slightly serrated edge. This is the most vulnerable stage in the plant’s life.
Seedlings have no real root reserve yet, so they’re an easy target for cutworms, slugs, and damping-off fungus in soil that stays too wet. Thin crowded seedlings now rather than later; crowding at this stage sets every later stage back.
Keep soil moist an inch down, not soggy on top. If you see thread-thin stems collapsing at the soil line, that’s damping-off, and it’s a soil moisture and airflow problem, not something a fungicide alone fixes.
This is also where most people get impatient and start fertilizing, which is exactly the wrong move, and here’s why.
Vegetative Growth: Weeks 2 to 5
The plant now puts out a real root system and a flush of compound leaves, three leaflets per leaf, and starts branching. Bush beans stay compact, 12 to 20 inches tall. Pole beans start reaching for anything vertical and need their trellis or pole in place now, not later.
If you assumed more nitrogen fertilizer speeds this alongthat’s the guess that ruins the most bean crops. Beans fix their own nitrogen through bacteria in root nodules, and heavy nitrogen feeding tells the plant it doesn’t need to bother flowering. You get a big, dark green, leafy plant that produces almost no pods.
Skip the high-nitrogen feed. A balanced or low-nitrogen fertilizer, or just decent compost at planting, is enough.
Healthy vegetative growth looks like steady new leaf pairs every few days, with no fertilizer boost required.
That restraint pays off in the very next stage, which is where the real anxiety starts.
Flowering: Weeks 5 to 7
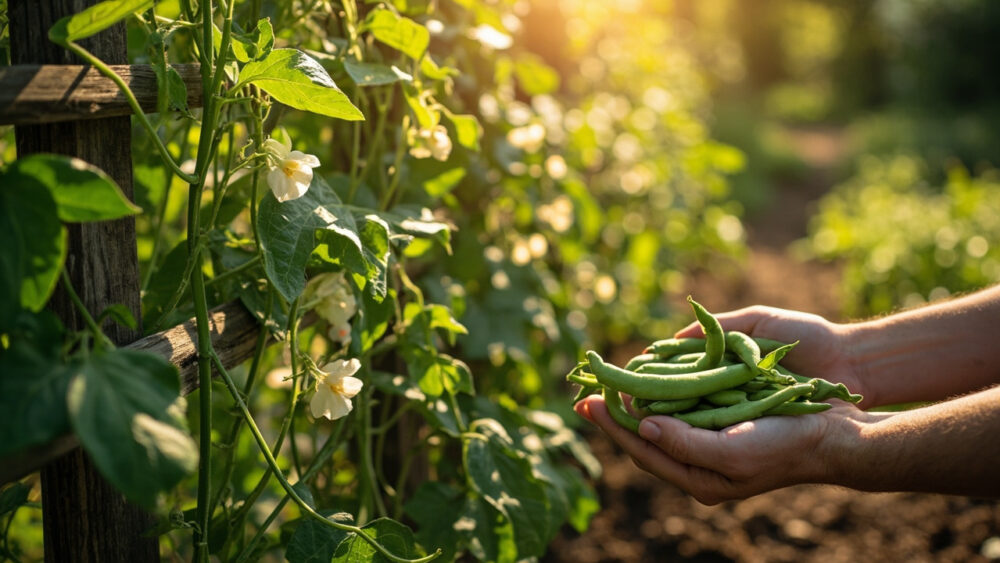
Small white, pink, or pale purple flowers appear at leaf joints, depending on variety. This is the stage everyone worries about, because flowers seem to vanish overnight with no pod in sight.
That’s usually not a disease and not a pest. Heat above 90°F, or a dry spell during floweringcauses blossom drop, a completely normal defense move where the plant sheds flowers it can’t support with the water it has. It is frustrating, but it is not fatal, and new flowers usually keep coming once conditions ease.
What actually helps: consistent watering, about 1 inch per week, delivered at the soil line rather than overhead, right through this stage. Wet flowers from overhead watering also encourage the drop.
Bees and other pollinators matter here too, though beans are largely self-pollinating and don’t strictly need them.
Once a flower holds, you’ll see the actual pod within days, and that’s when the countdown to harvest really starts.
Pod Formation: Weeks 6 to 8
A tiny, thread-like pod emerges right where the flower was, and it thickens and lengthens fast, sometimes visibly different day to day. This is the stage where consistent moisture matters most of all, because pods that develop under drought stress turn tough, curved, and stringy even on varieties bred to be stringless.
Keep watering at that same 1 inch a week, and mulch around the base to hold soil moisture steady, especially in hot weather.
This is also the honest answer to the question most readers are already forming: no, you can’t rush a bean plant to pod faster with feeding or babying it. Pod fill happens on the plant’s own clock, driven by heat and water, not by anything you add.
Pods usually go from thread-thin to harvest-ready in 7 to 10 days.
Which means the real skill at this point isn’t growing them, it’s knowing exactly when to stop waiting.
Harvest: Days 50 to 70, and Onward
Pick bush beans when they’re about the thickness of a pencil, 4 to 6 inches long, firm, and snap cleanly rather than bend. Pole bean pods often run longer, 6 to 8 inches, depending on variety, and stay tender further along than bush types do.
Check daily once flowering starts winding downbecause beans left on the vine too long turn fibrous, and the plant reads mature pods as a signal to stop producing new flowers. Picking regularly is what keeps a bush bean plant going for 3 to 4 weeks of harvest instead of one big flush.
Pole beans, picked consistently, will often keep producing for 8 weeks or more.
Miss that window and you’ll notice the next stage yourself, which brings up the one thing every new grower misreads.
How to Tell a Stall From Normal Slow Growth
Slow but healthy growth looks like steady color, firm stems, and new leaves appearing every few days, even if the pace feels unhurried. A real stall looks different: yellowing lower leaves, stems that stay thin and pale, or a plant that’s been the same size for two weeks straight.
The usual causes of an actual stall are compacted or waterlogged soil, night temperatures that dropped below 50°F for several nights running, or nitrogen-starved soil with no organic matter at all. None of these fix themselves. They need a specific correction, whether that’s improving drainage, waiting out a cold spell, or working in compost.
A plant that’s simply taking its time doesn’t need intervention. A stalled plant does, and confusing the two is how people overwater or overfeed a perfectly fine bean plant into real trouble.
Once you can tell those two apart at a glance, the rest of the season is mostly just watching and picking.
Green Beans at a Glance
- When to plant: after your last frost, once soil is reliably 60 to 70°F, not by calendar date alone.
- Depth and spacing: 1 inch deep, 2 to 4 inches apart for bush beans, 4 to 6 inches apart for pole beans on a trellis.
- Days to harvest: 50 to 60 days for bush beans, 60 to 70 days for pole beans.
- Water needs: about 1 inch per week, steady, delivered at the soil line, especially critical during flowering and pod fill.
- Fertilizer rule: skip high-nitrogen feeds, they cause leafy growth and fewer flowers, since beans fix their own nitrogen.
- Harvest sign: pods pencil-thick, 4 to 6 inches for bush types, firm and snapping cleanly, not bending.
- Keep it producing: pick every 1 to 2 days once pods start, since mature pods left on the vine signal the plant to stop flowering.
Green beans reward attention more than effort. Water them consistently, resist the fertilizer, and pick often, and the plant does the rest on its own schedule.