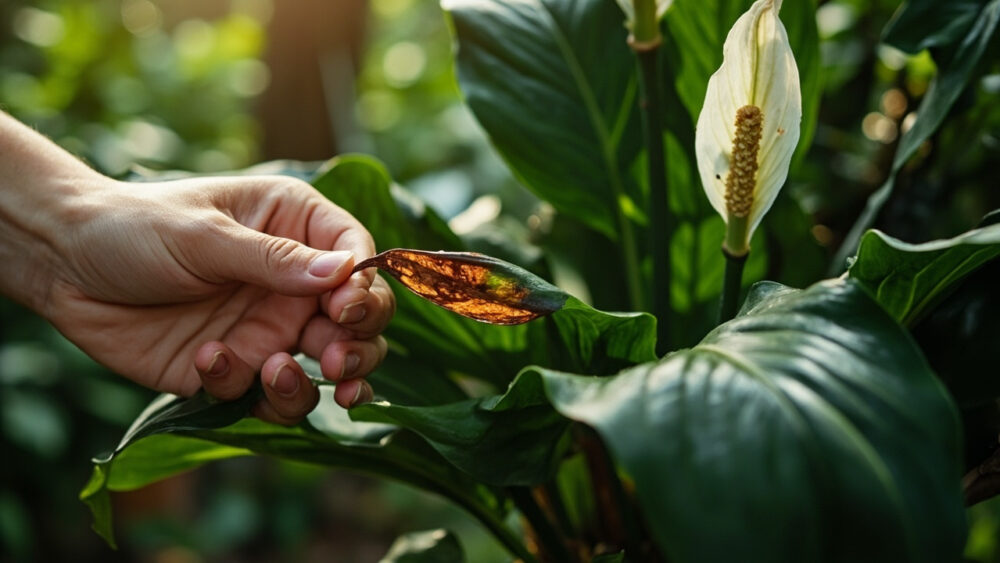
Brown tips on a peace lily are almost always a water quality or watering consistency problem, not a sign of disease. The most common single cause is fluoride or salt buildup from tap water and fertilizer, which shows up as dry, crispy brown edges on the older, lower leaves first. Switch to distilled or rainwater, flush the pot, and the new growth that follows should come in clean.
Here is the thing almost everyone gets wrong first: they assume the plant is underwatered and start flooding it, which usually makes brown tips worse, not better. The real clue is not how thirsty the plant looks, it is exactly where on the leaf and where on the plant the brown shows up.
Peace lilies are honest plants. They tell you what is wrong, you just have to read the right leaf. Stick with this, because the diagnosis checklist at the bottom will let you confirm your exact cause in about two minutes standing right at the pot.
Causes, Most to Least Likely
1. Tap Water Minerals and Fertilizer Salt Buildup
Confirm it: check the soil surface and pot rim for a white or grayish crust. Brown tips are dry, tan to dark brown, and appear mostly on older, lower leaves in a fairly even pattern across the plant.
Fix it by watering with distilled water, rainwater, or tap water left out uncovered overnight so chlorine dissipates. Flush the pot thoroughly every couple of months by running water through until it drains freely, and cut fertilizer to half strength or less.
This one cause explains most brown-tip complaints, but it is far from the only one.
2. Low Humidity or Dry Indoor Air
Confirm it: this shows up most in winter when heaters run, or near a heat vent, drafty window, or air conditioner. Tips brown and curl slightly, often on leaves closest to the dry air source rather than uniformly.
Move the plant away from vents and cold drafts, group it with other plants, or run a humidifier nearby. Misting helps briefly but does not fix the underlying dryness the way ambient humidity does.
If the browning tracks a specific spot in the room instead of the whole plant, air is your suspect.
3. Underwatering or Letting It Wilt Repeatedly
Confirm it: press a finger two inches into the soil. If it is bone dry and the plant has drooped dramatically more than once in recent weeks, this is likely part of the story.
Peace lilies dramatically wilt before they die back, and each wilt-and-recover cycle stresses leaf tips first. Water when the top inch or two of soil is dry, and aim for soil that is evenly moist, never soggy, never bone dry for days.
But do not assume dry soil automatically means underwatering is the cause, because overwatering causes the exact same dry crispy look at the tip.
4. Overwatering and Root Stress
Confirm it: if the pot feels heavy, the soil stays wet for a week or more after watering, or you notice a sour smell at the soil line, roots are struggling. Brown tips from this cause often come with yellowing leaves nearby, not just crispy edges.
Fix it by letting soil dry out properly between waterings and checking that the pot actually drains. If roots are dark, mushy, or smell rotten when you check them, trim the worst and repot into fresh, well-draining mix.
This is the cause most people misdiagnose as thirst, so it is worth checking before you water again.
5. Direct Sun or Heat Scorch
Confirm it: look for browning concentrated on the side of the plant facing a bright window, sometimes with a papery, bleached look rather than solid brown. Peace lilies want bright indirect light, not direct sun through glass.
Move the plant a few feet back from south or west windows, or add a sheer curtain between the plant and the glass.
Light problems are easy to fix once you spot the pattern, and the pattern is the giveaway.
6. Cold Drafts or Temperature Swings
Confirm it: check if the plant sits near a frequently opened door, a drafty single-pane window, or an AC unit. Peace lilies sulk below about 55°F and react to sudden temperature drops with tip and edge browning.
Relocate away from the draft and keep the plant in a steady 65 to 80°F range.
Temperature issues often ride along with humidity issues, so check both at once.
7. Natural Aging of Older Leaves
Confirm it: if only the oldest, lowest one or two leaves are browning at the tip while everything else looks great, this may simply be normal leaf turnover.
Snip the affected leaf at the base with clean scissors and move on. No fix needed beyond basic tidy-up.
If that description does not match what you are seeing, the cause is something on this list above, not aging.
How to Tell the Causes Apart
Location on the plant matters more than the color of the brown. Mineral buildup and natural aging hit old, lower leaves. Light scorch and drafts hit whichever side faces the window or vent. Humidity problems cluster near the dry air source.
Pattern matters too. Even, uniform browning across many leaves points to water quality or fertilizer. One-sided or localized browning points to light, heat, or drafts.
Texture is a tiebreaker: crispy and dry usually means water quality, underwatering, or air. Soft, yellowing brown paired with mushy stems means overwatering and root trouble, a more urgent problem.
Once you know where and how the brown started, the tell-apart guide above should already have narrowed you to one or two suspects.
Will It Recover?
The tips themselves will not turn green again. Brown tissue is dead tissue. But the plant as a whole recovers well once the cause is fixed, and new leaves will grow in clean.
Mineral buildup, humidity, and light causes have excellent outlooks. Correct the cause and trim the ugly tips for appearance, and you will usually see fully clean new growth within four to eight weeks.
Overwatering with root rot is the honest exception. Mild cases recover after a repot and drier schedule. Severe cases with mostly black, mushy roots often do not save the whole plant, though healthy sections can sometimes be divided and restarted.
Trimming a brown tip does not hurt the plant, so there is no reason to leave damaged leaves in place once you know the cause.
How to Keep It From Happening Again
Consistency beats perfection with peace lilies. Use distilled or rested tap water, water on a check-the-soil schedule rather than a calendar, and flush the pot periodically to clear mineral buildup before it starts.
Keep the plant in bright indirect light, away from direct sun through glass and away from heat vents, cold drafts, and AC blasts. Feed lightly, at half the label strength, since peace lilies are not heavy feeders and salt buildup from overfeeding is a common self-inflicted cause.
Get these basics steady and brown tips become rare instead of routine.
Diagnosis Checklist
- Check the soil surface and pot rim for white or gray crust: if present, suspect mineral or fertilizer buildup first.
- Note which leaves are affected: old lower leaves point to water quality or natural aging, one-sided leaves point to light or drafts.
- Press a finger two inches into the soil: bone dry repeatedly means underwatering, constantly wet and heavy means overwatering.
- Smell the soil line and check root color if repotting is easy: sour smell or dark mushy roots means root rot, act now.
- Look at the plant’s position: near a heat vent, cold draft, or direct sun through glass all point to environmental scorch.
- Feel the brown tissue: crisp and dry suggests water or air causes, soft and yellowing suggests overwatering.
- Trim affected tips with clean scissors regardless of cause, then fix the underlying issue and wait six to eight weeks for clean new growth.
Brown tips look alarming but they are rarely fatal, and almost every cause on this list is fixable with a schedule change, not a new plant.
Fix the cause, trim the damage, and let the next round of leaves prove you got it right.