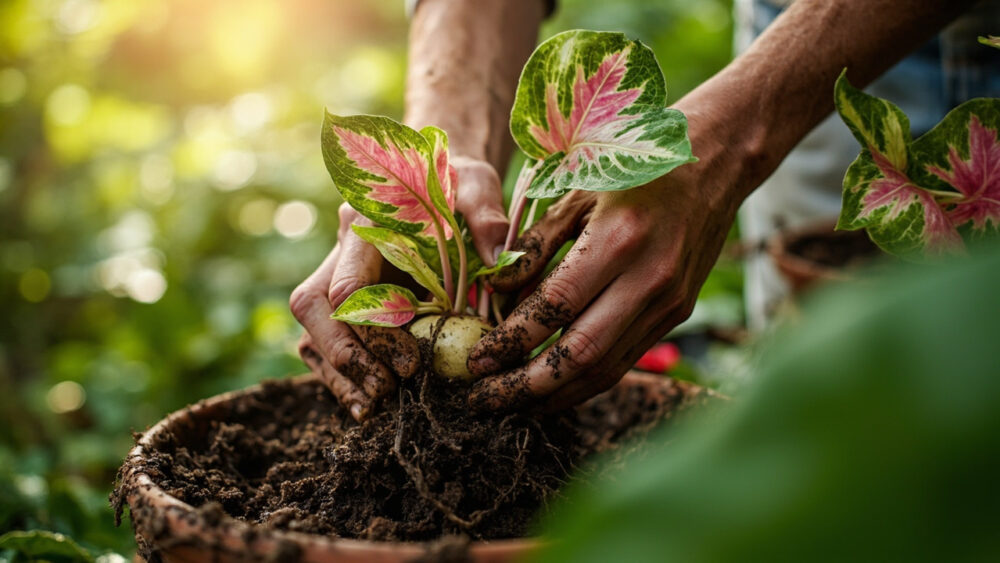
The method that actually works is dividing the tuber, not taking leaf or stem cuttings. Caladiums grow from a swollen underground tuber, and every new plant has to come from a piece of that tuber with at least one growth eye attached. Cut it right, let it callus, and pot it in warm, barely damp mix, and you will have new caladiums with almost no failure.
Most people who try to propagate caladium reach for a leaf first, the way they would with a pothos or a African violet, and that is the single mistake that ruins most attempts. Caladium leaves have no capacity to root on their own. There is no hormone dip, no water glass, no trick that changes this.
There is also a sign everyone misreads, a soft spot on the tuber that looks like rot but is actually where a new eye is about to push through, and getting that wrong costs people a perfectly good tuber. Stick around and I will show you exactly what a healthy eye looks like versus a rotting one. And stick around for the Caladium at a Glance card at the bottom, it is the version of this you will actually want saved to your phone before you pick up a knife.
Why Division Is the Only Method Worth Your Time
Caladium is a tuberous plant, closely related in habit to dahlias and potatoes. All the plant’s stored energy and all its growth points live in that tuber, not in the leaves or stems above ground. Cut a leaf off and you have a leaf, nothing more, it will sit in water looking pretty for a couple weeks and then rot.
Division works because you are not asking the plant to create a whole new root and shoot system from scratch. You are simply separating growth points that the tuber already has, each one capable of becoming its own plant the moment it gets warmth and moisture.
This is also faster than any other propagation route by a wide margin, you get a rooted, growing plant in three to five weeks instead of the months seed-grown caladium takes to reach a usable size.
Here is exactly how to make the cut without losing the tuber to rot.
Step by Step: Dividing the Tuber
Digging or Unpotting the Tuber
If your caladium is in the ground, lift the tuber after the foliage yellows and dies back in fall, before the first frost hits it hard. If it is in a pot, you can divide it any time the plant is dormant or just breaking dormancy, typically late winter.
Brush off the soil rather than washing it, and let the tuber sit somewhere dry and shaded for a day. This firms up the skin and makes clean cuts easier.
Finding and Reading the Eyes
Look for small raised bumps or slightly conical points on the tuber’s surface, these are the growth eyes, the same structures you’d look for on a seed potato. A healthy eye is firm, dry, and often has a faint pink or cream tint at its tip.
A rotting spot, by contrast, feels soft or mushy under light thumb pressure and smells sour. That is the soft spot everyone confuses with a new eye. If you press it and your finger comes away wet or the tissue collapses, cut that section out entirely and discard it, do not try to save it.
Making the Cut
Using a clean, sharp knife, cut the tuber into sections so that each piece has at least one, ideally two, healthy eyes and a fair share of the dense white flesh around it. Tubers larger than about 2 inches across can usually be split into three or four viable pieces.
Let every cut piece dry in open air for 24 to 48 hours before planting. This callusing step matters more than almost anything else in this process, a fresh wet cut going straight into damp soil is how rot starts.
Once the cut surfaces have sealed over and feel dry to the touch, you are ready for the rooting medium.
Rooting Medium and Conditions
Plant each division about 1 to 2 inches deep, eye facing up, in a well-draining mix, a standard potting soil cut with perlite works fine, or a straight seed-starting mix. Avoid anything that stays soggy.
Caladium tubers want warmth more than they want water at this stage. Soil temperature of 70 to 80°F is the range that gets eyes to push growth reliably, cooler than that and the tuber can sit dormant for weeks or rot before it sprouts.
Keep the medium barely damp, not wet, until you see the first shoot. A heat mat under the pot solves more stalled propagations than any fertilizer or additive ever will.
Bright, indirect light is enough for now, direct sun on a bare pot with no leaves yet does nothing but dry the soil out faster.
Now here is what actually happens week by week, and it is slower than most people expect.
The Timeline: What to Expect Week by Week
Week one is nothing visible, and that is normal, not a failure. The tuber is callusing further and beginning to root from its base.
Weeks two to three bring the first sign of life, a small pointed shoot pushing up from the eye, pale green or sometimes pink depending on the variety. Roots are developing underground during this window even though you cannot see them.
By week four, the first leaf usually unfurls, small and often more solid-colored than the mature leaf pattern will be.
Weeks five to six is when growth speeds up noticeably, a second and third leaf appear, and the true leaf color and pattern for that variety starts to show.
If you hit week four with no shoot at all and the tuber piece still feels firm, be patient, some varieties and some pieces genuinely take five to six weeks. If it has gone soft, that division has failed and will not recover.
Once you have a couple of real leaves and a few visible roots at the drainage holes, it is time to think about the next pot.
Potting Up and Moving Outdoors
Pot up into a container only one size larger than the starting pot, caladiums do not like being buried in excess soil volume before their root system fills in. Keep the growing point at the same depth it was rooted at.
If you are moving new divisions outdoors, wait until nighttime lows are reliably above 60°F and soil temperature has warmed well past that point, this is a tropical plant and it stalls out or sulks in anything cool. That is usually two to three weeks after your last frost date, not right at it.
Space plants 8 to 12 inches apart for the smaller varieties, up to 15 inches for the big strap-leaf types, giving each one room to spread its leaf canopy without crowding its neighbors.
Harden new divisions off gradually over about a week, giving them a few hours of outdoor shade at first before a full day outside.
Even with perfect timing, a fair number of attempts still fail, and almost always for the same handful of reasons.
Why Most Attempts Fail
Overwatering a freshly cut division is the top cause of failure, by a wide margin. A cut surface sitting in wet soil before it calluses is an open door for rot, no amount of good light or warmth fixes that afterward.
The second most common mistake is planting too early in cold soil. A tuber can sit in 55°F soil for a month, rotting slowly, before you ever see a sign of trouble above ground.
- Skipping the callus period on a fresh cut
- Keeping soil wet instead of barely damp before sprouting
- Planting into cold soil below roughly 65°F
- Cutting a division with no visible eye at all
- Giving direct hot sun to a bare, unrooted pot
Fix those five things and division becomes close to foolproof, which is the whole reason it beats every other propagation method for this plant.
Here is the short version worth keeping on your phone.
Caladium at a Glance
- Propagation method: divide the tuber, leaf and stem cuttings do not root.
- When to divide: after foliage dies back in fall, or in late winter as dormancy breaks.
- Cutting depth for eyes: plant divisions 1 to 2 inches deep, eye facing up.
- Callus time before planting: 24 to 48 hours of open air drying on the cut surface.
- Rooting temperature: 70 to 80°F soil, use a heat mat if your space runs cooler.
- Timeline to first leaf: roughly 3 to 5 weeks from planting the division.
- Moving outdoors: two to three weeks after last frost, once nights stay above 60°F.
Get the callus time and the warmth right, and this plant almost propagates itself.
Rush either one, and you will be blaming the tuber for a mistake that was actually yours.