Growing broccolini means giving this cool-weather hybrid the same conditions you’d give broccoli, but with tighter spacing and a faster clock. It’s a cross between broccoli and Chinese kale, so learning how to grow broccolini is mostly about timing it around heat, not babying it once it’s in the ground. Get it into cool soil, keep it fed and evenly watered, and you’ll be cutting slender, tender stalks in 50 to 65 days.
Here’s what trips people up. Most gardeners plant it exactly like broccoli and then wonder why half the crop bolts to flower before the stalks are worth eating.
There’s also a harvest mistake almost everyone makes on their first try, one that either wastes the plant’s best trick or convinces you the season is over when it’s actually just getting started. And if you’ve grown broccoli before, you’re probably about to make an assumption about spacing that will cost you. Stick around, because the save-able Broccolini at a Glance card at the bottom has every number in one place for your phone.
When to Plant Broccolini
Broccolini is a cool-season crop through and through. Direct-seed or transplant it two to four weeks before your last spring frostonce soil temperature has climbed to at least 45 F, ideally 50 to 65 F for quicker germination. It tolerates a light frost once established but stalls out and turns bitter once daytime highs sit above 75 to 80 F for any stretch.
That heat sensitivity is why a fall crop often outperforms a spring one. Count back 55 to 70 days from your first fall frost and get seedlings in the ground in mid to late summer so they mature in cooling weather.
In zones 3 to 7, spring and fall both work. In zones 8 and warmer, skip summer entirely and grow it as a fall-into-winter crop, since spring heat arrives too fast for broccolini to finish before it bolts.
Get the timing right and the rest of the season is mostly maintenance, but the spot you choose matters just as much.
Choosing the Spot and Prepping the Soil
Broccolini wants full sunat least 6 hours a day, in soil that drains well but holds moisture. Waterlogged roots and drought-stressed plants both trigger early bolting, so this is not a crop for a low spot that puddles after rain.
Work in 2 to 3 inches of compost before planting. Broccolini is a hungry feeder, and thin, depleted soil produces skinny, tough stalks instead of the tender ones you’re growing this for.
Aim for a soil pH between 6.0 and 7.0. If you grew any brassica (broccoli, cabbage, kale, cauliflower) in this bed within the last two years, rotate to a different spot. Shared pests and diseases build up fast in brassica soil.
Once the bed is built, the actual planting is the easy part.
Planting Broccolini Step by Step
You can direct-seed or start transplants indoors 4 to 6 weeks before your target planting date. Transplants get you a head start and more reliable stands if slugs or flea beetles are a problem in your yard.
Steps for planting
- Depth: sow seeds ¼ to ½ inch deep, or set transplants at the same depth they were growing in their pots.
- Spacing: space plants 6 to 9 inches apart in rows 12 to 18 inches apart. This is tighter than standard broccoli, and that’s intentional.
- Technique: firm the soil gently over seeds, water in transplants immediately, and mulch lightly to hold moisture and moderate soil temperature.
Here’s the assumption that costs broccoli growers a good harvest: they space it like broccoli, 18 to 24 inches apart, because that’s the habit. Broccolini doesn’t form one dominant head, so it doesn’t need that room. Crowd it a little on purpose and you get more stems per square foot, which is the entire point of growing this crop instead of standard broccoli.
Once plants are in and spaced right, watering habits decide how tender those stalks turn out.
Watering and Feeding Through the Season
Broccolini needs consistent moistureabout 1 to 1.5 inches of water a week from rain or irrigation. Uneven watering, wet then dry then wet, is one of the fastest routes to bitter, woody stems and early flowering.
Check soil an inch down; if it’s dry there, water.
Feed with a balanced fertilizer or a side-dressing of compost or blood meal about 3 weeks after transplanting, then again 3 weeks later if the plants look pale or growth has slowed. Nitrogen drives the leafy growth that fuels good stalk production.
Mulch is doing double duty here. It keeps soil temperature steady through warm afternoons and keeps moisture from swinging, which is exactly what prevents the bolting problem you were warned about above.
Feed and water well and the plant stays productive, but a few pests and one weather pattern can undo it fast.
Problems That Actually Show Up
The biggest threat isn’t a bug, it’s heat. A sudden warm spell pushes broccolini to flower early, sending up thin, leggy stalks with open yellow blooms before you’ve had a real harvest. There’s no fixing a bolted plant; once it flowers, quality is gone and the honest move is to let it finish and pull it, then replant when temperatures cool.
Common pests to watch for
- Cabbage worms and loopers: chew ragged holes in leaves. Handpick when populations are low, or use a row cover to block egg-laying moths from reaching plants in the first place.
- Aphids: cluster on the undersides of leaves and new growth. A strong water spray knocks most off, and insecticidal soap handles the rest if you follow the label.
- Flea beetles: riddle young leaves with small holes, especially on seedlings. Row covers early in life are the most reliable prevention.
Clubroot and black rot are the two diseases worth knowing by name, both spread through infected soil and worse in wet, poorly drained beds. Crop rotation and good drainage are your real defense, since there’s no in-season cure for either once a plant is infected.
Manage heat and moisture well and pest pressure usually stays minor, which means the last skill you need is knowing exactly when to cut.
When and How to Harvest Broccolini
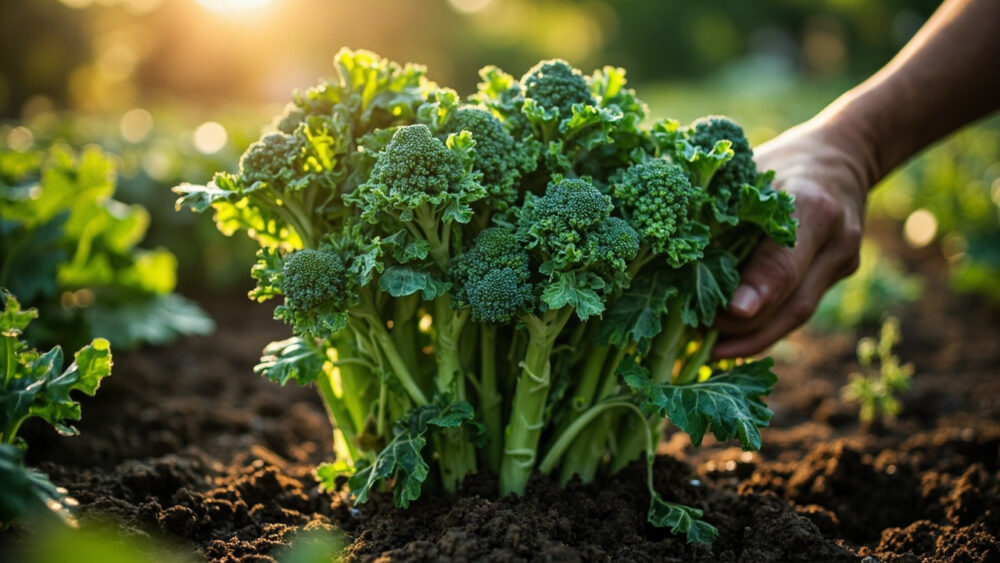
Here’s the harvest mistake almost everyone makes: they wait for one big central head like broccoli, and either cut way too early or let the plant bolt while waiting for something that isn’t coming. Broccolini’s central stalk is smaller, often just 4 to 6 inches, with small loose buds, and that’s the signal to cut, not a sign something went wrong.
Harvest when buds are tight and green, before any yellow petals show.
Cut the central stalk at an angle, 5 to 7 inches down, while buds are still firm and closed. This is usually 50 to 65 days after transplanting, depending on variety and temperature.
The real payoff comes after that first cut. Broccolini is a cut-and-come-again crop: removing the central stalk pushes the plant to send up side shoots for another 3 to 6 weeks, often giving you more total harvest than the first stalk alone.
Keep cutting every few days as new shoots reach 5 to 7 inches with tight buds, and the plant keeps producing until heat or a hard frost finally shuts it down.
Broccolini at a Glance
- When to plant: 2 to 4 weeks before last spring frost with soil at least 45 F, or in mid to late summer for a fall crop finishing after temperatures cool.
- Spacing: 6 to 9 inches apart, rows 12 to 18 inches apart, tighter than standard broccoli.
- Depth: ¼ to ½ inch for seed, same depth as the pot for transplants.
- Water: 1 to 1.5 inches per week, kept consistent to prevent bolting and bitterness.
- Feeding: balanced fertilizer or compost 3 weeks after transplanting, repeated if growth slows.
- Harvest: cut the central stalk at 4 to 6 inches with tight closed buds, 50 to 65 days from transplant, then keep cutting side shoots for weeks after.
- Biggest risk: heat-triggered bolting, which has no fix once flowers open.
Get the timing and spacing right and broccolini nearly grows itself from there.
Cut the main stalk early and keep cutting, and one planting will feed you far longer than a single broccoli head ever could.