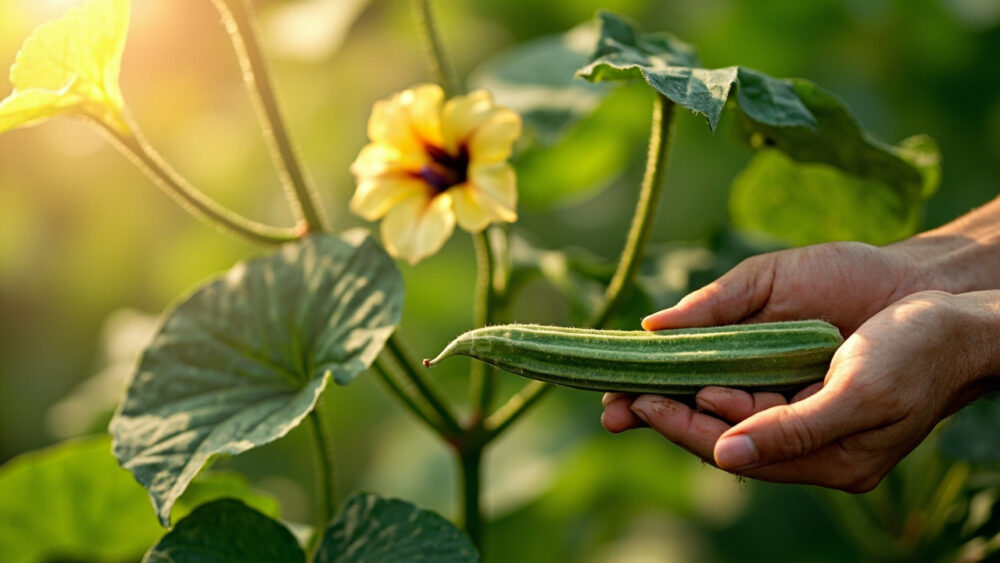
Growing okra comes down to three things it will not compromise on: hot soil, full sun, and pods picked young. Plant seed after the soil hits at least 65 to 70 F, give it 6 to 8 hours of direct sun, and check plants daily once they start blooming because a pod goes from tender to woody in about 48 hours. Get those three right and okra is one of the easier vegetables you will grow all year.
Most first-time failures trace back to one mistake: planting too early into cool soil, where the seed just sits and rots instead of sprouting. There is also a sign almost every new okra grower misreads, a plant that looks stalled and stubby for weeks, and it is not sick, it is doing exactly what okra does before it takes off. And there is a question you are probably already forming: why did my pods turn hard and stringy so fast, when I swear I checked them two days ago.
All of that gets answered below, in order, so you know what to do this week instead of guessing. Stick around to the bottom for the Okra at a Glance card, a save-to-your-phone summary of timing, spacing, and harvest windows you can pull up standing in the garden.
When to Plant Okra
Okra is a heat lover from the same family as hibiscus, and it will not forgive cold, wet soil. Wait until night temperatures reliably stay above 55 F and soil temperature at planting depth holds at 65 to 70 F, which is usually two to three weeks after your last spring frost date.
In zones 8 to 11 that can mean late spring, in zones 4 to 6 you are often looking at early to mid summer soil timing even though the calendar says late spring feels late enough.
If you are not sure, press a thermometer 2 inches into the soil in the afternoon for a few days running. Cold soil is the mistake that ends most first attempts before a single seed sprouts.
Once the soil is genuinely warm, okra grows fast enough to make up for a late start.
Choosing the Spot and Prepping the Soil
Okra wants full sun6 to 8 hours minimum, and it wants room. Mature plants can reach 4 to 7 feet depending on variety, so give the bed some distance from anything that will shade it later in the season.
Soil should be loose, well-drained, and moderately fertile. Work a couple inches of compost into the top 6 to 8 inches before planting, and aim for a pH around 6.0 to 6.8.
Heavy clay that stays soggy is a real problem here, since wet roots in cool clay is a near-guarantee of rot. Raised rows or mounded beds fix that if drainage is a known issue on your site.
Good soil gets you a strong start, but how you actually put the seed in the ground decides whether it germinates at all.
Planting Okra Step by Step
- Depth: sow seeds 1/2 to 1 inch deep, no deeper, since deeper sowing in cool soil is a common cause of no-shows.
- Spacing: plant seeds 4 to 6 inches apart within the row, then thin to 12 to 18 inches once seedlings have two true leaves.
- Rows: space rows 24 to 36 inches apart to give mature plants air and light.
- Soaking: soak seed in room-temperature water for 8 to 12 hours before planting to speed up germination, which can otherwise take 1 to 3 weeks in marginal soil.
- Direct sow versus transplant: okra dislikes root disturbance, so direct sowing is usually more reliable than transplants; if you do start indoors, use biodegradable pots and set them out 3 to 4 weeks after sowing.
Once seedlings are up, the next stretch of weeks is where patience gets tested.
Why Young Okra Looks Like It Has Stalled
Here is the sign that trips people up: for the first 3 to 5 weeks, okra plants often sit at 6 to 12 inches tall, looking thick-stemmed but barely taller than when you planted them.
If you assumed that means the plant is strugglingthat guess sends a lot of gardeners chasing a fertilizer fix it does not need. Okra spends its early weeks building roots and a sturdy stem before it puts energy into height.
Once soil and air temperatures climb into true summer heat, growth accelerates fast, often adding a foot or more in a couple of weeks. This is completely normal and not a symptom of anything gone wrong.
What the plant does need during this stretch is steady moisture and the right feeding, which is where people tend to overcorrect.
Watering and Feeding Through the Season
Okra is more drought-tolerant than most garden vegetables once established, but consistent watering during flowering and pod set makes a real difference in yield. Aim for about 1 inch of water a week, more during extended heat and dry spells.
Feed lightly, not heavily. Too much nitrogen produces huge, leafy plants with few pods, which is the opposite of what you want. Work a balanced fertilizer or an inch of compost into the soil at planting, then side-dress once when plants begin flowering.
Mulch with straw or shredded leaves once soil has warmed through, both to hold moisture and to keep weeds down without cooling the root zone too early in the season.
Feeding right keeps the plant productive, but even a well-fed okra plant has a short list of things that can knock it back.
Problems Most Likely to Strike
Okra is tougher than most garden vegetables, but a few issues show up regularly enough to plan for.
- Aphids and stink bugs: check the undersides of leaves and young pods regularly; a strong water spray handles light infestations, and insecticidal soap applied per the label works for heavier ones.
- Fusarium wilt and root-knot nematodes: more common in soil where okra or related crops have grown repeatedly. Rotate okra to a new bed every year or two as the main defense.
- Blossom drop: flowers falling without setting pods usually points to temperature stress, either a cold snap or extreme heat above 95 F, and it typically resolves on its own once conditions moderate.
- Poor pod set from crowding: skipping the thinning step leaves plants competing for light and nutrients, which cuts yield noticeably by midseason.
Head off crowding and rotation problems early, because by the time pods are forming there is no fixing a root problem underground.
When and How to Harvest Okra
Here is the honest answer to why your pods went from tender to tough so fast: okra pods mature quickly once a plant starts flowering, often reaching harvest size just 4 to 6 days after the bloom opens, and they turn fibrous within another day or two after that.
Pick pods at 2 to 4 inches longdepending on variety, while they still snap or cut cleanly and feel slightly tender under light pressure. Any pod that bends without snapping is already past its best.
Check plants every day, or at minimum every other day, once flowering begins, because missing even one picking window on a fast-growing plant means that pod is now tough and headed straight to woody.
Cut pods with a knife or pruners rather than snapping them by hand, leaving a short stub of stem, since this reduces damage to the plant and keeps new flowers coming.
Regular picking is what keeps a plant productive for months, so if you want the full-season number, the harvest window and yield expectations are exactly what is in the card below.
Okra at a Glance
- When to plant: two to three weeks after last frost, once soil holds at 65 to 70 F for several days running.
- Sun and soil: full sun, 6 to 8 hours minimum, well-drained fertile soil, pH 6.0 to 6.8.
- Depth and spacing: sow 1/2 to 1 inch deep, thin to 12 to 18 inches apart, rows 24 to 36 inches apart.
- Water: about 1 inch per week, more consistent moisture during flowering and pod set.
- Feeding: light balanced fertilizer at planting, one side-dress at flowering, avoid heavy nitrogen.
- Days to maturity: roughly 50 to 65 days from seed to first harvest, depending on variety and heat.
- Harvest: pick pods at 2 to 4 inches long every day or two once flowering starts, cutting rather than snapping.
If you remember one thing, remember this: okra rewards heat and daily attention more than any other input.
Get the soil warm before you plant and pick pods every day once they start, and the rest of the season takes care of itself.