The short answer: plant bare-root blackberries in late winter to early spring while they are still dormant, or use potted plants any time after your last frost through early summer. Give each plant 3 to 5 feet of space in full sun, in soil that drains well, and you will get your first real harvest in the second summer. Berries ripen from early to late summer depending on your variety and climate, and you will know they are ready by feel, not just color.
That sounds simple, and mechanically it is. But there is one mistake that wrecks more blackberry patches than drought, disease, and bad luck combined, and it has nothing to do with planting.
There is also a picking mistake almost everyone makes in their first year, a mistake that makes ripe berries taste sour and gives the plant a bad name it does not deserve. Stick with me through the sections below and I will hand you a save-able Blackberries at a Glance card at the very bottom with every number in one place.
When to Plant Blackberries
Timing depends on what you bought. Bare-root canes go in the ground while dormant, roughly 2 to 4 weeks before your last expected frost, as soon as the soil is workable and not soggy. Potted, actively growing plants are more forgiving. Plant them anytime from after your last frost through early summer.
Soil temperature matters more than the calendar. Wait until soil at 4 to 6 inches deep feels cool but not cold and crumbles instead of clumping when you squeeze it. Blackberries handle a light frost fine once established but hate sitting in cold, waterlogged ground as new roots.
In warmer zones (7 and up) fall planting also works well since winters are mild. In colder zones (4 to 6), stick to spring so plants have a full season to establish before winter.
Timing gets the plant in the ground safely, but the spot you choose decides whether it thrives for the next decade.
Choosing the Spot and Prepping the Soil
Full sun is non-negotiable. Six or more hours a day gives you sweeter berries and fewer disease problems. Part shade will keep the plant alive but the fruit stays smaller and less sweet, and fungal issues climb.
Blackberries want soil that drains well and holds some moisture, slightly acidic, in the pH 5.5 to 6.5 range. If water puddles on the surface 30 minutes after a hard rain, that spot will rot roots eventually. Raised rows or mounded beds fix that fast.
Work 2 to 3 inches of compost into the top 8 to 10 inches of soil before planting. This is also your last easy chance to deal with perennial weeds like bindweed or quackgrass, because once canes are established you cannot till between them without destroying roots.
Good soil prep now saves you years of fighting weeds and wet feet later.
Here is the mistake that ruins most attempts
It is not planting mistakes, it is support and space. New growers plant blackberries too close together, skip a trellis, and let the canes flop into a tangled thicket. Within two years you cannot reach the fruit, air cannot move through the pile, and disease moves in.
Blackberries are vigorous. Erect and semi-erect types still benefit from a simple two-wire trellis, and trailing types absolutely require one. Set posts every 15 to 20 feet with wires at about 3 and 5 feet high, and tie new canes to it as they grow.
Give the plant room to be trained, not just planted.
Planting Step by Step
- Dig the hole: wide enough to spread roots fully, about as deep as the root mass or the pot, no deeper.
- Set the depth: bare-root crowns sit with the topmost roots about 1 to 2 inches below the soil surface. Potted plants go in at the same depth they were growing in the container.
- Space plants: 3 feet apart for erect varieties, 5 to 6 feet apart for trailing and vigorous semi-erect types, with rows 8 to 10 feet apart.
- Backfill and water: firm soil gently around roots, then soak thoroughly to settle air pockets.
- Cut canes back: trim bare-root canes to about 6 inches after planting to push energy into root establishment rather than top growth.
- Mulch: 2 to 3 inches of straw or wood chips, kept a couple inches back from the base of each cane.
Get the spacing and support right at planting and every season after this gets easier, not harder.
Watering and Feeding Through the Season
Blackberries want about 1 to 2 inches of water a week, more during fruit set and ripening in hot weather. Check soil 3 to 4 inches down; if it is dry at that depth, water. Drip irrigation or soaker hoses beat overhead watering because wet foliage invites fungal disease.
Feed lightly. A balanced fertilizer or compost top-dress in early spring as growth starts is usually enough. Heavy nitrogen pushes lush cane growth at the expense of fruit and makes canes floppy and disease-prone.
Here is the part most guides skip: blackberries fruit on second-year canes, called floricanes, not the new growth from this year. That means your first-year canes (primocanes) are just building the plant. First fruit typically comes in year two.
Prune spent floricanes to the ground right after harvest, they will not fruit again, and that single habit keeps the whole patch healthy for years.
The Problems Most Likely to Strike
Cane blight and anthracnose show up as dark, sunken lesions on canes, usually where air circulation is poor. Thin canes to 4 to 6 healthy ones per plant, remove and destroy pruned material, and avoid wetting foliage.
Spotted wing drosophila is a small fruit fly that lays eggs in ripening berries, leaving fruit soft and full of tiny larvae. Harvest promptly and often, and pick up any dropped or overripe fruit, since it breeds in the fruit you leave behind.
Yellowing leaves get blamed on water almost every time. If you assumed pale leaves mean the plant is thirsty, that guess is usually wrong here. Blackberries on alkaline soil (above pH 7) commonly show yellowing between leaf veins from iron deficiency, not drought. A soil test, not more water, is the real fix.
If a fungicide is genuinely needed for a persistent fungal problem, follow the product label exactly for timing and rate rather than guessing.
Handle the plant’s health right and the only real work left is the fun part.
When and How to Harvest
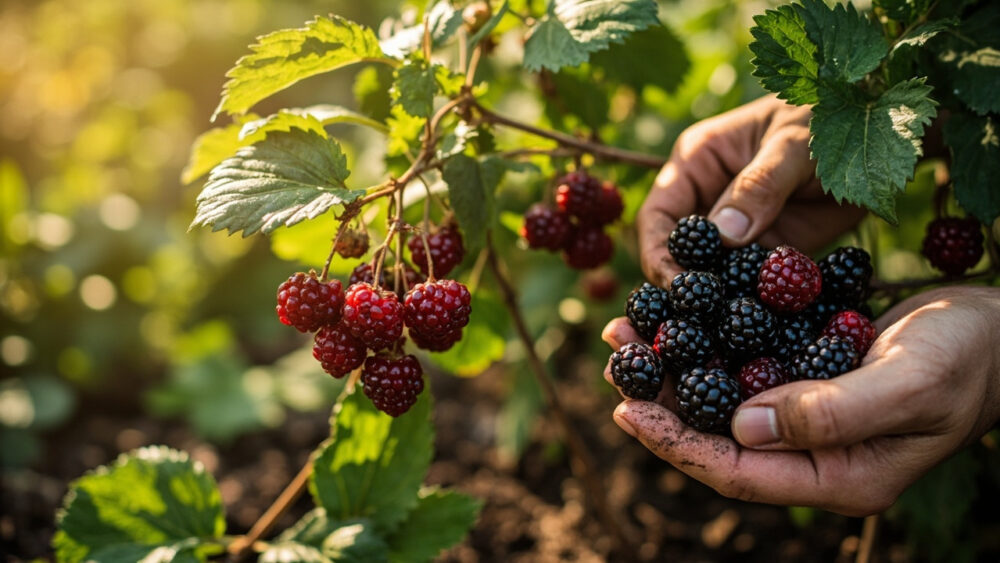
Color lies, at least at the end. A blackberry turns fully black 2 to 4 days before it is actually ready to eat. This is the sour-berry mistake almost everyone makes in year one: picking the moment the berry looks ripe instead of waiting for it to taste ripe.
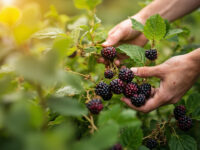
The real test is feel. A ripe blackberry comes off the plant with a gentle tug and almost no resistance, and it should feel slightly soft, not firm. If you have to pull hard, it is not ready yet, even if it looks jet black.
Depending on variety and climate, harvest runs from early summer into late summer, sometimes stretching into early fall for late-fruiting varieties. Pick every 2 to 3 days once berries start coloring, since ripening is fast in warm weather.
Berries do not ripen further once picked, so taste one before you commit to a whole bowl.
Blackberries at a Glance
- When to plant: bare-root 2 to 4 weeks before last frost while dormant, potted plants anytime from after last frost through early summer.
- Sun and soil: full sun, 6 or more hours daily, well-drained soil at pH 5.5 to 6.5.
- Spacing: 3 feet apart for erect types, 5 to 6 feet for trailing types, rows 8 to 10 feet apart.
- Planting depth: topmost roots 1 to 2 inches below the surface, or same depth as the container.
- Water needs: 1 to 2 inches per week, more during fruiting, checked 3 to 4 inches down in the soil.
- First harvest: typically the second summer, since fruit forms on second-year canes.
- Harvest cue: berries should pull free with almost no resistance and feel slightly soft, not just look black.
Get the support and spacing right at planting, and prune out old fruited canes every year without fail.
Do those two things and a blackberry patch will outlive most of the other plants in your yard.