The best time to transplant irises is 4 to 6 weeks after they finish blooming, which for most bearded irises means mid to late summer, roughly July through early September depending on your zone. That timing gives the rhizomes a full season to root in before winter without forcing them to bloom and relocate in the same breath. Transplant too early and you cut off flowering, too late and the roots never establish before frost.
Here is the mistake almost everyone makes: they transplant in spring because that is when the iris bed looks messy and overcrowded, and spring is when people are already out digging. It feels logical. It is also the number one reason a transplanted iris sulks for a full year and refuses to bloom.
Below I will walk through the actual window by zone, the depth mistake that rots more rhizomes than any pest does, and the one sign in the leaves that tells you a clump is overdue for division, months before the blooms confirm it. Save-able specifics, including the exact spacing and depth, are waiting in the Irises at a Glance card at the bottom.
When to Transplant, Anchored to Bloom and Frost
Bearded irises want to move when they are semi-dormant, which is that stretch after flowering ends when the plant is quietly building next year’s rhizome instead of pushing top growth. That is 4 to 6 weeks post-bloom for most gardeners.
In zones 3 to 6, that lands in July or early August, giving roots a solid 8 to 10 weeks before the ground cools hard. In zones 7 to 9, you have more slack and can push into September, since your first frost is later and soil stays workable longer.
The hard cutoff: stop transplanting once you are inside 6 weeks of your average first frost date. Roots need that runway or the rhizome sits loose in cold soil all winter and heaves out.
Beardless types (Siberian, Japanese) are more forgiving and can also be moved in early spring before growth really takes off, but bearded irises specifically do not want a spring move.
Once you know your window, the next question is where to put them.
Choosing the Spot and Prepping the Soil
Irises want full sun, 6 hours minimum, and soil that drains fast. Standing water or heavy clay that stays wet is the single biggest killer of rhizomes through rot, more common than any insect problem.
Work the bed 10 to 12 inches deep and mix in compost, but go easy on nitrogen-heavy amendments. Rich, wet, high-nitrogen soil grows soft rhizomes that rot and attract borers.
If your soil is heavy clay, raise the bed 4 to 6 inches or plant on a slight mound. Irises planted in a depression that collects runoff rarely last more than a season or two.
A pH close to neutral, 6.5 to 7.0, suits them fine, and most garden soils don’t need adjusting for irises specifically.
Good drainage solves more iris problems before they start than any amount of watering or feeding ever will.
Planting Step by Step
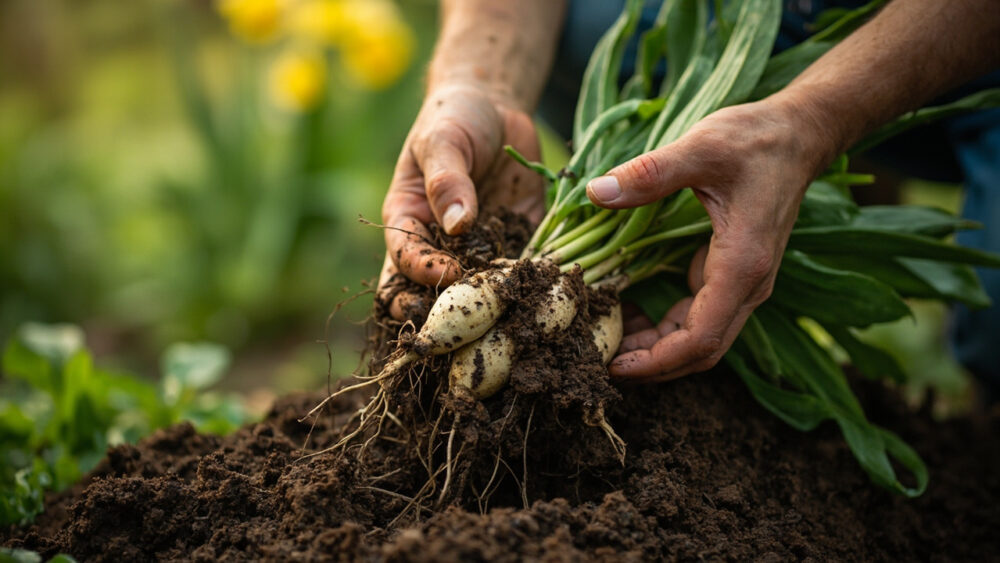
- Lift and divide: dig the clump, shake off soil, and separate healthy rhizomes with a fan of leaves attached, discarding any that are soft, hollow, or mushy.
- Trim the leaves: cut fans back to about 4 to 6 inches, in a fan shape, to reduce water loss while roots reestablish.
- Set the depth: this is where most people get it wrong. Plant so the top of the rhizome sits just at or barely below the soil surface, exposed to slightly buried, not deep. In hot climates, leave more of it exposed.
- Space generously: 12 to 18 inches apart, rhizome pointing outward from the center so new growth has room to fan away from the clump.
- Firm and water: press soil around the roots, water once to settle it, then hold off until the top inch dries.
If you assumed deeper planting means sturdier roots, that guess is exactly what rots bearded iris rhizomes. They are semi-succulent structures that need air at the crown, not burial.
Watering and Feeding Through the Season
Newly transplanted irises need consistent moisture for the first 3 to 4 weeks while roots establish, about 1 inch of water a week between rain and irrigation. After that, they want to dry out somewhat between waterings.
Established irises are genuinely drought-tolerant once settled, and overwatering mature clumps is a far more common problem than underwatering.
Feed lightly in early spring as growth starts, using a low-nitrogen, higher-phosphorus fertilizer, something like a 5-10-10 ratio, applied lightly around the base. Skip nitrogen-rich lawn fertilizer entirely.
A second light feeding right after bloom supports the rhizome as it recharges for next year.
Feed wrong and you get lush leaves with few flowers, which brings us to what actually goes wrong out there.
The Problems Most Likely to Strike
The two big threats are iris borer and bacterial soft rot, and they are related. Borers tunnel into leaves and rhizomes, and the wounds they leave are exactly where soft rot moves in.
The tell-tale sign is water-soaked, mushy, foul-smelling tissue at the rhizome, or ragged notching and sawdust-like frass on leaves in early summer. Cut out and discard any affected rhizome tissue immediately, and clean up old foliage every fall since borer eggs overwinter in dead leaf debris.
Leaf spot, small brown or tan spots on foliage, is mostly cosmetic but spreads in humid, crowded conditions. Thin the clump and improve airflow before reaching for any fungicide, and if you do use one, follow the product label exactly.
Overcrowding itself is the quiet failure mode. Clumps left undivided for 4 to 5 years bloom less and less, and the tell isn’t the flowers, it’s a dead, woody center with green growth only around the rim.
Catch that ring-shaped growth pattern early and you will know it’s time to lift and divide before bloom count ever tips you off.
When Irises Actually Bloom, and What That Tells You
Bearded irises bloom once a year, typically over a 3 to 6 week stretch in late spring to early summer depending on your zone and variety, with some reblooming types offering a second flush in fall.
A newly transplanted rhizome usually skips blooming the first spring and comes back strong the second year. That is normal, not a failure.
If a well-established clump suddenly blooms poorly, look at the center of the fan before blaming pests or soil. A hollow or woody middle means it is overdue for the division and transplant cycle this whole guide is built around.
That bloom pattern is really the plant telling you when to start this whole process over again.
Irises at a Glance
- When to plant or transplant: 4 to 6 weeks after bloom ends, roughly midsummer to early fall, and stop at least 6 weeks before your first frost.
- Sun and soil: full sun, 6 hours or more, and fast-draining soil, raised or mounded if you have clay.
- Planting depth: rhizome top at or just barely below the soil surface, never deeply buried.
- Spacing: 12 to 18 inches apart, rhizome pointing outward from the clump’s center.
- Water: weekly for the first month after transplanting, then drought-tolerant once established.
- Feeding: light, low-nitrogen fertilizer in early spring and again right after bloom.
- Divide again: every 3 to 5 years, or as soon as you see a dead, woody center ring in the clump.
Get the timing and the depth right and irises basically take care of themselves for years.
Everything else on this list just protects that one good decision.