Peanuts are ready to harvest 100 to 150 days after planting, usually in early to mid fall, once the plant’s leaves start yellowing and a test dig shows pods with dark, netted veins inside a papery shell. There is no color change on the plant itself that tells you it is time, which is exactly why so many people harvest peanuts too early. You have to pull a plant and look.
Most first-time growers guess wrong on at least one of three things: when to actually check, how to check without wrecking the plant, and what to do in the hours right after digging. Get any of those wrong and you end up with a wheelbarrow of pale, underdeveloped nuts or a rotting mess that never cures properly.
Stick with this and I will walk you through the exact signs to look for, the digging method that keeps pods on the plant instead of in the dirt, and what curing actually requires. There is a save-able Peanuts at a Glance card waiting at the bottom once you have the full picture.
The Sign Everyone Misreads: Yellowing Leaves
New growers wait for the whole plant to turn brown and collapse, the way you would with onions or garlic. Peanuts do not work that way.
Yellowing leaves are a hint, not a verdict. Some leaves yellow while the plant is still actively filling pods underground, and a plant that looks tired above ground can still have mature nuts and immature ones on the same root system at the same time.
The leaves tell you it is time to check. They do not tell you it is time to harvest.
The Only Test That Actually Works: Dig One Up
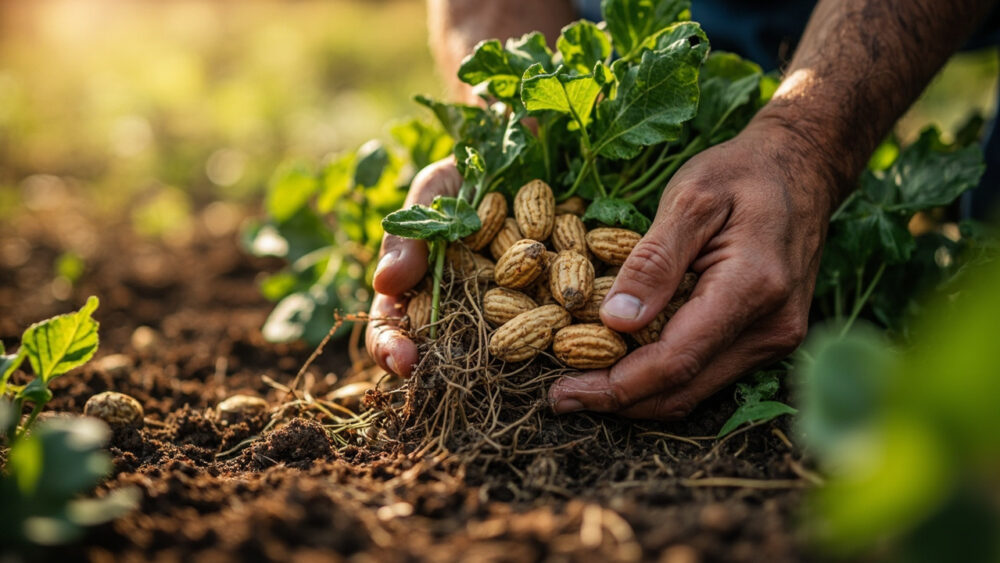
About 100 days after planting, pull one whole plant and look at the pods still attached to the roots.
What a ready pod looks like
Crack open two or three pods from that test plant. Mature pods have a shell with dark brown netting or veining on the inside, and the papery skin around the actual peanut kernel is thin and tight, often tan to pink or red depending on variety. The kernel itself should fill the shell, not rattle around loose inside it.
What an immature pod looks like
Immature pods have pale, whitish interiors with faint veining, and the shell often still looks a little swollen or spongy rather than firm. If most of the pods on your test plant look like this, get back in the ground in seven to ten days and try another plant.
This is the step almost everyone skips, and skipping it is the single mistake that ruins the most harvests.
The Timing Window, and What Early or Late Actually Costs You
Peanuts need roughly 100 to 150 days of warm soil after planting, with runner and Virginia types on the longer end and Spanish and Valencia types often ready closer to 100 to 120 days. Most home gardeners are digging sometime in September or October, timed to land before the first hard frost, not right on the calendar date.
Dig too early and a large share of pods will be pale and underfilled, with kernels that shrink and taste starchy once dried rather than sweet and nutty. There is no fixing this after the fact. Once a pod is off the plant, it stops developing.
Wait too long and you run into a different problem: pods left in wet fall soil start to sprout, mold, or get stripped by soil pests, and a hard freeze can damage the roots and make the whole plant crumble apart when you try to lift it, leaving pods buried and un-harvestable.
The safest window is the week or two before your first fall frost, once your test digs show most pods mature.
How to Harvest Without Losing Half the Crop in the Dirt
Peanuts detach easily from their roots, and a rushed pull leaves half your crop underground.
- Water the bed lightly a day before digging if the soil is bone dry. Damp soil releases pods far more cleanly than hard, cracked ground.
- Loosen first, don’t yank. Slide a garden fork or spade in a wide circle around the plant, 6 to 8 inches out from the stem, and lift the whole root ball up from underneath.
- Lift the entire plant by the base of the stem once it is loosened, keeping the root mass intact so pods stay attached.
- Shake off loose soil gently rather than banging the roots against something hard, which snaps pods off into the dirt.
- Hand-pick any stragglers left behind in the loosened soil before you move on to the next plant.
Once the plants are up and shaking off soil, the clock on curing starts immediately.
What to Do in the First 24 Hours After Digging
Fresh-dug peanuts are wet inside the shell, and wet peanuts left in a pile will mold within a day or two.
Get them off the ground and into airflow fast. The traditional method is hanging whole plants upside down, pods and all, in a dry, covered, well-ventilated spot out of direct sun and rain, like a garage, shed, or covered porch. Leave them like that for a few days to a week to start drying before you pull the pods off the vines.
Do not rinse the pods and do not stack them in a closed bin at this stage. Wet peanuts in a sealed container is how you get a moldy crop overnight instead of a cured one.
Drying the plant is only step one, the real curing takes longer than most people expect.
Curing and Storage: The Part That Actually Determines Flavor
Once the plants have hung for a week or so, strip the pods off and spread them in a single layer on screens, mesh trays, or shallow boxes.
Cure them for two to four weeks in a dry, well-ventilated space at room temperature, stirring or shaking them every few days so air reaches all sides. You will know they are cured when the shells are dry and brittle and the kernel inside rattles slightly and snaps rather than bends.
Skipping this stage and eating or storing peanuts right after digging is the honest answer to the question most people ask next: no, you cannot eat them straight out of the ground and expect peanut flavor. Raw, uncured peanuts taste grassy and starchy, nothing like a roasted peanut.
Once cured, store shelled or unshelled peanuts in a breathable bag or container in a cool, dry spot, and they will keep for several months. For longer storage, shelled peanuts freeze well for up to a year.
Curing is slow on purpose, and rushing it is the second most common way a good harvest goes bad after the fact.
Peanuts at a Glance
- When to plant: two to three weeks after your last spring frost, once soil hits at least 65°F.
- Days to maturity: 100 to 150 days, depending on variety, with Spanish and Valencia types on the shorter end and runner and Virginia types longer.
- How to check readiness: dig one test plant around day 100 and crack open a few pods, looking for dark veined shells and tight-fitting kernels.
- Best digging window: the one to two weeks before your first fall frost, once most test pods look mature.
- How to dig: loosen soil in a wide circle with a fork, then lift the whole plant by the stem rather than pulling straight up.
- After digging: hang or dry whole plants in a covered, ventilated spot for about a week before stripping pods.
- Curing time: two to four weeks spread in a single layer, stirred regularly, until shells are dry and brittle.
The whole process rewards patience more than effort. One test dig and one honest look at the pods will save you from the two mistakes, digging too early and skipping the cure, that ruin most home peanut crops.