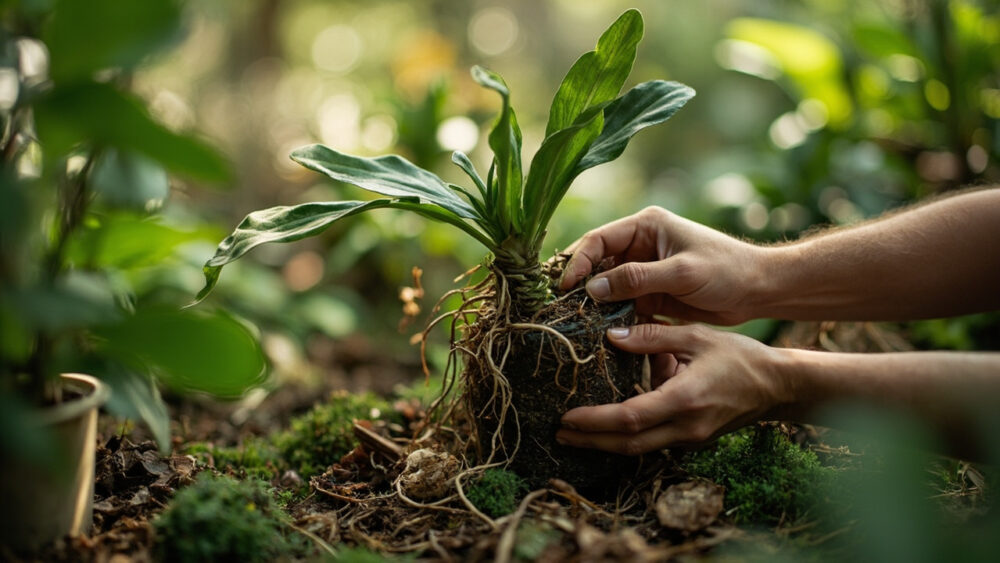
Repot your orchid when the roots outgrow the pot or the potting bark breaks down into mush, which usually happens every one to two years, and the best time to do it is right after flowering ends when new growth is just starting. Slide the plant out, knock off the old bark, trim any soft or dead roots, and reset it in fresh bark or moss with the base of the plant sitting at the same level it was before. That is the whole job in outline, but the details are where most repots go sideways.
Here is what nobody tells you upfront: the single biggest mistake is not timing, it is burying the crown. Do that and you can rot a perfectly healthy orchid in a matter of weeks, no drama, just a slow collapse that looks like it came out of nowhere. There is also a sign almost everyone misreads as “time to repot” that actually means something else entirely, and it costs people a whole growing season when they act on it wrong.
Stick around, because I am going to walk through exactly how to read your orchid’s roots, how often to water one that just got repotted, and what a genuinely thriving orchid looks like versus one that is just surviving. There is a save-able Orchid at a Glance card at the very bottom with every number in one place, so keep scrolling until you get there.
Light, Placement, and Temperature
Most houseplant orchids, phalaenopsis especially, want bright, indirect light, think an east-facing window or a few feet back from a south or west one. Direct midday sun through glass will scorch the leaves into ugly bleached patches. Too little light and the plant survives for years without ever blooming again, which is the most common complaint I hear and it is almost always a light problem, not a soil problem.
Leaves should be a medium grass green. Dark green, glossy leaves mean too little light. A reddish or yellowish tinge means too much.
Temperature-wise, most orchids are comfortable in the same range you are, roughly 65 to 80°F during the day, with a slight nighttime drop of 10 to 15 degrees actually helping trigger flower spikes in fall. Keep them away from cold drafts, heating vents, and glass in winter.
Get the light right first, because no amount of perfect watering fixes a plant that is starving for sun.
Watering: How Much, How Often, and How to Tell
If you assumed more frequent watering means a happier orchid, that guess kills more of these plants than neglect does. Orchid roots need to dry out between waterings or they rot, full stop.
Water about once a week, sometimes every 10 to 14 days in cooler months, and always check the roots first rather than going by the calendar. Healthy orchid roots are firm and silvery green when dry, and turn bright green when wet. Mushy, brown, or hollow roots are dead and watering will not fix them.
The classic method: run room-temperature water through the pot in a sink for 15 to 20 seconds, let it drain completely, and never let the pot sit in standing water. Ice cubes on top of the bark work for some growers but are not required and do not change the underlying rule.
Get this one habit right, checking roots instead of the calendar, and you will fix most orchid problems before they start.
Potting Mix and Feeding
Regular potting soil will suffocate orchid roots, which need airflow far more than typical houseplants do. Use a bark-based orchid mix, or a bark and sphagnum moss blend, in a pot with generous drainage holes. Clear plastic pots are popular because they let you see root color without unpotting.
Feed with a diluted, balanced orchid fertilizer, roughly quarter to half strength, every other week during active growth in spring and summer, tapering off in fall and winter. Orchids are light feeders. Overfeeding shows up as burnt, blackened root tips and leaf edges, and it is far more common a mistake than underfeeding.
This is also where the repotting clock actually starts ticking.
Repotting: The Real Timing and the Real Method
Here is the sign almost everyone misreads: roots crawling over the top of the pot and into the air look alarming, but that is not automatically a sign the plant needs repotting. Many orchids, especially phalaenopsis, naturally send aerial roots up and out to grab humidity from the air. Leave those alone.
The real signals to repot are the bark breaking down into dense, dark, compost-like mush, roots that are rotted or packed into a solid airless clump, or the plant physically pushing itself up and out of the pot. Do this right after blooming, not while a flower spike is up, since repotting during bloom often aborts the flowers.
- Remove the orchid gently, running water over the roots if the old bark is stuck.
- Trim away any brown, mushy, or hollow roots with clean scissors, leaving healthy firm roots intact.
- Choose a pot only one size up, orchids actually prefer being slightly snug.
- Set the plant so the crown sits at the same height it was in the old pot, never buried.
- Fill in fresh bark mix around the roots, tapping the pot to settle it, and skip watering for two to three days to let cut roots callus over.
Get the crown depth wrong here and nothing else you do matters, so that is the one step worth double-checking before you walk away.
Problems Most Likely to Strike
Root rot from overwatering is the number one killer, and it looks like a plant that is wilting despite moist soil, which confuses people into watering more. Cut back watering, trim rotted roots, and repot into fresh bark.
Crown rot shows up as a soft, yellowing, mushy center where new leaves emerge. It is often fatal once advanced, so catching it early by keeping water out of the crown when you irrigate matters more than any cure.
Scale and mealybugs show up as small waxy or cottony bumps along stems and leaf undersides. Wipe them off with a damp cloth or treat with an insecticidal soap labeled for houseplants, following the product label exactly.
Yellowing lower leaves on an otherwise healthy plant are normal aging, not disease, and can simply be removed once they turn fully yellow.
Most orchid problems trace back to water sitting where it should not, which brings us to what success actually looks like.
Signs Your Orchid Is Genuinely Thriving
A thriving orchid has firm, medium-green leaves with no spots, and roots that are plump and mostly silvery-green with visible healthy tips. New leaf growth and new root growth appearing at the same time is the best sign you can get.
Flower spikes emerging from the base of a leaf, not from an old dead spike, tell you the plant is storing enough energy to reproduce, which is the real marker of a happy orchid, not just survival.
A plant that reblooms yearly, holds its flowers for six to twelve weeks, and pushes new leaves once or twice a year is doing exactly what it should.
Everything above boils down to a handful of numbers worth keeping on hand.
Orchid at a Glance
- When to repot: right after blooming ends, or whenever bark has broken down into mush, roughly every one to two years.
- Light: bright, indirect light such as an east window or a few feet from south or west glass, never direct midday sun.
- Watering: about once a week, checking root color rather than the calendar, always letting the mix dry out between waterings.
- Potting mix: bark-based orchid mix or bark and sphagnum blend in a pot with strong drainage, never regular potting soil.
- Feeding: quarter to half strength balanced orchid fertilizer every other week in spring and summer, tapering off in fall and winter.
- Temperature: 65 to 80°F by day with a modest nighttime drop, kept away from drafts and cold glass.
- Warning sign: a soft, yellowing crown means crown rot, act immediately and keep water out of the crown going forward.
If you remember one thing, remember this: check root color before you water, and keep the crown out of the bark and out of standing water. Get those two habits right and everything else about growing orchids gets a lot easier.