The short answer on how to prune dogwood trees: do it in late winter while the tree is still dormant, a few weeks before new growth starts, and remove no more than a quarter of the live wood in any one year. Cut back to a bud, a branch collar, or the ground, never partway into open air. Get this wrong and you either lose next year’s flowers or you spend three seasons cutting out the mess that follows.
Most people prune dogwood at the worst possible moment, for the worst possible reason, and don’t find out until the blooms fail to show up. There’s also a cut almost everyone makes that looks tidy the day you make it and turns into a rotting stub by the following summer.
And there’s a question that comes right after “when do I prune” that nobody answers honestly: how much is actually too much for a stressed or overgrown tree. Stick around, because the save-able Dogwood Trees at a Glance card at the bottom covers all of it in one place for whenever you’re standing under the tree with loppers in hand.
When to Prune, and When to Walk Away
Late winter, while the tree is dormant and bare, is the right window. You want it done before buds swell, roughly the last few weeks before your typical last frost date, when the wood is still fully asleep.
Avoid pruning in spring just as flowers or leaves emerge. That’s when dogwood is pushing sap hardest, and fresh cuts bleed and heal slowly, inviting borers and disease right into the wound.
Late summer and fall are also off limits for anything beyond removing dead wood. Cuts made then don’t have time to callus before winter, and you’re pruning right as the tree is setting next year’s flower buds.
If you’re chasing spring bloom, timing is most of the battle, and dogwood does not forgive a rushed cut.
Tools and the One Prep Step Everyone Skips
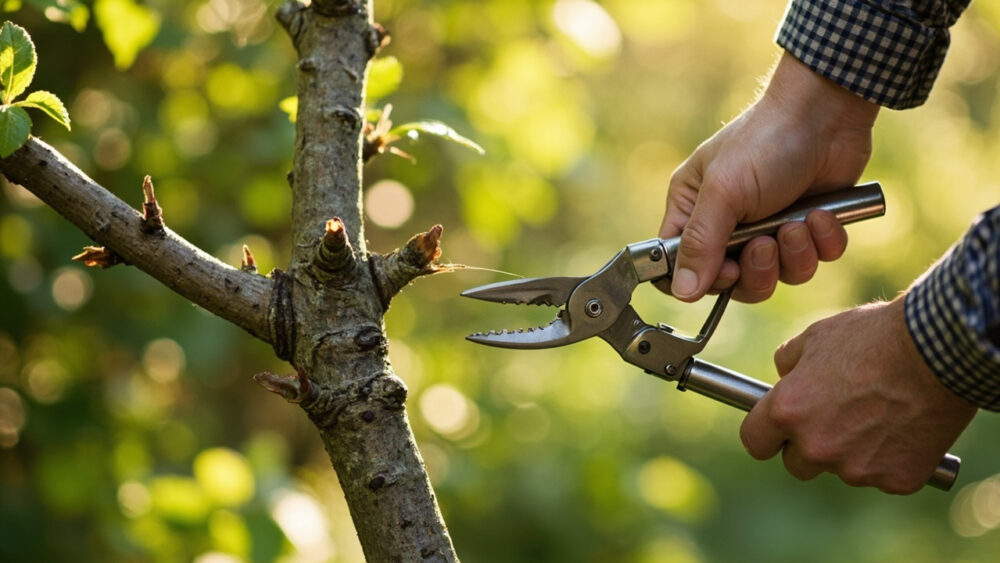
You need bypass hand pruners for anything under half an inch, loppers for branches up to about an inch and a half, and a pruning saw for anything bigger. Skip anvil-style pruners, they crush rather than slice and leave torn tissue that heals poorly.
Sanitize your blades before you start and again between trees if you’re working more than one dogwood, especially if any of them show canker or leaf spot. A quick wipe with rubbing alcohol between cuts is enough. Dogwoods are genuinely prone to fungal and bacterial issues, and dirty blades are one of the easiest ways to spread them tree to tree.
The prep step people skip is simply standing back and looking at the whole tree before the first cut. Walk around it, note the crossing branches, the dead tips, the one limb rubbing another, before you touch a single blade.
Once you know what you’re removing and why, the actual cutting goes fast.
How to Prune a Dogwood Step by Step
Step 1: Remove the dead, damaged, and diseased wood first
Look for wood that’s gray, brittle, or has no live buds. Scratch the bark lightly with a thumbnail; green underneath means it’s alive, brown and dry means it’s dead.
Cut dead branches back to healthy wood or all the way to the trunk. This wood is never worth saving and removing it first makes the rest of the tree easier to read.
Step 2: Take out crossing and rubbing branches
Where two branches cross or rub, pick the stronger, better-placed one and remove the other entirely. Rubbing bark is an open door for disease, and it only gets worse as both branches thicken.
Step 3: Thin for light and airflow, not for shape
Remove branches growing straight into the center of the canopy or straight down toward the ground. You’re opening the tree up, not sculpting a ball or a box.
Cut just outside the branch collar, the slightly swollen ring where a branch meets the trunk or a larger limb. Never cut flush against the trunk and never leave a stub sticking out past the collar.
Step 4: Cut back to a bud where you’re shortening a branch
If you’re shortening rather than removing a branch entirely, cut about a quarter inch above an outward-facing bud, angled slightly away from the bud. That bud becomes the new growth direction, so choose one pointing the way you want the branch to go.
Step 5: Stop at a quarter of the live canopy
Stand back after every few cuts and reassess. Once you’ve removed about a quarter of the total live wood, stop, even if the tree still looks a little wild to you.
That restraint is exactly what most people get wrong, and it’s the next thing worth understanding before you make another cut.
The 25 Percent Rule, and Why More Is Not Better
If you assumed a heavier prune fixes an overgrown or leggy dogwood faster, that instinct is what puts a tree into years of stress instead of one clean season of recovery. Dogwood responds to hard pruning with a flush of weak, whippy watersprouts rather than sturdy new branches, and those sprouts are magnets for borers.
A quarter of the live canopy per year is the real ceiling, even on a tree that’s badly overgrown. If a dogwood genuinely needs more correction than that, spread the work over two or three winters instead of forcing it in one visit.
Young trees, under about three years old, need even less. Limit first-year pruning to dead wood and obvious crossing branches only, and let the structure fill in before you shape anything.
Restraint this year is what buys you flowers next spring, and that trade is where most of the real mistakes happen.
What Happens After You Prune
Expect the tree to look a little sparse for a few weeks, especially if you removed much interior growth. That’s normal and it fills back in through the growing season.
You’ll often see a small amount of clear to amber sap weep from larger cuts in the days right after pruning, particularly on branches over an inch thick. That’s a normal dogwood trait, not a sign of infection, and it stops on its own.
Don’t paint or seal the cuts. Wound sealants trap moisture against the cut surface and slow natural healing more than they help. Bare, clean cuts callus over on their own within a season or two.
Watch new growth over the next month, because it tells you whether your cuts were placed well.
The Mistakes That Cost You Flowers, Fruit, or the Whole Branch
Pruning in spring or early summer is the single most common way to lose a year of bloom, since flowering dogwoods set next year’s buds on the current season’s wood shortly after they finish flowering. Cut then and you’re removing the very buds you were hoping to see next spring.
Flush cuts against the trunk are the second big one. They look neater on the day, but removing the branch collar strips away the tree’s natural ability to seal that wound, and rot works its way inward from there.
Leaving stubs is just as bad in the other direction. A stub past the collar dies back, invites decay, and eventually rots toward the trunk instead of healing over.
Topping, cutting main branches back hard to control height, triggers exactly the weak watersprout regrowth dogwood handles worst, along with a long-term increase in disease risk. If height is the real problem, remove whole branches at their origin instead of hacking across the middle of several.
And working with dirty tools during an active canker or leaf spot outbreak is how one sick branch becomes a sick tree. Clean blades are cheap insurance against a problem that isn’t.
Every one of those mistakes is avoidable with the same short list of numbers, which is exactly what the card below is for.
Dogwood Trees at a Glance
- When to prune: late winter, while fully dormant, a few weeks before your last frost date and before buds swell.
- When to avoid pruning: spring during bud break or bloom, and late summer into fall when buds are set for next year.
- How much to remove: no more than about a quarter of the live canopy in any single year, less on young trees under three years old.
- Where to cut: just outside the branch collar for full removal, or a quarter inch above an outward-facing bud when shortening a branch.
- Tools needed: bypass pruners for under half an inch, loppers up to about an inch and a half, a pruning saw for anything larger, blades sanitized between cuts.
- After pruning: expect some sap weeping on larger cuts and a temporarily sparser canopy, both normal and no sealant needed.
- Biggest mistakes: pruning after buds break, flush cuts, stubs left past the collar, and hard topping that triggers weak, disease-prone regrowth.
If you only remember one thing, remember the season: dormant winter cuts protect next year’s flowers, anything cut too late does not.
Everything else on this page is just the detail behind getting that one decision right.