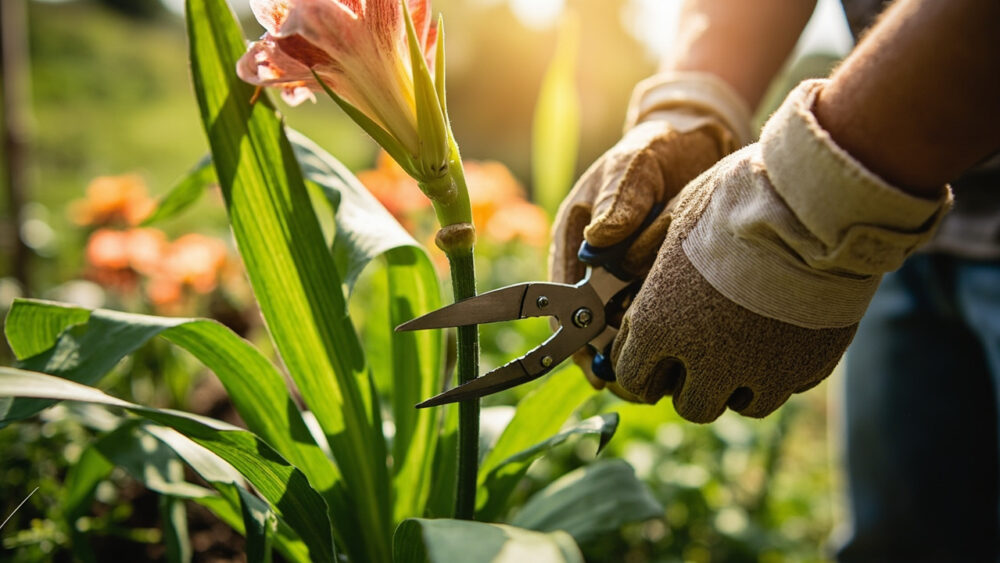
The short answer to how to prune daylilies is this: remove spent flower stalks (scapes) as they finish blooming, cut individual flowers off daily if you want tidiness, and leave the strappy green foliage alone until it yellows and flops on its own, usually after a hard frost. That is nearly the whole job. Daylilies do not need the aggressive cutting back that roses or hydrangeas do, and treating them that way is where most people go wrong.
There is one habit that quietly costs gardeners a whole season of rebloom, and it is not the one you are picturing. There is also a sign on the foliage that people read as “disease” almost every summer when it is actually completely normal. And there is a question you are probably about to ask right after this one, about whether cutting the leaves back hard in early summer will make the plant bush out fuller. It will not, and I will tell you what it actually does instead.
Stick with me through the how and when, and save the “Daylilies at a Glance” card at the bottom of this page. It has the numbers you will want the next time you are standing in front of the clump with pruners in hand.
When to Prune Daylilies, and When to Leave Them Be
There are really three separate jobs, on three separate calendars. Deadheading individual spent flowers happens daily to every-other-day through the bloom window, which typically runs four to six weeks sometime between late spring and mid summer depending on your climate and variety. Scape removal happens once a stalk has finished producing flowers entirely, usually a week or two after the last bloom on that stalk fades. Foliage cutback happens once, in fall, after the leaves have died back on their own from frost.
The mistake is doing that third job in summer because the leaves look ragged. Cutting green, living foliage back hard in July does not tidy the plant, it starves it. The leaves are still feeding the root system and building next year’s flower buds.
Timing is most of the battle with daylilies, and almost all of that timing is about patience, not precision.
Tools and the One Prep Step That Actually Matters
You need clean bypass pruners or scissors for scapes, and honestly your fingers work fine for deadheading individual flowers, they snap off cleanly at the base with a light pinch and twist. For the fall foliage cutback, hand shears or even hedge shears speed things up on a big clump.
The one prep step people skip: wipe your blades with rubbing alcohol between plants, especially if any clump in your bed has shown streaking, spotting, or soft rot at the crown. Daylilies can pass fungal and bacterial problems on cutting tools, and a clump that looks fine can still carry something. It takes fifteen seconds and it is the cheapest insurance in the whole job.
Clean tools handled, here is exactly where to cut.
How to Prune Daylilies Step by Step
Deadheading Individual Flowers
Each daylily bloom lasts one day. Pinch or snip the spent flower off where it meets the stalk, right above the small swelling node. Do this daily during peak bloom if you want a consistently clean-looking bed. Skipping it will not hurt the plant, it just leaves brown, mushy spent blooms hanging visibly among the fresh ones.
Removing Finished Scapes
Once a scape has opened its last bud and that flower has faded, the whole stalk is done producing. Cut it at the base, close to where it emerges from the foliage, using bypass pruners. Do not cut scapes that still have unopened buds further up, even if the lower flowers on that same stalk are finished.
Fall Foliage Cutback
Wait until foliage has yellowed and gone limp from frost, then cut the whole clump down to about 3 to 4 inches above the crown. In mild-winter climates (zone 8 and warmer) where foliage stays semi-evergreen, you can skip a hard cutback entirely and just clean out dead or matted leaves by hand in late winter.
That is the entire technique, but knowing what happens next is what tells you whether you did it right.
What to Expect After Pruning
After deadheading and scape removal, you will likely see rebloom on reblooming varieties like Stella de Oro types within two to four weeks, sending up fresh scapes from the same clump. Once-blooming varieties will not send up new flowers this season, and that is normal, not a failure on your part.
After the fall cutback, expect nothing visible until new shoots push up from the crown in early spring, often before you think it is warm enough. That waiting period is exactly when the yellow-leaf worry usually kicks in.
If you assumed yellowing lower leaves in mid summer meant disease or a watering problem, that is the guess almost everyone makes. Daylily foliage naturally yellows from the base as older leaves age out and the plant redirects energy to blooms and roots. It is only a problem if the yellowing is accompanied by soft, mushy, foul-smelling tissue at the crown, which signals crown rot, or if leaves show reddish streaking and lesions along the length of the blade, which points to leaf streak fungus. Ordinary tip-and-edge yellowing on lower leaves in July is just the plant doing its normal seasonal thing.
Once you can tell normal aging from an actual problem, the real mistakes to watch for are almost all about timing and restraint.
The Mistakes That Cost You Next Year’s Flowers
The single biggest mistake is cutting green summer foliage back hard to “clean up” the bed. It looks productive. It is actually removing the plant’s food-making machinery while it is still trying to build energy reserves and next year’s buds in the crown. A daylily can survive this, but it usually blooms lighter the following year.
Second is braiding or rubber-banding the leaves, an old trick some gardeners use to tidy floppy foliage. It restricts airflow into the crown and creates a moist, shaded pocket that invites rot, especially in humid climates.
Third, and this answers that early-summer bushing-out question directly: shearing foliage in half in June to force fuller growth does not work. Daylily leaves grow from the base, not from cut tips, so shearing just leaves you with blunt, brown-edged stubs and no new growth to hide them until fall.
- Cutting green foliage in summer: weakens next year’s bloom.
- Pruning too early in spring, before frost risk has passed in your area, removing emerging growth that then has to regrow from scratch.
- Leaving scapes with unopened buds cut by mistake, losing flowers that hadn’t opened yet.
- Ignoring true crown rot signs (soft, foul-smelling base) because you assumed it was normal yellowing.
Avoid those four and daylilies genuinely take care of themselves the rest of the year.
Daylilies at a Glance
- When to deadhead: daily to every other day through the four to six week bloom window, pinching spent flowers at the base.
- When to remove scapes: cut at the base once all buds on that stalk have opened and faded, leaving stalks with unopened buds intact.
- When to cut back foliage: once after fall frost has yellowed and collapsed the leaves, down to 3 to 4 inches, skip entirely in mild winter zone 8 and warmer.
- Never do this: cut green, living summer foliage back hard, it weakens next year’s bloom.
- Tool prep: wipe blades with rubbing alcohol between plants to avoid spreading crown rot or leaf streak.
- Normal vs. problem: lower leaf yellowing in summer is normal aging, soft foul-smelling crown tissue or reddish leaf streaking is not.
- Rebloom timing: reblooming varieties send new scapes within two to four weeks of deadheading, once-bloomers won’t flower again that season.
Daylilies forgive almost everything except impatience with the green leaves. Leave the foliage working until frost takes it, and the plant handles the rest on its own.